iPhoneography Lesson 99: Christmas Eve and the iPhone

Just a quick tip that Christmas trees work well with Hipstamatic as well as more traditional camera apps.  Also try including reflections of the lights in the windows in the frame if you want something a little different from the traditional Christmas tree.

Have a wonderful day tomorrow whether you celebrate Christmas or not.  Peace on earth, goodwill to all, and good night!

iPhoneography Lesson 98: Comparison of Apps at Night


Having just passed the shortest day of the year in the Northern hemisphere, I thought it was a good time to look at how different apps perform at night on the iPhone 5S.  I’m sure you all heard that the 5S was a step up for low-light photography with it’s bigger aperture and larger, less noisy sensor.  If you don’t know what any of that means, that’s OK, it’s just supposed to be better than predecessors at night.

As someone who shoots a lot with a DSLR that does fantastic things at night, it’s a little hard for me to judge fairly about whether the improvement is significant between my 4S and 5S, but I was curious to see if using different apps on the iPhone while hand holding made any difference at all in the quality of the images in low light.

The answer is pretty much “no” for the apps I tried in this comparison:  the Apple Camera App, Hipstamatic, Camera Awesome, and Pro HDR.  Here are the things that differ, both good and bad, over the Apple Camera App:

Hipstamatic

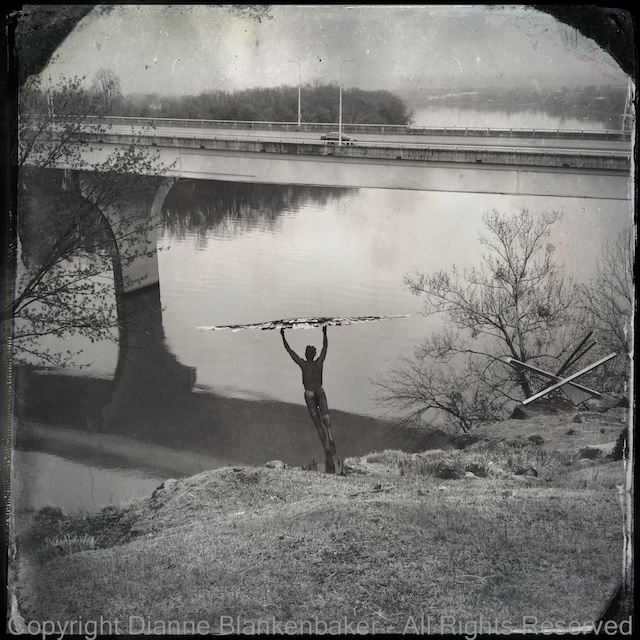
The cool (or should I say hip?) thing about Hipstamatic at night is that the filters it applies to the image make the noise of low-light photos look intentional.  They seem like part of the artistic effect instead of an annoying accident.

The downside is that you only get square images, which I don’t particularly like for a scene that is wide and short like the Chattanooga riverfront.

Past Hipstamatic Lessons:  Lesson 13:  Getting Hip; Lesson 24:  Using Hipstamatic to Include and Exclude; Lesson 26:  The iPhone and Wildlife; Lesson 29:  Hipsta-Classic; Lesson 30:  Awesomely Hip Portraits; Lesson 43:  Patterns; Lesson 46:  Flower Power; Lesson 88:  Hip Heads; Lesson 93:  Old Places, New Dressing.

Camera Awesome

The level–it’s particularly useful at night when it’s too dark to judge visually if you’ve got a tilt going on or not.

Being able to separate the focus point from the exposure point gives you more control over whether you get a lighter or darker exposure (I did not use this feature in the examples, but you can see how to use it here).

Past Camera Awesome Lessons:  Lesson 7:  Keep It Level; Lesson 8:  Separating Focus from Exposure; Lesson 12:  Awesomization; Lesson 14:  Another Way to Be Hip; Lesson 31:  Blur and Flash; Lesson 34:  When You’ve Got the Shakes; Lesson 43:  Patterns.

HDR Pro

Combining two images helps get better exposure, but the inherent problem of hand-holding at night is that the shutter is pretty slow, meaning more shake shows in the image.  When you add a second image to that, the focus looks extra soft.  We’ll try it on a tripod in another lesson to see how much that helps.

Past HDR Pro Lessons:  Lesson 9:  Combining Two Exposures into One Photo; Lesson 18:  When the Light is Out of ControlLesson 20:  Using Filters in Pro HDR; Lesson 21:  Filters and Photos in Your Library; Lesson 36:  Creating Space.

Your Assignment:  Pick an app.  Any app.  Go out in the dark, find an area with night lights, and experiment for yourself.  Does Hipstamatic make the noise tolerable?  Does Pro HDR solve much of the problem or make it worse?  Are you able to hand-hold and still get a sharp image?  Does the level on Camera Awesome (several other camera apps include a level) help you as much as it helps me?  How much does separating the exposure from the focus point help?

Lesson 43: Patterns

Today we’re going to return to a basic photography concept for inspiration.  Early on, we talked about filling the frame, the rule of thirds, and symmetry as different ways to create interesting compositions in your photos.  By composition, we’re talking about the arrangement of the stuff in your frame.  We also talked about inclusion and exclusion when it comes to deciding what to put in the frame and what to keep in focus.

Today, we’re going to talk about repeating patterns.  Sometimes, something that might seem ordinary and not worth photographing can become very interesting we we select a pattern from what we’re seeing and fill the frame with that pattern.

One of the aspects of what makes an interesting pattern in a photo is the 3 dimensional aspect of the subject.  For example, here are a couple of repeating patterns that don’t work so well to my tastes:

But, when we take a repeating pattern that has some dimension to it and add an angle to help guide the eye into the photo, you start to get something more interesting.  Compare the begonia angles and the walkway angles side-by-side:

Gardens create interesting patterns to work with almost by definition–the gardener has probably carefully grouped together different types of flowers to create patterns pleasing to the eye.  In this particular garden, I found lots to work with.  Not only are the plants grouped to form patterns, but the plants themselves contain patterns, such as the large hosta.  The hosta has rib patterns in its leaves, a pattern of white marks at the edge of each leaf, patterns of repeating leaf shapes, and the pattern in which it grows.  It works well in color and it works in black and white against a similarly patterned fence:

I particularly like to have a surprise in my photos that contain a repeating shape.  For example, one flower that stands out from the rest, fallen petals, a complimentary color in the background.  These are the kinds of things that make the pattern more obvious because there’s an exception.

A field of flowers can create more random patterns.  If you look at the photo that shows a field of flowers vs the photo next to it that gets in closer and just shows a few flowers as a random arrangement of repeating shapes, it give it a totally different look at feel (these were taken with a DSLR, sorry):

Your Assignment:  Look for repeating shapes with interesting textures and/or lines that can help draw the eye.  Try taking pictures of these repeating patterns from different angles and different distances.  Try using different apps–Camera Awesome is always great for realistic photos.  The black and white examples were taken using Hipstamatic with the Helga Viking lens and Black Keys film.  Do some patterns work better in color or B&W?  Do some work better from far away?  Think of photos you may have seen of the tulip fields in the Netherlands–if you haven’t see any, do a quick Google search on “tulip fields netherlands” and click on images to get an extraordinary number of examples of ways to shoot these repeating patterns).  Are there times when you could think about repeating patterns to enhance the way you, say, take a picture of a flower?

Lesson 36: Creating Space

Now that we’ve spent over a month together taking tons of pictures with our iPhones, we’re bound to have lots of extra photos lurking about that are just occupying space.  One of the great things about digital photography is that it frees us up to experiment and take lots of pictures without worrying about the cost of film and development.  The downside is that we end up with cluttered hard drives.

I use the Apple Photostream service.  I love it because it means I can take pictures on my iPhone and get back to my iMac or my MacBook Pro to write my lessons and find all the photos I just took already there.  There are a couple of problems with this, however.  First, Photostream has a way of proliferating the problem if you have a lot of trash photos.  Those trash photos get stored in the monthly archive for Photostream on each non-mobile device.  Add to that backup copies you make and that’s yet another copy of trash.

There are several things you can do to reduce the load.  First, apps like Camera Awesome do not automatically save the photos to your Camera Roll (which is what populates Photostream) unless you tell it to.  I like to leave the setting on the default, which is manual save mode.  That way, I can decide if I want to save a photo and let it proliferate or not.  The rest, I can delete and keep them out of my other devices.

Here’s how to check the auto export to Cameral Roll Setting:

Here’s how to go in and delete photos from inside the app (note:  make sure you’ve downloaded the ones you want first):

Fast Camera is another app that doesn’t automatically save all the photos to your Camera Roll.  This is particularly good because if you’re shooting with no delay between shots, you could quickly fill Photostream with one burst of shooting.  Fast Camera also has a nice organization of a series of photos–it puts them into folders.  You can open a folder to review, select a few to save, save them, and then select all and delete.   Here’s how to quickly delete the contents of a folder all at once:

Actually, you don’t even have to delete–if you click the done button, it will warn you that your photos will all be deleted.  Only use that if you are truly done with all photos in all folders–it deletes everything.

The default Apple Camera app and Hipstamatic do save photos to the camera roll automatically.  However, I tend not to take a large volume of photos with Hipstamatic because it has rather slow processing time.  I’ve run Hipstamatic out of memory on more than one occasion.  I also only use the default camera for panoramics, which I tend to take few of.  As a result, clean up is relatively easy.  If you use Photostream, just remember to remove bad photos from your Photostream as well as your camera roll.  Prioritize keeping Photostream clean–it will spread those bad photos everywhere.

The final app we’ve used so far is the Pro HDR app.  In this app, you can choose whether you want to save the original photos as well as the HDR processed photo or just the HDR processed photo.  I like to save them all, but then I regret it when I end up with a photostream full of over and under exposed photos.  I suggest just saving the HDR processed photo to minimize the clutter.

Finally, do not get attached to photos.  You don’t need those 15 bad shots of the same thing.

Your Assignment:

Go delete junk photos!  Here are some rules to help you get over the urge to keep them all:

  1. If you only got one really bad shot of something really important to you, keep it.  Otherwise:
  2. If they’re out of focus, delete them.
  3. If they’re overexposed, delete them.
  4. If they’re underexposed, delete them.
  5. If you have 15 you can’t tell apart, delete the first 14.
  6. If you have 15 that are all slightly different, pick the 2 you like best and delete the rest.
  7. If you used photos for utilitarian purposes like taking pictures of serial numbers on things you own for insurance purposes, file those away and delete them from your Photostream.

Lesson 34: When You’ve Got the Shakes

In Lesson 31, we talked about how adding the iPhone flash can help reduce the blur of slow-moving subjects.  What we didn’t talk about was another way blur can be introduced by movement–the movement of you holding your iPhone.

One way to reduce movement of your phone is to hold it very still.  For tips on how to hold it as steady as possible, see Lesson 6.  Sometimes, it’s hard to hold your phone still–especially if you’re shooting in low-light conditions when holding it still makes the biggest difference.  In those cases, using a tripod would be ideal, if a little silly looking.

In Lesson 25, we looked at using a telephoto attachment from Photojojo that includes a mini-tripod for your iPhone.  You don’t have to use the telephoto attachment to benefit from the tripod.  If you are taking landscape photos, especially in low-light, and you purchased the telephoto kit, try using the tripod without the telephoto lens to see how it improves your landscape photos.

There are other options if you don’t have a tripod for your iPhone.  For one, you can find a place to set the iPhone if you can balance it or prop it against something to eliminate your shake.  If you are a die-hard iPhone user, you may also find some of the various attachments for the iPhone that are helpful for keeping it stable.  For example, a car holder that doesn’t block the camera, a mount on your bike, or even the LifeProof life vest I showed in Lesson 19.  The large block size of the life vest makes the iPhone easier to grip securely.  It also makes it easier to stand on edge.  As a bonus–if your iPhone falls off its perch, there’s not much chance it will get damaged!

But let’s say you want to take a photo when there is no way to prop up your phone, or, the only place you could prop your phone would not result in getting the photo you want.  Another option is to use the “image stabilization” feature provided in many camera apps.  Unfortunately, not the default camera app from Apple, but, yes, it is one of my favorite features in the Camera Awesome app.

Unlike expensive gear that comes with image stabilization features that work mechanically, the Camera Awesome app uses the gyroscope in the iPhone to determine if the phone is moving.  If it is, it waits until a moment when you’re still before taking the photo.  This works great in that pushing the volume-up button or touching the shutter button on the screen creates most of the motion.  This setting allows the movement to settle before the picture is taken.

The downside is that the pause can cause you to miss the exact shot you wanted when your subject is fickle (like my dog) and decides to walk away while you’re waiting for the photo to take.  I highly recommend it when you’re taking photos of subjects that are either still or cooperative.

Here’s how to turn the image stabilization feature on in the Camera Awesome app (downloaded in Lesson 7):

Your Assignment:  Get out the Camera Awesome app and turn on the image stabilization feature.  Take some photos of a scene that isn’t moving.  Now, turn it off and take the same photos.  Do you notice a difference?  If so, you might want to make it a setting you use a lot.  If you happen to have very steady hands, you might prefer not to use it because of the delay it can introduce.

Lesson 31: Blur and Flash

Something we haven’t talked about yet is how to deal with motion.  There are two sources of motion to deal with when shooting with a smart phone:  1)  Subject motion, and 2)  Photographer motion.  Today, we’re going to talk about subject motion.

When it comes to subject motion, if we were using fancy cameras with lots of manual controls, we could stop the motion pretty easily.  Since we’re not, we have limited control over whether subject motion will show up in a photo or not.

Since my dog will never hold still when I try to take pictures of him, I thought I would use him to demonstrate how to deal with a moving subject.  Of course, for once, this is the day he chose to fall peacefully asleep on the couch and not move a muscle!

In any case, one of the easiest ways to deal with motion is to add light.  The more light you can get on your subject, the less motion will show up in the photo.  I could explain to you why this is, but I promised Gina, the inspiration for this blog, not to talk about stuff like that, so you’ll just have to trust me.

Sometimes, we can’t control whether we have light on our subject or not.  When a subject is moving, it’s pretty hard to run around turning on lights without missing the moment.  Fortunately, if we’re able to get up close to our subject, the iPhone comes equipped with a built-in “flash.”

To be honest, the LED light on the iPhone is not great, but it can make the difference between getting a photo and not getting any photo.  Just remember that it’s not going to do you a bit of good if your subject is more than about 5 feet away (give or take).  It will just waste your battery.

Most camera apps have different choices for how you use your flash.  Today, we’re going to look at Camera Awesome.  First, let’s try turning the flash on.  Here’s how to do that in Camera Awesome:

In the traditional “flash on” setting, the flash will turn on and off quickly with each photo you take.  I like to turn the flash either on or off rather than using the Auto flash mode–I don’t usually agree with the camera as to when it should use the flash.

There’s actually one other option I like a lot, however.  That’s the flashlight setting. This turns the light on continuously.  This is not a great option if your battery is running low, but it’s great if you’re literally shooting in the dark.  I also feel I get better exposure when I set the exposure with the light on, but I haven’t done apples to apples comparisons to prove that.  Here’s how to turn the flashlight option on:

Your Assignment:  If you don’t have a dog to work with, try following a human around in the house and seeing if you can get some photos of them where their motion doesn’t show.  Note that the iPhone flash isn’t bright enough to help freeze rapid motion, but it can help with slower movements. Also remember that you have to be very close.  (WARNING–if you’re photographing a human (or canine) subject, be careful not to shine the flashlight directly in their eyes.  This may cause enough discomfort at close proximity that your subject will never agree to model for you again.)  Can you see a difference in the amount of blur in your photos?

Lesson 30: Awesomely Hip Portraits

Let’s talk about different kinds of portraits–or, pictures of people.

To keep it simple, let’s use 3 general categories for the purposes of our discussion:

  1. Traditional Portraits – “It’s all about you”
  2. “You were there” portraits
  3. Landscape portraits.

In the first category, traditional portraits are all about the person and any background is just a “mood setting.”  In the second category, there’s a balance between a setting and the person (see Lesson 22).  The difference being that a “You were there” portrait puts a person in a specific place that isn’t where they would normally be found.

In our final category, there’s the kind of portrait that’s more about the scene and the people provide more of a “mood” or sense of scale.  I thought I made up the term “landscape portrait,” but it turns out there’s a group on Flickr on the subject.  Great minds.  😉

If you’re in a setting that’s worth photographing and you also have people with you, it’s good to think about these 3 choices.  Since my husband, dog, and I took a hike to a beautiful waterfall this weekend, I created examples using a couple of different combinations of lenses and films in Hipstamatic to show you the differences.

For a more traditional portrait, the Tinto 1882 lens we used in Lesson 24 works quite nicely.  As you can see, the facial recognition does a good job of keeping the face sharply in focus while the rest of the scene blurs.  To keep the background from getting too distracting, I took these in front of some stone steps instead of the waterfall.  I used the Black Keys Fine film (available for free download from the shopping cart in the app) for the photo on the left and the Kodak XGrizzled film we used in Lesson 13 for the photo on the left:

I like the Black Keys film for a crisp black and white look.  The Kodak XGrizzled film makes for a color photo with character.  I would have also used a neutral film, but my model was starting to grumble about mosquitoes.

To get more of a balance between the setting and the “people” (including my canine kid) for a “they were there” portrait, I positioned myself much closer to the people.  I also switched from the Hipstamatic app to the Camera Awesome app to get a “normal” photo:

For the landscape portrait, I did two completely different looks.  First, I used Hipstamatic with the Helga Viking lens and D-type film. Second, I used Pro HDR.  In both examples, I included the entire waterfall and had my husband looking away from the camera.  My dog was not so cooperative about where to look.

In both photos, the clear subject is the waterfall and having people in front of it creates a sense of scale as well as a different mood than, say, the waterfall by itself.  Compare a similar Hipstamatic photo with the same lens and film side-by-side with the one with my husband and dog:

How would you describe the difference in the feelings evoked by the two photos?

Your Assignment:  Take a cooperative person with you to an interesting setting.  It doesn’t have to be a waterfall–an interesting building can make an equally compelling photo.  Try using the different combinations of lenses and films in Hipstamatic in the different styles of portraits we discussed.  Try with Camera Awesome and Pro HDR, too.  Compare the photos.  Which do you like best?

Lesson 14: Another Way to Be Hip

In yesterday’s lesson, we used an included “lens” and “film” in Hipstamatic to create some interesting effects in our photos. One of my personal favorite combinations in Hipstamatic is the combination of the Helga Viking lens and the D-type plate film, which creates a black and white, tintype effect.

However, that lens and film combination costs extra, so I thought today we would look at how to create a similar effect using the Camera Awesome app, downloaded in lesson 7 and further explored in lessons 8 and 12.

One of the differences between the two apps is that in Hipstamatic, you frame and shoot and you’re done. In Camera Awesome, you have more decisions to make while shooting and then you apply different edits to get the effects. The disadvantage is the time it takes. The advantage is that you have a “normal” photo to work with and you can always get back to the original to try something different. In Hipstamatic, you get what you get.

I often take photos with Hipstamatic and then take a similar photo using Camera Awesome or my DSLR so that I have both the Hipstamatic version and something I can control. I always have to laugh when I’m standing somewhere with my DSLR hanging around my neck while I’m taking a picture with my iPhone.

In any case, let’s take a look at what the tintype effect in Hipstamatic looks like compared to using edits in Camera Awesome.

This is what I got using the Helga Viking lens and D-type plate film in Hipstamatic of my dog taking possession of my husband’s shoes:

IMG_0012

I took a similar image using Camera Awesome and started with this:

IMG_2882

I tapped the magic wand to get into the edit screen, and then did the following (click to enlarge):

camera awesome vintage.001

Next, I added a preset and a filter. If you need detail instructions, you can look back at lesson 12, just choose the Lone Star preset and the Cyanotype filter.

camera awesome vintage.002

Finally, we’re going to add a frame to the photo–I didn’t show all the screens, but it’s basically a repeat of selecting a filter. The main difference is when you’re done, it’s time to tap the done button.

camera awesome vintage.003

Now, let’s compare the Hipstamatic to the Camera Awesome version:

I did this same exercise with a landscape photo of the fog in the hills this morning. I added a square crop to better emulate the Hipstamatic look, which is done using the “Transform” option from the editing choices. Here’s a comparison of the results:

Your Assignment: Find three types of subjects to photograph: a person or pet to photograph up close, a room or garden to photograph from a bit further back, and a large open area to photograph from far away (like up the length of your street). Using Camera Awesome, photograph all 3 of these subjects. Now try applying the editing instructions to see which of them you like best with this type of look. Which kind of subject do you like best?


Lesson 12: Awesomization

Today we’re going to do something really fun.  We’re going to take an ordinary photo and turn it into something complete unique from anything you’ve ever produced with an ordinary camera.  This lesson does require an iPhone.  We will be using the Camera Awesome app we downloaded back in Lesson 7.

I started by applying yesterday’s lesson on symmetry to taking a very close-up picture of a large, silk flower.  You can choose whatever you like for your subject and framing, but taking a close-up is probably a good idea for today’s lesson.  Use the Camera Awesome app to take your photo as a starting place.

20130808 A Little Fun.001

Now that you have a picture, you’re going to open it and perform several editing steps all inside the Camera Awesome app to create a completely different look.  Start by opening the photo in the app and getting into the editing screen as shown in the example below (click to enlarge).  Also try the Awesomize slider to see if it improves your image.

20130808 A Little Fun.002

Next, we’ll try the “Transform” option to apply cropping to really get rid of any distracting background we can.  You’ll notice in my example below (click to enlarge), I still have a distracting bright area in the upper left corner of the photo even after I crop.

20130808 A Little Fun.003

Now let’s get really creative!  Let’s try the presets available.  Now, Camera Awesome offers a bunch of presets if you keep scrolling through the categories (flick to the left to see more groups of presets).  However, only the first category is free.  You have to pay $5.99 to get the other options.

20130808 A Little Fun.004

In this case, I chose Road Trip because I liked that it both reduced the glare of the bright spot and brightened the flower in a nice way.

Next, I decided to apply a filter.  Again, only the first category of filters is free.  I picked the Cyanotype because, combined with the Road Trip preset, it did some pretty cool things to my photo.

Once you’ve picked the filter you like (click “Undo” if you don’t like any of them), it’s time to click the “Done” button.  This applies your changes and save the edited image.  But before you go anywhere, make sure you also export at least your edited image.  (You may also want to export the original image.  You can go back to the same photo to export the original after you export your edited version.)  See the following example (click to enlarge):

20130808 A Little Fun.005

Now your lovely new picture is in your Camera Roll.  You can open it up and view it full screen and share it at will.  This is what my final picture looked like:

Awesomized

And this is what the original and edited version look like side-by-side:

20130808 A Little Fun.007

You’re Assignment:  Pick a subject that’s interesting close up and has some texture or a pattern of some kind.  A big, silk mum is great because it has a very dimensional texture vs, say, carpet.  However, even carpet can be interesting up close.

Use Camera Awesome to take a picture–remember to focus and expose separately if that helps.  Make sure you’re far enough away that the iPhone can focus–if you’re pictures keep coming out blurry, you may be too close.

Now use the step-by-step instructions above to play with the editing capabilities of Camera Awesome until you get an image you like.  Don’t forget to export it!

Which image do you prefer?  The original or the modified picture you created?

Lesson 8: Separating Focus from Exposure

In yesterday’s lesson, we downloaded the app Camera Awesome.  If you missed yesterday’s lesson, you might want to download it now.  It’s a free app available from the Apple App Store.

One of the pains of using the default camera app that comes with the iPhone is that you can only pick one spot on your screen to set both the exposure and the focus.  The Camera Awesome app is one of several apps that allows you to pick one spot to set the focus and another spot to set the exposure.

Why is this awesome?  There are many times when the thing you want to be in focus is  darker or lighter than the overall scene and you have to choose between what you want in focus and how you want the image exposed (see lesson 5).  With Camera Awesome, you can focus in one spot and adjust the exposure in another spot so you get a better exposure and still get the focusing point you want.

For example, when shooting landscape scenes like the one in the example below (click to enlarge), with the default camera app, if I choose the rock for the focus point, the sky turns white.  If I choose the sky to get a better exposure, the rock is not longer sharp.  I don’t want a blurry foreground and I don’t want a white sky.

Separate Focus and Exposure.001

Using the Camera Awesome app, I can touch the screen with one finger and, while keeping that finger still, tap the screen with a second finger to get a green square for focusing and a blue circle for setting exposure. I can move each around with a fingertip to find the best focus point and best exposure point separately.

Separate Focus and Exposure.002

By separating the two functions, I have more choices about how the photo will look.

Separate Focus and Exposure.003

One note I didn’t mention in yesterday’s lesson:  With the Camera Awesome app, the photo is stored inside the app until you tell it to save it to your Camera Roll.  It’s best to choose the images you want to keep and save them to your Camera Roll for future use as soon as you’re done shooting.  That way you won’t end up with hundreds of photos in the app.

Here’s one last example of when separating focus and exposure are important.  I focused on my dog is in the foreground, but found an exposure that keeps details visible in both the dark spot on his face and the sky.

IMG_1956

Your Assignment:  Choose a scene that has some brighter and darker areas where you want to focus on something in the foreground.  Using the default camera app that comes with the iPhone, choose the focus point and take a picture.

Next, open up the Camera Awesome app and practice touching with one finger and tapping with a second finger to get the separated exposure and focus settings to appear.

Focus on the same point you focused on using the default app.  Now slide the exposure around until you get the best exposure for your image.  Take a picture.  Save it to your Camera Roll.  Compare the two images.  Which one do you like better?