


Today we’re going to do something really fun. We’re going to take an ordinary photo and turn it into something complete unique from anything you’ve ever produced with an ordinary camera. This lesson does require an iPhone. We will be using the Camera Awesome app we downloaded back in Lesson 7.
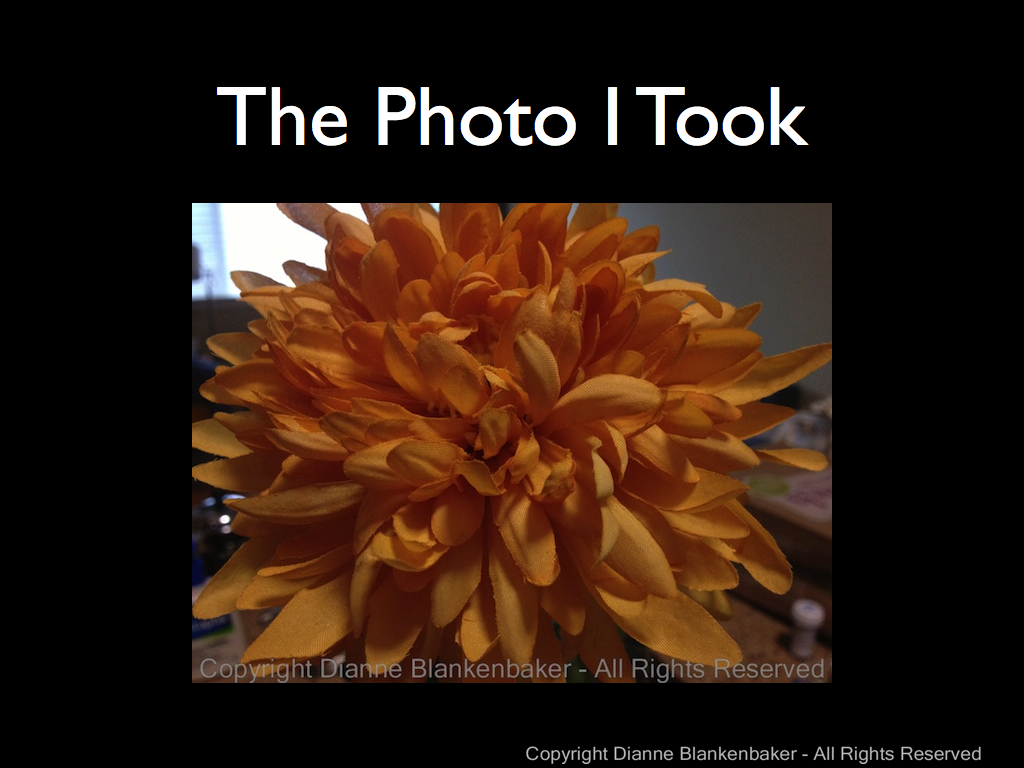
I started by applying yesterday’s lesson on symmetry to taking a very close-up picture of a large, silk flower. You can choose whatever you like for your subject and framing, but taking a close-up is probably a good idea for today’s lesson. Use the Camera Awesome app to take your photo as a starting place.
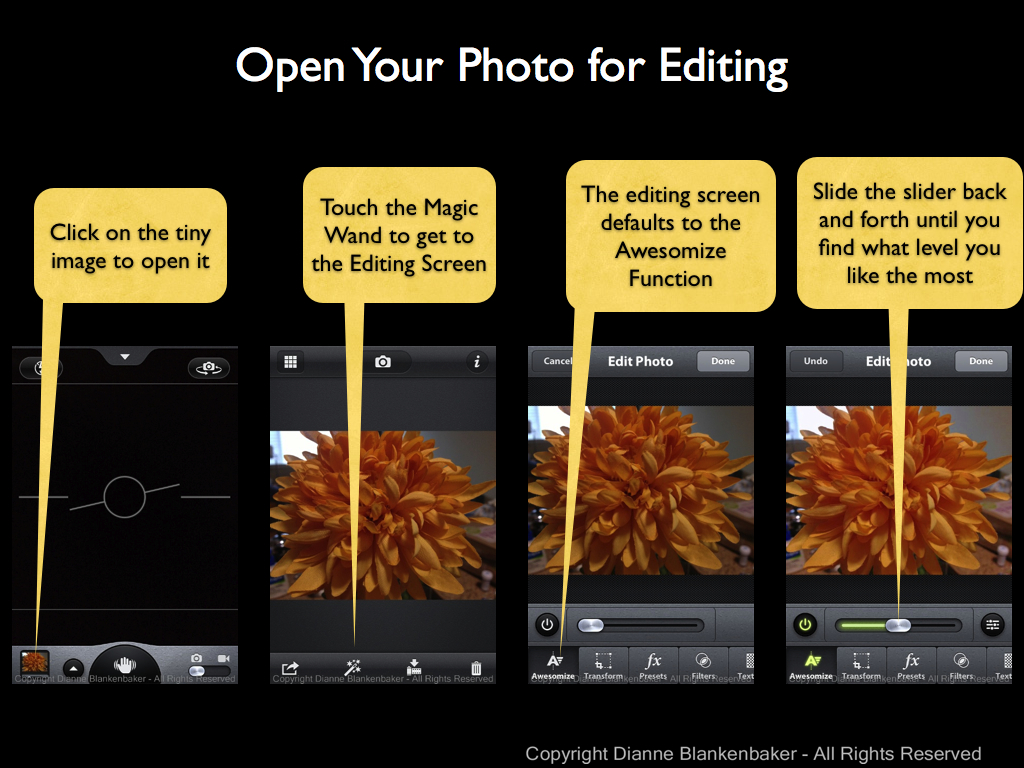
Now that you have a picture, you’re going to open it and perform several editing steps all inside the Camera Awesome app to create a completely different look. Start by opening the photo in the app and getting into the editing screen as shown in the example below (click to enlarge). Also try the Awesomize slider to see if it improves your image.
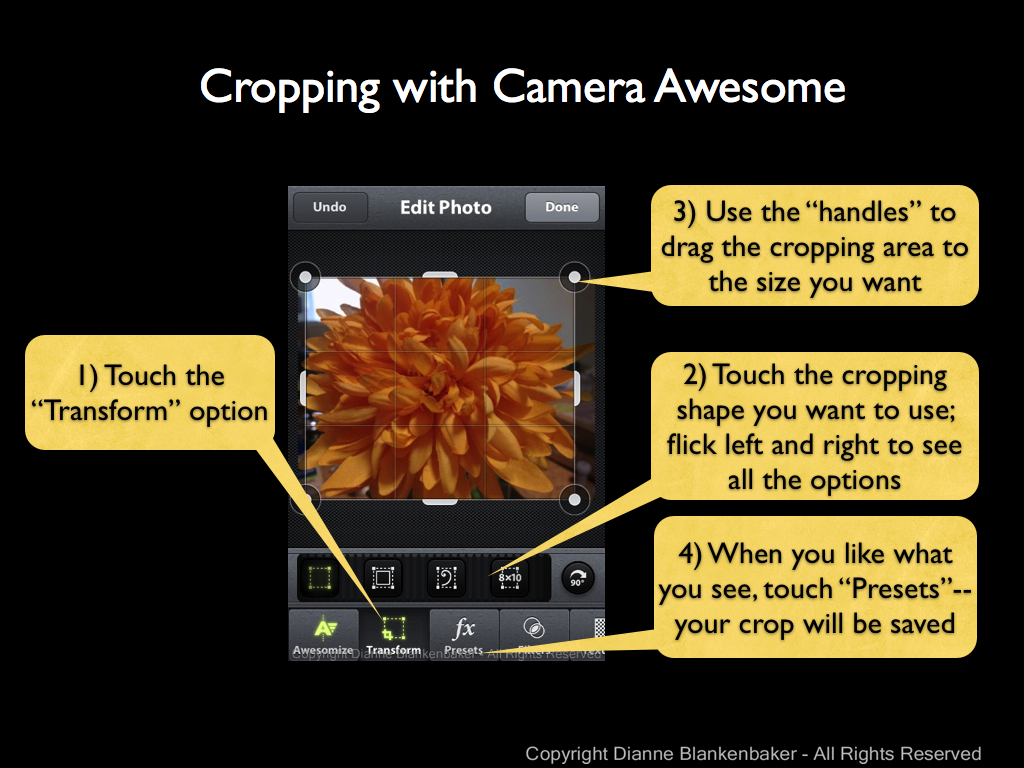
Next, we’ll try the “Transform” option to apply cropping to really get rid of any distracting background we can. You’ll notice in my example below (click to enlarge), I still have a distracting bright area in the upper left corner of the photo even after I crop.
Now let’s get really creative! Let’s try the presets available. Now, Camera Awesome offers a bunch of presets if you keep scrolling through the categories (flick to the left to see more groups of presets). However, only the first category is free. You have to pay $5.99 to get the other options.

In this case, I chose Road Trip because I liked that it both reduced the glare of the bright spot and brightened the flower in a nice way.
Next, I decided to apply a filter. Again, only the first category of filters is free. I picked the Cyanotype because, combined with the Road Trip preset, it did some pretty cool things to my photo.
Once you’ve picked the filter you like (click “Undo” if you don’t like any of them), it’s time to click the “Done” button. This applies your changes and save the edited image. But before you go anywhere, make sure you also export at least your edited image. (You may also want to export the original image. You can go back to the same photo to export the original after you export your edited version.) See the following example (click to enlarge):

Now your lovely new picture is in your Camera Roll. You can open it up and view it full screen and share it at will. This is what my final picture looked like:

And this is what the original and edited version look like side-by-side:

You’re Assignment: Pick a subject that’s interesting close up and has some texture or a pattern of some kind. A big, silk mum is great because it has a very dimensional texture vs, say, carpet. However, even carpet can be interesting up close.
Use Camera Awesome to take a picture–remember to focus and expose separately if that helps. Make sure you’re far enough away that the iPhone can focus–if you’re pictures keep coming out blurry, you may be too close.
Now use the step-by-step instructions above to play with the editing capabilities of Camera Awesome until you get an image you like. Don’t forget to export it!
Which image do you prefer? The original or the modified picture you created?

Whew! I sure like the original a lot more than the modified awesomeized photo.
That’s funny–my husband said the same thing. For me, the original image does nothing. The revised image makes me think of a greeting card. Can’t say I’d hang either in my wall. 🙂
Thanks for commenting!