


In yesterday’s lesson, we used an included “lens” and “film” in Hipstamatic to create some interesting effects in our photos. One of my personal favorite combinations in Hipstamatic is the combination of the Helga Viking lens and the D-type plate film, which creates a black and white, tintype effect.
However, that lens and film combination costs extra, so I thought today we would look at how to create a similar effect using the Camera Awesome app, downloaded in lesson 7 and further explored in lessons 8 and 12.
One of the differences between the two apps is that in Hipstamatic, you frame and shoot and you’re done. In Camera Awesome, you have more decisions to make while shooting and then you apply different edits to get the effects. The disadvantage is the time it takes. The advantage is that you have a “normal” photo to work with and you can always get back to the original to try something different. In Hipstamatic, you get what you get.
I often take photos with Hipstamatic and then take a similar photo using Camera Awesome or my DSLR so that I have both the Hipstamatic version and something I can control. I always have to laugh when I’m standing somewhere with my DSLR hanging around my neck while I’m taking a picture with my iPhone.
In any case, let’s take a look at what the tintype effect in Hipstamatic looks like compared to using edits in Camera Awesome.
This is what I got using the Helga Viking lens and D-type plate film in Hipstamatic of my dog taking possession of my husband’s shoes:
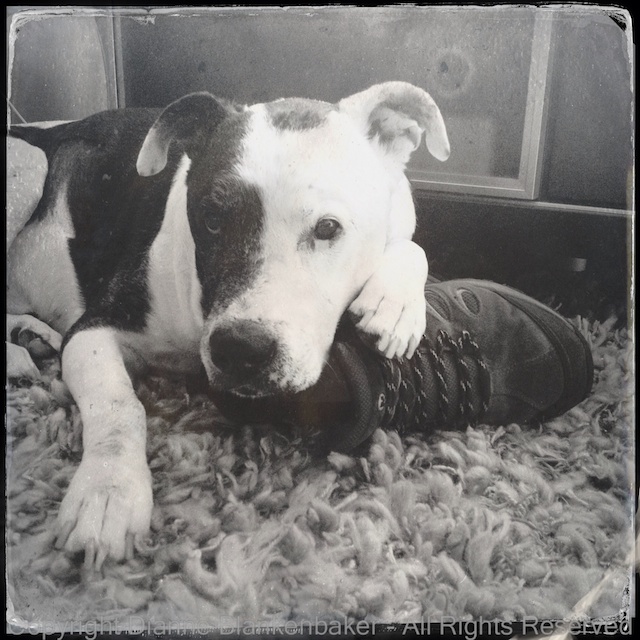
I took a similar image using Camera Awesome and started with this:

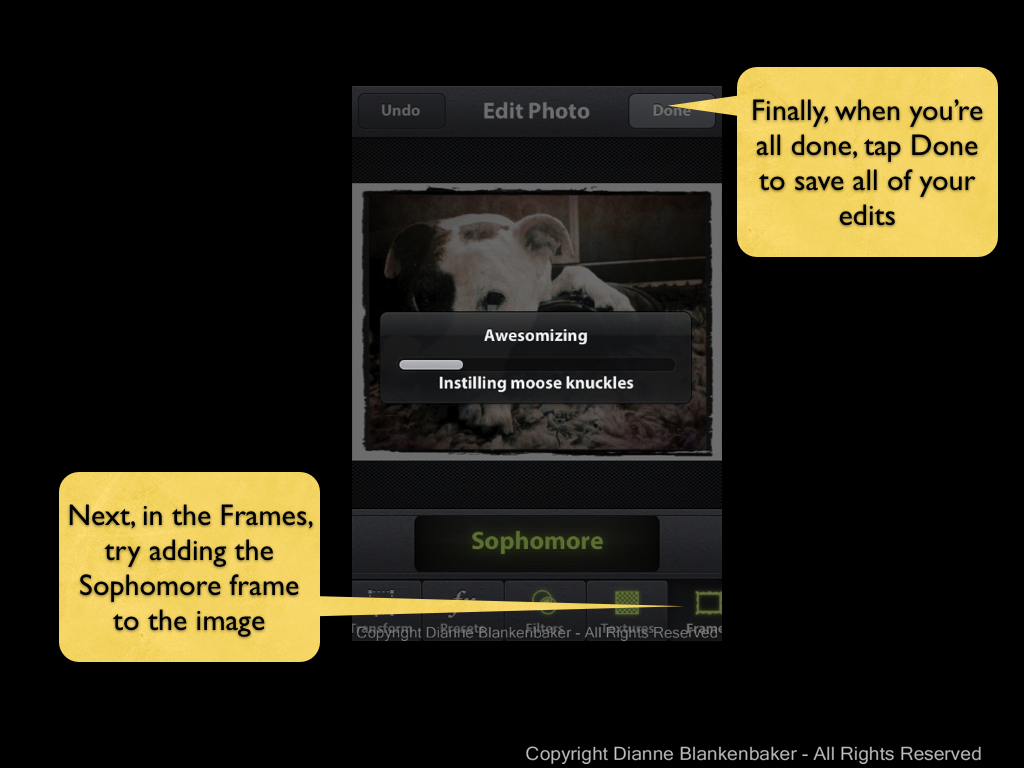
I tapped the magic wand to get into the edit screen, and then did the following (click to enlarge):

Next, I added a preset and a filter. If you need detail instructions, you can look back at lesson 12, just choose the Lone Star preset and the Cyanotype filter.

Finally, we’re going to add a frame to the photo–I didn’t show all the screens, but it’s basically a repeat of selecting a filter. The main difference is when you’re done, it’s time to tap the done button.
Now, let’s compare the Hipstamatic to the Camera Awesome version:


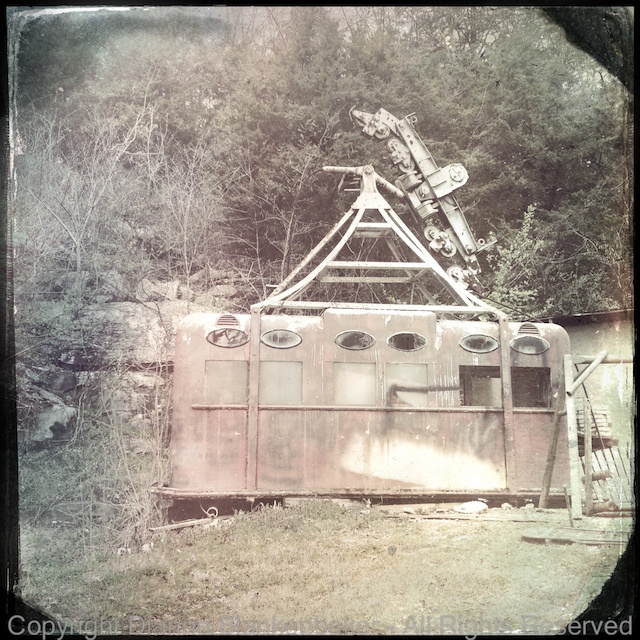
I did this same exercise with a landscape photo of the fog in the hills this morning. I added a square crop to better emulate the Hipstamatic look, which is done using the “Transform” option from the editing choices. Here’s a comparison of the results:


Your Assignment: Find three types of subjects to photograph: a person or pet to photograph up close, a room or garden to photograph from a bit further back, and a large open area to photograph from far away (like up the length of your street). Using Camera Awesome, photograph all 3 of these subjects. Now try applying the editing instructions to see which of them you like best with this type of look. Which kind of subject do you like best?

4 thoughts on “Lesson 14: Another Way to Be Hip”