


Having just passed the shortest day of the year in the Northern hemisphere, I thought it was a good time to look at how different apps perform at night on the iPhone 5S. I’m sure you all heard that the 5S was a step up for low-light photography with it’s bigger aperture and larger, less noisy sensor. If you don’t know what any of that means, that’s OK, it’s just supposed to be better than predecessors at night.
As someone who shoots a lot with a DSLR that does fantastic things at night, it’s a little hard for me to judge fairly about whether the improvement is significant between my 4S and 5S, but I was curious to see if using different apps on the iPhone while hand holding made any difference at all in the quality of the images in low light.
The answer is pretty much “no” for the apps I tried in this comparison: the Apple Camera App, Hipstamatic, Camera Awesome, and Pro HDR. Here are the things that differ, both good and bad, over the Apple Camera App:
Hipstamatic
The cool (or should I say hip?) thing about Hipstamatic at night is that the filters it applies to the image make the noise of low-light photos look intentional. They seem like part of the artistic effect instead of an annoying accident.
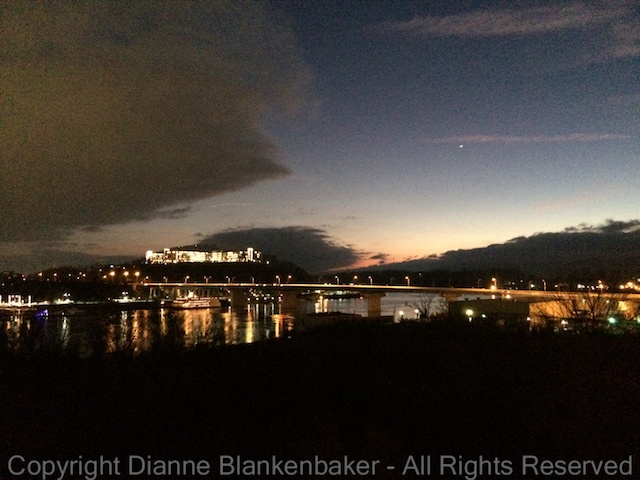
The downside is that you only get square images, which I don’t particularly like for a scene that is wide and short like the Chattanooga riverfront.
Past Hipstamatic Lessons: Lesson 13: Getting Hip; Lesson 24: Using Hipstamatic to Include and Exclude; Lesson 26: The iPhone and Wildlife; Lesson 29: Hipsta-Classic; Lesson 30: Awesomely Hip Portraits; Lesson 43: Patterns; Lesson 46: Flower Power; Lesson 88: Hip Heads; Lesson 93: Old Places, New Dressing.
Camera Awesome
The level–it’s particularly useful at night when it’s too dark to judge visually if you’ve got a tilt going on or not.
Being able to separate the focus point from the exposure point gives you more control over whether you get a lighter or darker exposure (I did not use this feature in the examples, but you can see how to use it here).
Past Camera Awesome Lessons: Lesson 7: Keep It Level; Lesson 8: Separating Focus from Exposure; Lesson 12: Awesomization; Lesson 14: Another Way to Be Hip; Lesson 31: Blur and Flash; Lesson 34: When You’ve Got the Shakes; Lesson 43: Patterns.
HDR Pro
Combining two images helps get better exposure, but the inherent problem of hand-holding at night is that the shutter is pretty slow, meaning more shake shows in the image. When you add a second image to that, the focus looks extra soft. We’ll try it on a tripod in another lesson to see how much that helps.
Past HDR Pro Lessons: Lesson 9: Combining Two Exposures into One Photo; Lesson 18: When the Light is Out of Control; Lesson 20: Using Filters in Pro HDR; Lesson 21: Filters and Photos in Your Library; Lesson 36: Creating Space.
Your Assignment: Pick an app. Any app. Go out in the dark, find an area with night lights, and experiment for yourself. Does Hipstamatic make the noise tolerable? Does Pro HDR solve much of the problem or make it worse? Are you able to hand-hold and still get a sharp image? Does the level on Camera Awesome (several other camera apps include a level) help you as much as it helps me? How much does separating the exposure from the focus point help?