
I mentioned in yesterday’s lesson that the iPhone’s default camera app both focuses and sets exposure based on where you tap on your phone’s screen. Yesterday we talked about focus. Today we will talk about exposure.
The fact that focus and exposure are tied together in the iPhone app can create some frustrating situations. In later lessons, we’ll talk about other iPhone apps you can use that separate these two functions, for right now, we’ll stick to the default app.
Let’s take a made-up example. Let’s say I want a picture of my dog that includes the patio door for some reason. When I tap my dog on the screen, the iPhone both focuses and sets the correct exposure for my dog, which works reasonably well:

Now let’s pretend there is something really fascinating about that patio door and I want a picture that exposes the patio door correctly, but also includes my dog. If I tap on the patio door to get the right exposure for it, this is what I get:

If we could see my dog, we would find that he’s kind of fuzzy in addition to being too dark.
To get both my dog and the door, I can choose a portion of the image that is approximately halfway in between the two and turn on the flash like this:
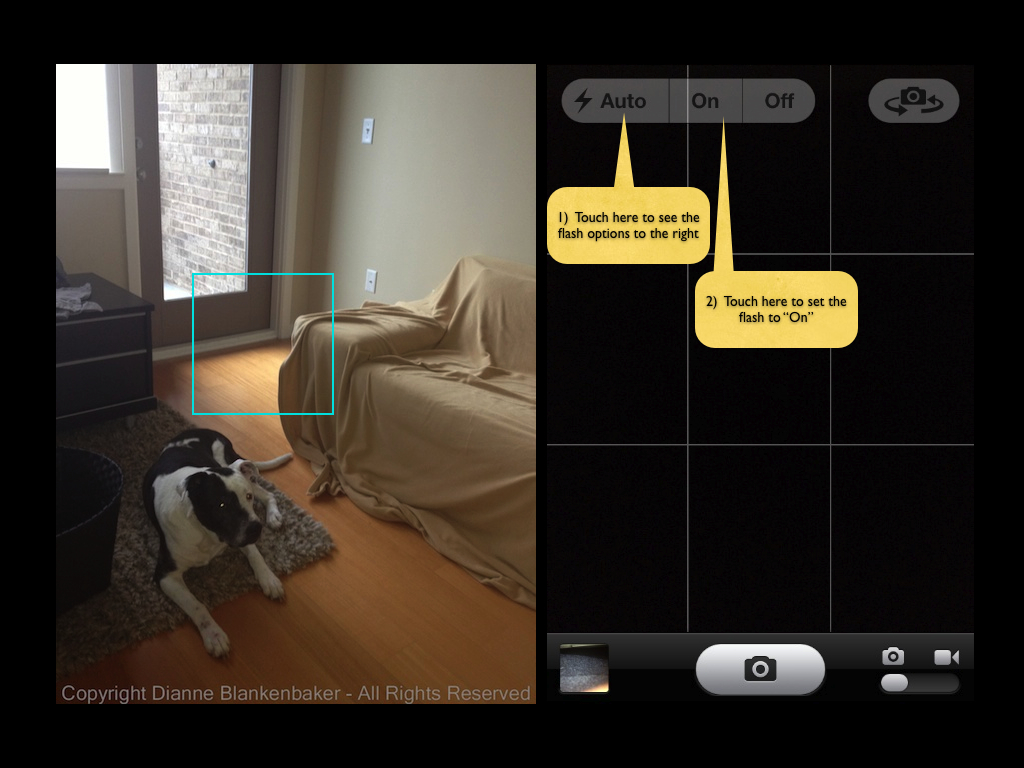
You’ll notice in the image above (click to enlarge) used to show where to focus, the downside of using the flash is that my dog’s eye reflected the light, but we’ll learn how to deal with that later.
As you can see, when the exposure required for a subject causes the rest of the image to be too bright or too dark, this technique can help. By choosing the place to tap so that it’s between the two extremes, it helps equalize the gap. If the gap is too big, you can use the built-in flash to help equalize things further. Note: the distance the flash will have an effect is limited to very short distances (a few feet).
Your Assignment: Take a walk outside during the day. Try taking a photo of a solid subject that has a lot of light behind it. See if you can find good spot to tap on to get both reasonable exposure and focus. Try turning on the flash to see if it helps. For bonus points, try using the rule of thirds in the same photo.

3 thoughts on “Lesson 5: Exposure”