Recovering “Erased” Photos

Hopefully, you are all well-organized and have never gotten confused about which images on your memory card have been saved to your computer and which haven’t. In my case, I recently had a brain malfunction known as “brain flatulence” causing me to reformat a memory card containing about 1000 images I hadn’t uploaded yet.

It happened in a moment of distraction. I was checking to see how much space was left on the memory card in my camera in preparation for a shoot just to see if I needed to swap out the card before I started. I knew I hadn’t uploaded the images yet. I made several mistakes:

  1. I went to the format card menu to see how full the card is because it’s easier for me to see the big bar graph displayed on my LCD than the counter that tells you how many images you have room for. Putting on my reading glasses and looking at the counter would have been safer.
  2. I was sitting in my car waiting to meet someone with traffic zooming by and other distractions. In the moment when I should have selected “cancel,” a loud vehicle grabbed my attention.
  3. I use the format card menu every time I want to erase images. My muscle memory is to select “format card,” not to select “cancel”–I have to pay close attention when in the format card menu.

In the moment the loud vehicle captured my mind, my muscle memory took over and gone were all my images! Mind you, I had bushwacked through thick undergrowth, dragged myself through poison ivy, and braved the aerial version of a mine field walking under a heron rookery to get some of the images on that card. I was not a happy camper.

But, here’s the good news! When you delete images or format your card, no data is actually lost. Rather, the existing data is marked as eligible for being overwritten. This means that as long as you set that card aside and don’t write any photos on top of your “deleted” data, your images can easily be recovered with the right software.

The software I chose first was Lexar’s Image Recovery 4. My main reason for choosing this software was because it is a) available for a mac (and windows), and b) free because I own several Lexar memory cards. This software claims to work on all memory cards, but it was a Lexar card I used it with.

Unfortunately, Lexar does not have the best ordering process. You can download the trial version of the software for free, but you can only get a key by contacting support. Alternatively, you can pay $40 for their newest version, IR 5.

I recommend NOT scanning your memory card with the trial version–you can only restore one image. After I had successfully scanned my card and restored one image, I was stuck waiting for a license key. Support told me it could take up to 48 hours to get it. When I finally got the license key and rescanned the card, the software couldn’t find any images. Yes, I freaked.

Fortunately, support provided me with a key for IR5 because I had recently bought one of my Lexar cards. Once I had IR5, I had no trouble restoring all of the images. The interface is intuitive and although running the scan on a full 32GB card and restoring the images does take a significant amount of time to run, all I had to do was click a couple of buttons.

So, if you own a recent Lexar card, download the IR5 version and send support a request for a free license key (you will probably need to tell them what card you have that entitles you to the software). Wait to run the software until you receive the key and then you should have no problems.

If you don’t own a Lexar card, there are other software options out there. I was unable to find a reliable source I’m familiar with for reviews of these software options, so I went with Lexar. My logic was that they have a major stake in making sure I recover my photos successfully and they are a company I’ve already trusted with my images for many years. While they have logistics issues with giving out licenses, they were helpful and supportive, the software worked, and it didn’t cost me anything but time.

By the way, for iPhoneographers, I stumbled across software that is supposed to recover deleted data on the iPhone, including photos. I cannot vouch for the product, but here is a review on CNET: http://download.cnet.com/Data-Recovery-for-iPhone/3000-2242_4-75856767.html

Lesson 104: Bird Photography Tips, or When Not to Use an iPhone

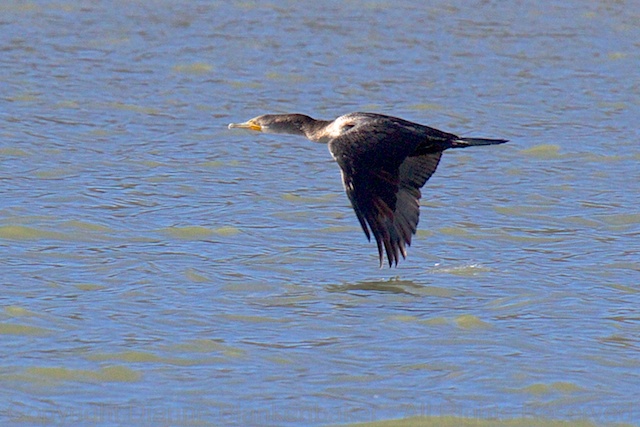
In Lesson 26, we looked at trying to get wildlife photographs with an iPhone.  Specifically of a Great Blue Heron hanging out by a bike path.  Today, I am sharing a few images from a recent river cruise in a wildlife preserve during Sandhill Crane migration.
All of the images in this post were taken with a DSLR.  In fact, I used two different DSLRs, each with a telephoto lens to take these images.  If your an iPhoneographer, I’m sorry, but here are the reasons why I left my iPhone in my pocket:

  1. Focusing while tracking a bird in flight with the iPhone may be possible, but if it is, I haven’t mastered it.  While I’ve gotten good images of a bird flying directly toward me with the iPhone, I’ve not been able to get images worth keeping of a bird flying across the field of view.
  2. The super-wide lens on the iPhone means that unless you can get within a few feet of a bird, you’ll end up with tiny bird spots instead of recognizable birds.
  3. The timing of when you click and when the image is made can be quite delayed in the iPhone–not ideal for a moving subject.
  4. Getting the exposure right for a small bird in a big sky is trickier than what can be accomplished quickly on the iPhone and speed is imperative when shooting moving birds from a moving boat.
  5. The resolution is too low to do a lot of cropping, which number 2 makes necessary.

So now you know why I didn’t use my iPhone.  Here are a few tips for photographing birds with a DSLR:

  1. Unless you’re going to be very close to large birds (like in our Raptography workshop), use the longest lens you own.
  2. If your lens has Image Stabilization, turn it on and select the type for panning (IS 2 for Canon, Active for Nikon).
  3. Use the continuous focusing setting on your camera (your camera will keep focusing as long as you keep the shutter button half pressed) in AI Servo mode for Canon or AF-C for Nikon.
  4. If you have tracking settings, set a choice that will stay with the subject and not refocus on new subjects entering the frame.
  5. If you can pick how many focus selection points are used, try using 8.  If you can’t keep up with a bird in flight or if you’re on a boat that’s bouncing a lot, you might want to expand to more.
  6. If your camera allows you to manually select one focus point but still uses the additional points when tracking motion, manually select the center focus point.  In all cameras, the center selection point has the best focusing sensitivity (although in some cameras, other selection points do as well).  For most people, using the center focus selection point also makes panning more intuitive.
  7. Panning with birds takes eye-hand coordination and becomes more difficult for your brain to adjust to when you’re on a moving vehicle (like a boat), so start practicing as soon as anything flies your way even if it’s not exciting.  Better to get bad shots of crows than when the elusive Whooping Crane suddenly appears on the scene.

Your Assignment:  For iPhoneographers, I’d love to see your bird images!  If you’ve managed to get a bird photo you’re proud of with your iPhone, please post it on our Facebook page:  facebook.com/snapgreatphotos!

For other shooters, get out and try these settings on robins and pigeons before you go on a birding excursion.  Everyone has different preferences and different camera features, so you may find different settings work better for you.

Lesson 103: Sunrise and the iPhone

The greatest thing about an iPhone (or any smart phone, for that matter) as a camera is that most of us don’t go out the door without it.  It takes forethought and extra effort to pop a lens on my DSLR, check to make sure it has space on its memory card, check the battery charge level, and look at what settings are on it.  I don’t think about photography at all when I grab my iPhone before I head out the door.  In fact, I have to remind myself that I have a camera with me because I carry my iPhone for so many other reasons.

When the clouds look interesting, it’s hard to resist getting a shot, even if the colors aren’t unusual.  The iPhone, for better or worse, makes it possible to capture all of the sunrises I happen to see.

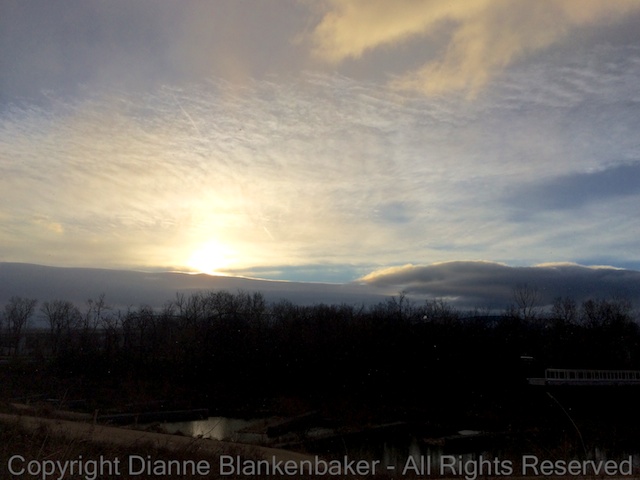
On this particular morning, the bank of clouds in front of the sun caught my eye.  As usual, I was out walking my dog.  This means I was at the mercy of his bladder, trying to get to a position where I had a view of the bridge and river before the sun got too high, but not wanting to rush him through his morning routine.  There is a reason you don’t see professional photographers toting around their gear while holding a leash with a dog at the other end.

I used two different apps for these images.  First, I used the Apple Camera App (the one that comes installed on your iPhone) for this image:

Then, when I finally made it down to the river, I used it again for this image:

But, I switch to Pro HDR for this image:

Here are the two different exposures Pro HDR used to combine them into the final image above:

The result is better exposure of both the water and the sky in the same image without looking over-processed.  This is one way to deal with the bright sun–I’ve covered the Pro HDR app in earlier lessons.  See Lessons 9, 18, 20, and 66.

A word about composition:  Compare these two images side-by-side:

Notice that in the one on the left, the sky takes up the majority of the frame.  The clouds in the foreground at the top enter the frame.  In the image on the right, the water occupies the majority of the frame.  The sunlight reflected in the water adds more depth to the image and the clouds seem secondary to the composition.  While one isn’t necessarily preferable to the other, in this particular example, in spite of my obsession with clouds, I prefer the one on the right.  The reflection in the water helps draw my eye into the bridges, sun, and clouds more than the extra clouds add to the image on the left.  Which framing do you like better?

Your Assignment:  The next time you’re out at sunrise or sunset, remember that you have a camera in your pocket.  Try taking a few shots with the default camera.  Try turning on the HDR feature in it as well (for a comparison of with and without HDR in the Apple camera app, see Lesson 72).  Then try Pro HDR and see if you like the results you get–remember you have to hold still until it takes both exposures (watch the screen prompts).

iPhoneography Lesson 101: Slow Shutter App and a Highway Bridge

I introduced the Slow Shutter app several posts ago, but this time, I dug out my iPhone tripod and found a view of a highway bridge over a river so I could demonstrate this app creating light trails.

3GSphoto of 5S

First and foremost, this requires a tripod.  Here is a shot taken with an iPhone 3GS of my iPhone 5S in its nice little tripod courtesy of Photojojo (they have crazy accessories for iPhoneography that will make you feel like you’re buying Barbie photography gear).  The one I have came with a telephoto attachment and works fine on flat surfaces, but if I had no interest in the telephoto attachment, I would go for the $15 Gorillapod.  Just something to keep in mind for the post-Christmas shopping frenzy.  🙂

If you decide to buy something, Photojojo is offering $5 off to both you (if it’s your first-time order) and me if you use this link to go to the website:  http://photojojo.com/r/afvu–a win-win deal!

To create the Slow Shutter images, I used an 8 sec exposure under the light trails settings.  Below, find the two steps required to set this up plus what to do after you shoot:

Once you get your camera set up and going, you can keep adding to the exposure.  In this example, I did a series of 4, 8-second exposures over top of each other before saving the final image.  The key is not to move the iPhone at all when you do this.  Any vibration from tapping the phone or in the tripod it’s sitting on shows up in the image.  The problem I experienced was that I couldn’t tap the screen firmly enough without moving it to get the camera to focus on the subject, leaving me with soft focus on the distant bridge.  Here are two images on the tripod, both with soft focus:

All-in-all, I’d have to say that Slow shutter is a great idea, but probably not a useful app if you just want to pull the camera out of your pocket and start shooting.  In case you’re curious what it would do if you just hand held the iPhone, here’s the best I could do hand-holding:

Your Assignment:  Do you have an interest in being able to capture light trails at night?  Is it worth it to you to have a tripod for your iPhone to capture such images?  If so, Slow Shutter is a great app to experiment with.  We’ll also take a look at using Slow Shutter with panning in future lessons.  In the meantime, give it a try with cars driving by and see if you can get the results you’re seeking.


iPhoneography Lesson 100: Hipstamatic on Ice with iPhoto on the Side

One of the great things about the iPhone as a camera is that it is virtually always with you.  Being able to pull out an iPhone versus missing a shot is a great option.  The only downside, for those of us who have invested heavily in prosumer DSLR equipment, sometimes we find ourselves opting for the more convenient iPhone, even when we could pull out the big guns with a little extra effort.

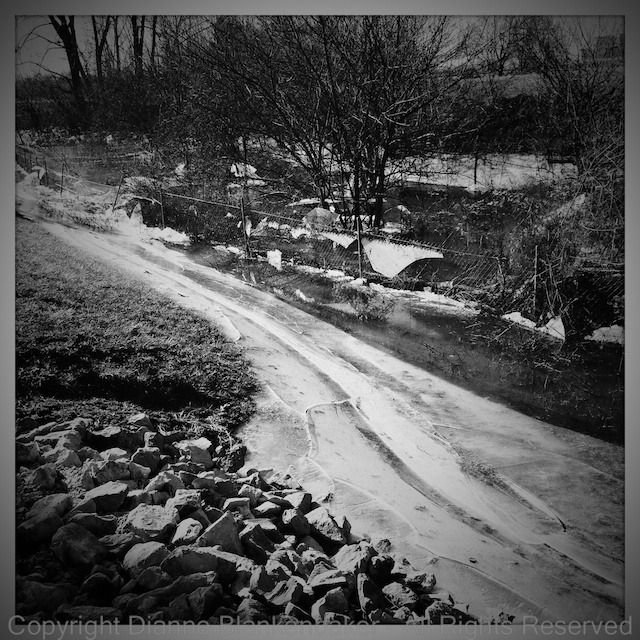
For example, today, I was wandering around a parking lot in a cold wind somewhere in Indiana or Kentucky, allowing my dog to stretch his legs after several hours of riding in the car.  A small drainage ditch ran around the parking lot, which bordered a farmer’s field.  It appeared the water had dropped several feet after freezing, leaving sheets of ice hanging from trees and fencing along the drainage ditch.

The bright afternoon sun glared off the ice, giving the whole scene less than ideal lighting, but interesting glare.  So, what did I do?  Did I return to my car, dig my camera bag out from its hiding place, unzip all the zippers required to get out my camera and a lens and then dig up my tripod and go back and shoot in the sub-freezing temperatures?  Well, I thought about it for a moment.  Then, I reached into my pocket, pulled out my iPhone, opened up the Hipstamatic app and grabbed as many shots as I found interesting.

Yes.  Sometimes I choose to be lazy.  Sometimes I choose to save time.  Sometimes I choose both.

To further complicate things, I didn’t have my glasses.  When I opened up Hipstamatic, I thought it was on the BlacKeys ultrachrome film.  It was actually Blanko film.  Blanko film is color film and I really wanted black and white.  So, it was iPhoto iOS to the rescue.  I did a quick auto-enhance + black and white effect to get the black and white look I’d envisioned.  These steps are covered in detail in Lesson 96 (I did not use the Sepia button in today’s examples, but otherwise the steps are the same).

Your Assignment:  Check out these earlier lessons on lighting:  Lessons 16, 17, and 67.  Sometimes, bright afternoon light can add interest to an image even though we normally think of it as being too harsh and creating strong shadows and contrasty images.  In the winter months in particular, the sun is lower to the South and the angle of the light gives it a very different look from a straight overhead sun in the summer.  Can you tell that the sun in these images is very bright?  Does the black and white version look more or less appealing to you?

iPhoneography Lesson 99: Christmas Eve and the iPhone

Just a quick tip that Christmas trees work well with Hipstamatic as well as more traditional camera apps.  Also try including reflections of the lights in the windows in the frame if you want something a little different from the traditional Christmas tree.

Have a wonderful day tomorrow whether you celebrate Christmas or not.  Peace on earth, goodwill to all, and good night!

iPhoneography Lesson 98: Comparison of Apps at Night


Having just passed the shortest day of the year in the Northern hemisphere, I thought it was a good time to look at how different apps perform at night on the iPhone 5S.  I’m sure you all heard that the 5S was a step up for low-light photography with it’s bigger aperture and larger, less noisy sensor.  If you don’t know what any of that means, that’s OK, it’s just supposed to be better than predecessors at night.

As someone who shoots a lot with a DSLR that does fantastic things at night, it’s a little hard for me to judge fairly about whether the improvement is significant between my 4S and 5S, but I was curious to see if using different apps on the iPhone while hand holding made any difference at all in the quality of the images in low light.

The answer is pretty much “no” for the apps I tried in this comparison:  the Apple Camera App, Hipstamatic, Camera Awesome, and Pro HDR.  Here are the things that differ, both good and bad, over the Apple Camera App:

Hipstamatic

The cool (or should I say hip?) thing about Hipstamatic at night is that the filters it applies to the image make the noise of low-light photos look intentional.  They seem like part of the artistic effect instead of an annoying accident.

The downside is that you only get square images, which I don’t particularly like for a scene that is wide and short like the Chattanooga riverfront.

Past Hipstamatic Lessons:  Lesson 13:  Getting Hip; Lesson 24:  Using Hipstamatic to Include and Exclude; Lesson 26:  The iPhone and Wildlife; Lesson 29:  Hipsta-Classic; Lesson 30:  Awesomely Hip Portraits; Lesson 43:  Patterns; Lesson 46:  Flower Power; Lesson 88:  Hip Heads; Lesson 93:  Old Places, New Dressing.

Camera Awesome

The level–it’s particularly useful at night when it’s too dark to judge visually if you’ve got a tilt going on or not.

Being able to separate the focus point from the exposure point gives you more control over whether you get a lighter or darker exposure (I did not use this feature in the examples, but you can see how to use it here).

Past Camera Awesome Lessons:  Lesson 7:  Keep It Level; Lesson 8:  Separating Focus from Exposure; Lesson 12:  Awesomization; Lesson 14:  Another Way to Be Hip; Lesson 31:  Blur and Flash; Lesson 34:  When You’ve Got the Shakes; Lesson 43:  Patterns.

HDR Pro

Combining two images helps get better exposure, but the inherent problem of hand-holding at night is that the shutter is pretty slow, meaning more shake shows in the image.  When you add a second image to that, the focus looks extra soft.  We’ll try it on a tripod in another lesson to see how much that helps.

Past HDR Pro Lessons:  Lesson 9:  Combining Two Exposures into One Photo; Lesson 18:  When the Light is Out of ControlLesson 20:  Using Filters in Pro HDR; Lesson 21:  Filters and Photos in Your Library; Lesson 36:  Creating Space.

Your Assignment:  Pick an app.  Any app.  Go out in the dark, find an area with night lights, and experiment for yourself.  Does Hipstamatic make the noise tolerable?  Does Pro HDR solve much of the problem or make it worse?  Are you able to hand-hold and still get a sharp image?  Does the level on Camera Awesome (several other camera apps include a level) help you as much as it helps me?  How much does separating the exposure from the focus point help?

Lesson 96: iPhoto Mobile and Sepia

iPhoto Mobile has become my favorite photo editing app on the iPhone.  I haven’t used them all, but it’s quick and easy and the editing capabilities are pretty impressive for a mobile app.  Plus, it’s free.  I first introduced iPhoto in Lesson 83 Metadata and also used it in Lessons 84 iPhone Mobile Editing, 85 iPhoto Con Tours, 86 My Silly Dog and the iPhoto Exposure Tool,  and 87 Adding Drama in iPhoto iOS.

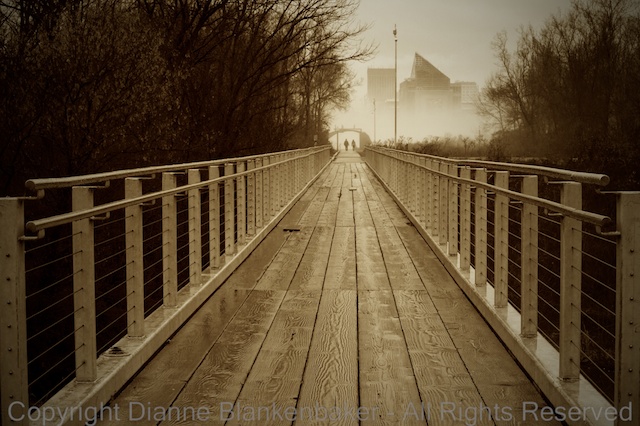
Today, I am going to show you how to take a color photo and turn it into a more nostalgic looking black and white with sepia.  I am not frequently a fan of sepia, but this image called out for sepia to me.  There is something about the rustic looking wood planks in the bridge leading to the couple headed into the fog against the very modern looking building in the background that made me think “sepia.”

I originally took this image with my DSLR, but because it was in my Photo Stream, it was easy to open it from the iPhone without having to do anything fancy to get it there.

I love Photo Stream when it works.  Sometimes, however, images don’t show up when and where I expect them to, which can be annoying.  Most of the time, I happily discover all of my recent images on all of my devices just as advertised.

One of the things I wanted to accomplish with the adjustment was to make the couple in the background walking into the fog stand out more.  While the bridge and path lead the eye to the couple, in the original version, they were competing with the colors in the trees and the background building for attention.  By changing the image to B&W and using a vignette to darken all of the outer objects in the frame, the people in the background pop out more.

To my eye, adding the sepia coloring made the effect even stronger by causing the bridge and path to look brighter compared to the trees, leading the eye more directly to the couple in the distance.

Here are the step-by-step instructions for the adjustments I made in the iOS version of iPhoto on my iPhone 5S:

Your Assignment:  Sometimes sepia will perk up an image that otherwise seems rather dull.  This, like all artistic choices, is subjective.  If you don’t like it, that’s OK–knowing what you don’t like is a great step towards learning what you do like.  But give it a try in any case–you can always delete it.  Choose an image where the colors are not a key component in the impact of the image and there is enough contrast in the image that the subject will still stand out without color.  I find sepia to usually be more appealing when there are architectural features in the image, but I have also used it with owls and vultures and liked it.  How do you feel about sepia?

Lesson 95: A Change of Perspective


How many times have you seen or taken a picture of a dog that looks a lot like this?  (You could probably replace the word “dog” with “child” here as well.)

02 Tisen grateful for Jack

Now, I don’t mean that all dogs (or children) look alike.  Rather, I mean that our default way of looking at a dog is from a standing position looking down at them.  Most dog photos dog owners snap are taken very quickly, spur of the moment without time to think or plan how we want to shoot.

This is usually because each of our dogs is the cutest, most brilliant canine kid in the world and we want to capture that hilarious thing he or she is doing that makes him or her that much cuter.

However, sometimes changing the perspective just a little can make a big difference  For example, compare these two photos:

In the first one, we have a funny expression that still cracks me up every time I look at it, but notice that the camera is above the dog’s head shooting down and the angle of his head to the camera makes it look considerably skinnier than it does in the photo on the right.  The one on the right was taken about level with the dog’s face, straight on to the nose.  If these were the only two pictures you’d ever seen of my dog, would you still feel certain these were both of the same dog?

Let’s compare a couple more:

Notice how in the image on the left, we have a cute snapshot of a dog rolling in the grass.  The camera is held almost parallel to the dog, leaving us no sense of the height of his body relative to the ground (except perhaps because of the stray foot that snuck into the shot).  But look at the leash that starts at the lower left corner and creates a line down to the dog.  It looks like it could be 10 feet long!  (It’s only 4 ft.)

Now look at the length of my dog’s front legs.  The are folded and parallel to the camera.  Compare that to the front leg in the photo on the right.  Notice how the leg now forms a similar angle to the lens that draws the eye back to the dog.  But this time, it’s his leg that looks exceptionally long.

Next, let’s look at wide angle perspectives that create a sense of size.

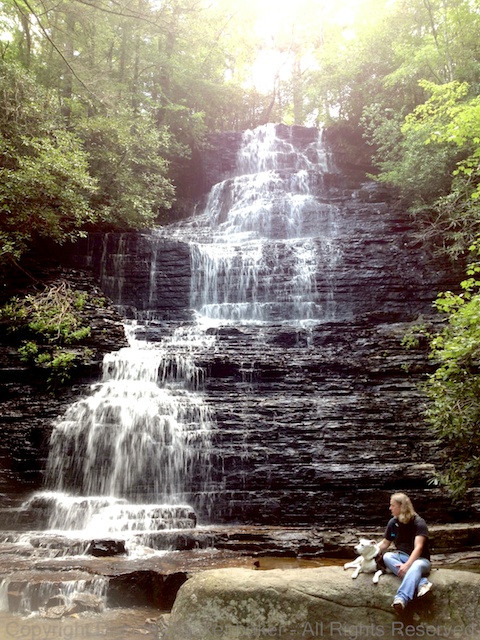
In the photo on the left, you could argue that the dog (and man) look really small, or, if you imagine the dog and man to be average sized, you might see this more as the waterfall looking really big.  On the right, we have an example shot tighter, but again, it’s wide, the camera is further back, and it’s shot from a standing position angled downward.  This creates the impression that the bench, man, and dog are all a little shorter than they really are.

Finally, here’s a perspective that creates a little bit of an optical illusion:

Both images were shot from the floor looking up at my dog hanging over the edge of a sofa.  In the photo on the left, the back legs are not visually connected to the front end of the dog.  They visually look like either there is a second dog in the photo or the visible dog was cut in half with his back legs moved to the side.  I can assure you that no animals were harmed in any way in the making of this post.

In the photo on the right, I got up tight to my dog’s back paws and created more of a silhouette effect.  By changing the perspective so that I am both closer and looking up, the paws look huge!  Notice that the one on the right looks significantly bigger than the one on the left.  This is because it was closer to the camera and it’s turned at a slightly different angle that makes the full breadth of the pad visible, but angled to the camera.

Your Assignment:  Experiment with the visual effects you can create by changing where you’re angle to the subject.  Move up, move down, move all around.  Try shooting from above and shooting from down low.  Try head on, too.  None of these angels are right or wrong; they just create a different perspective that affects the way the eye perceives the shape of the subject.  Bonus Tip:  want to look taller and thinner?  Have the iPhotographer get down low and shoot at an upward angle.

Lesson 94: Choices, Choices

Let’s say you happen to be walking along a scenic riverfront at sunset.  There are interesting architectural features on the South side of the river and the sun, not having recently changed it’s course, is setting off to the West.  There are just enough clouds along the horizon to make for a decent sunset, but the sky above the horizon is clear, without much interesting going on.

You think, “Oh, what a nice sunset reflecting on the river,” and you pull out your iPhone.  But you quickly discover that taking a picture of the sunset doesn’t include the interesting buildings and taking a picture of the buildings misses the best part of the sunset.  To boot, the buildings are too dark.  What do you do?

Well, this is the joy of photography:  sometimes you have to choose.  You can’t always get what you want . . . so what do you need?

And that is the other joy of photography–you get to decide.

I’ve shared 6 of the images I took in the gallery above, each with the scene framed differently.  Below, I’ve taken these 6 images and pointed out the things that bug me about them.  There are many.  However, I think it’s useful to learn what other people look at and what bugs them in photographs when you’re trying to figure out what makes one photograph more appealing than another.  Remember, there are no rules, but part of photography is learning to see things differently.  Sometimes that includes your own photos.


Your Assignment:  Take a look at the comments I’ve made on my photos below.  I’ve color-coded them for things I think are positives (green), things that are less-than-ideal but tolerable (yellow), and things that are a deal-breaker for me (red).

20131219 Choices Choices.001

20131219 Choices Choices.002

Do you agree with my assessment?  Do you see other things that bother you (there are many more things that bother me than I included in the comments)?  Do you like things I don’t?  Did you notice the things I pointed out before you read my comments?

Why do you think two people look at the same photo and see it differently?