
Yesterday we addressed how you can use Camera Awesome to set the exposure and focus separately in your iPhone. The advantage is being able to get a better overall exposure while still keeping the photo sharp where you want it.
Today, we’re going to learn another technique for getting the exposure you want that’s particularly useful when photographing a landscape scene like yesterday’s where there is a bright sky over a dark landscape.
We’re also going to download a second app called Pro HDR. Good news for non-iPhone users–it’s also available for Android! The bad news for all is that it’s not a free app. It costs $1.99, so you’ll have to decide if you want to spend the money to experiment with it for today’s lesson or not. If not, you can try with the iPhone’s default camera app, which has an HDR setting in the Options menu. I do not use this setting because I haven’t found it to work well for me, but perhaps you will have better luck.
At the risk of getting too technical, HDR stands for High Dynamic Range. It is not related to High Definition technology. What the Pro HDR app does is take one photo exposed for the darkest areas of the scene and a second photo for the lightest areas. Then it automatically combines the two into one image, choosing the best exposure for the different areas in the photo from the two photos and sprinkling in a little magic to make the photo look really good.
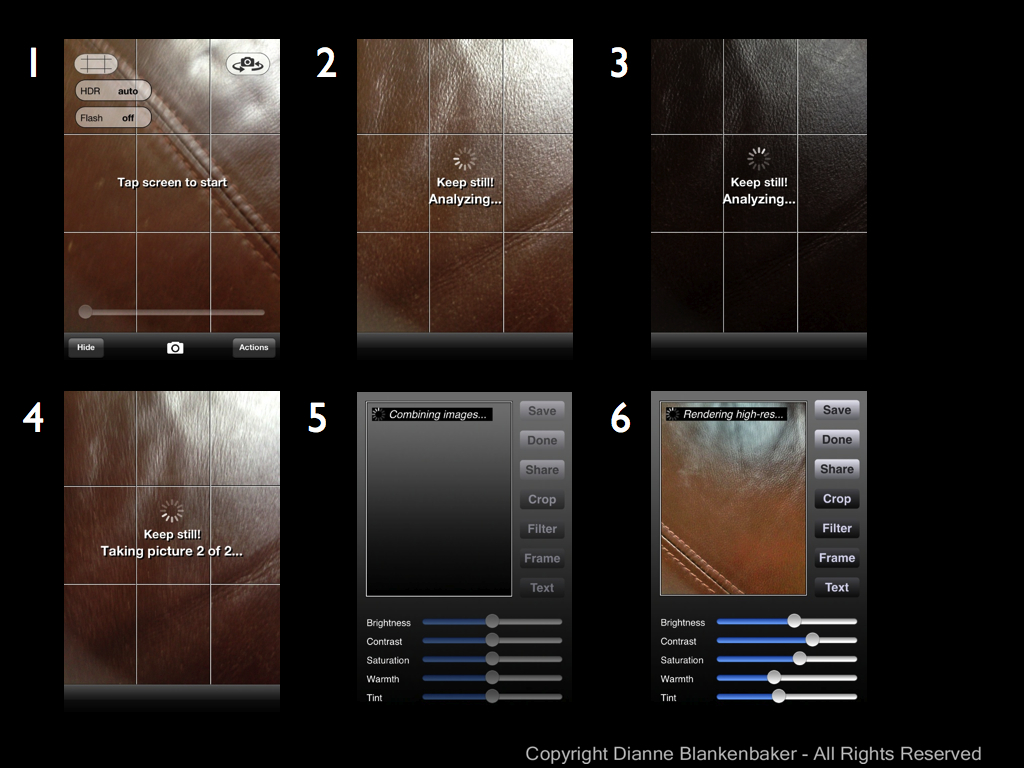
Because it’s all automated, it’s very easy to use and doesn’t require knowing anything about how HDR works. The only thing it requires is that you hold the phone very stable while it does some analysis and then takes the two photos–this can take a while, so make sure you’re using good form holding the phone and in a position you can maintain.
To start the process, you launch the app, frame the scene the way you want and then tap the screen (you can also push the volume up button, but the volume will annoyingly pop–it does still work) to start the process. Then, you just hold still and watch it do its magic (click to enlarge):
When I used this app while at Snooper’s Rock yesterday, these are the two photos it took and the combined image that resulted (click to enlarge):

You’ll notice that the combined image has much better exposure for the sky than in the first image and a much better exposure of the trees in than in the second. It works very nicely for these types of subjects.
Where this technology doesn’t work so well is when you have people walking in and out of your scene or if your subject is in motion. Check out this example of my dog’s best bud (and my dog’s tail end):
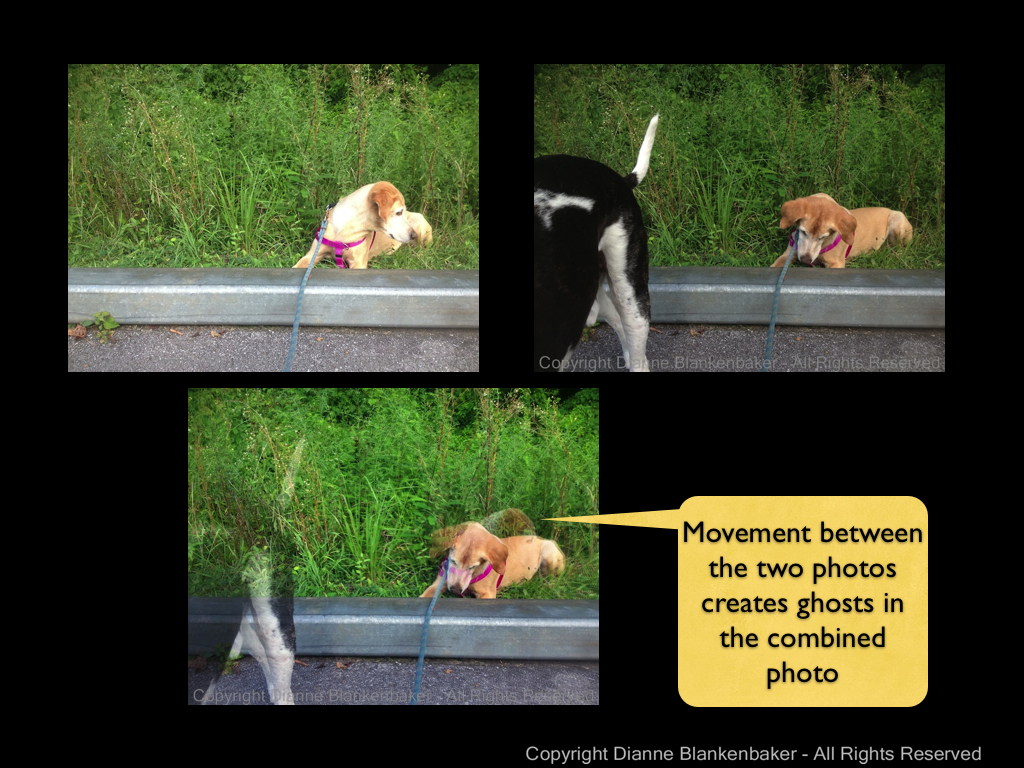
This is always disappointing to me as my black-and-white dog would be much easier to expose using Pro HDR. However, even though he stood very still in the next image, the motion of his panting was enough to cause his throat to get blurry in the combined image:

You’re assignment: Download Pro HDR (or turn the HDR option on in the iPhone default app). Choose a scene with both very bright and very dark areas. Now take a picture with the default app, with the Camera Awesome app using the methods we explored yesterday and the day before, and, finally, using Pro HDR. Compare the images. Do you feel like you got your $1.99 worth from the Pro HDR app?
Here’s my example comparing the results from the 3 apps:

Bonus Assignment: See if you can create some really cool ghost images using Pro HDR. Sometimes this can be a really fun effect.

15 thoughts on “Lesson 9: Combining Two Exposures into One Photo”