Lesson 93: Old Places, New Dressing

Now that winter is upon us (well, some of us more than others) in the northern hemisphere, even the tired old subjects we see everyday take on a whole new look.  One of the fascinating things about photography is that everyday is a new day.  Every minute is changing light.  You can always find a new way to see the same thing you looked at last season, last night, the last minute.  This change is particularly dramatic as the seasons change.

So, in today’s lesson, I invite you to revisit a common, convenient location like your own yard.  Put on an extra layer or two if it’s especially cold in your neck of the woods, but by all means, get outside.  Even if you don’t have snow where you live.

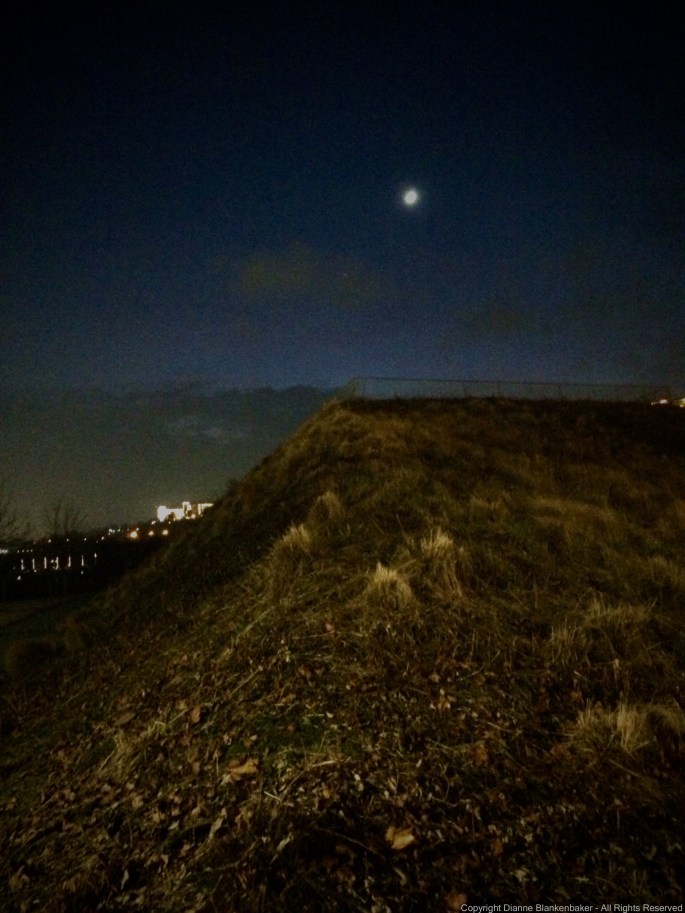
Go out early–when the temperatures drop to freezing overnight and you get out before the sun has had a chance to warm things back up, frost can be a spectacular subject.

In fact, even when the frost isn’t that dramatic, like in these images, it still creates a different look by brightening what can otherwise be dull looking plants when there’s no frost.

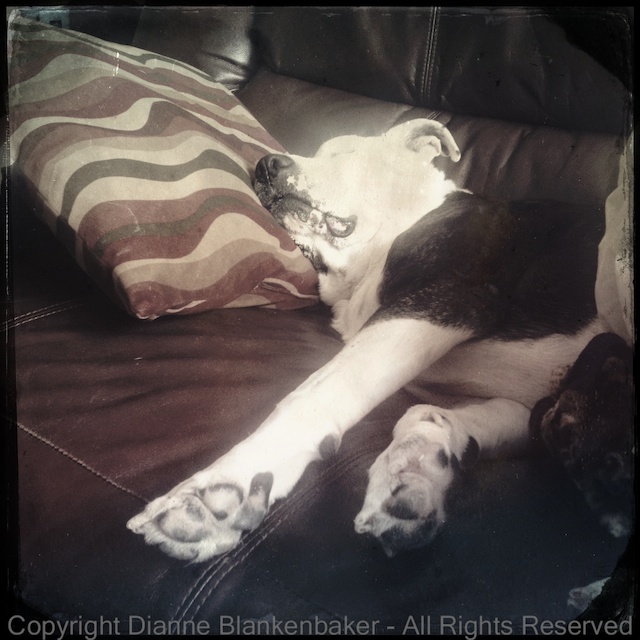
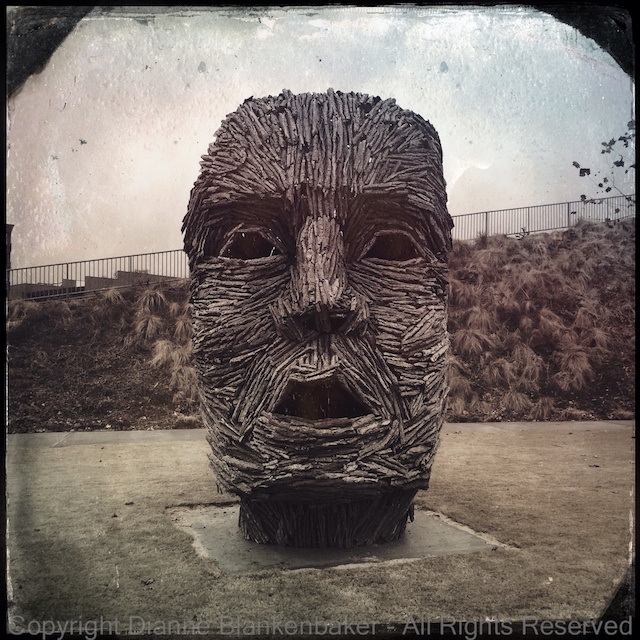
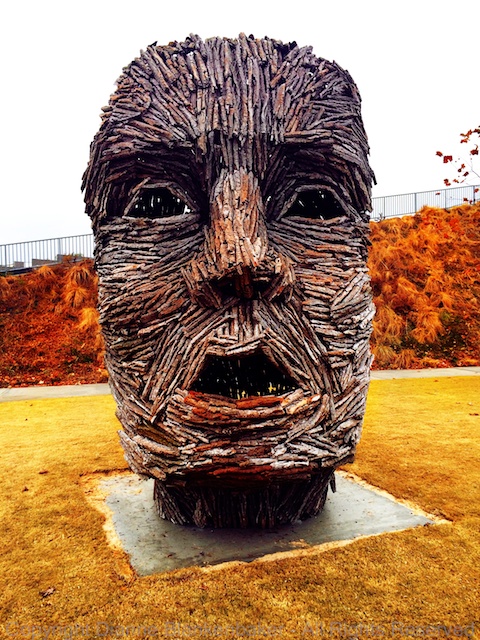
On the particular morning I pulled out my iPhone to capture some frosty spots in my neighborhood park, the sun was low, shadows were long, and colors were drab.  After taking a few images with the Apple camera app, I decided to use the Hipstamatic app with the D-Type film for the tintype effect.

I like how the frost-covered plants look in the tintype effect–they jump out more with their frosty coating.  The Apple Camera app works, too.

 Your Assignment:  Pick a place that might feel a little tired as a photographic subject.  Your yard might be one such place.  A place you walk regularly might be another.  Make sure your iPhone is fully charged and then head out at sunrise (which isn’t so early these days) to look anew at what you’ve seen a hundred times before.  Look at the shadows and light.  Look for frost bouncing back the rising sun.  Look for new angles and new ways of seeing the same old thing.  Try the Apple Camera app.  Try the Hipstamtic app.  See if you can make something old look brand new.

Lesson 92: Heavenly Bodies


Every once in a while, I take my dog out after dark (which happens a lot more often this time of year), look up, and am inspired to take some photos.  To be honest, the amount of noise in the iPhone night photos continues to frustrate me, even with the iPhone 5S.

But, recently, I was teaching a workshop and I asked if anyone had seen a creative use of noise (all the grainy speckles) in photography and a couple of folks commented that it could be used to create an antique effect.  I’m not sure I’ll ever get to where I make noise a goal, but it does open up some possibilities.

So, tonight, I looked up and saw Venus chasing the moon.  I immediately pulled out my iPhone and gave it a shot.  The images in the gallery were edited using the free, iOS version of iPhoto on my iPhone (see Lessons 84, 85, 86, and 87).  As you can see, they are noisy, but Venus and the moon are worth some noise.

Although the crescent moon turns into a blob, I’m pleased that Venus shows up in most of the images.

Your Assignment:  Don’t be afraid to go for broke on night images just because you’re using an iPhone.  Don’t let any Nokia Lumia-owning friends intimidate you!  However, as you may recall from Lesson 3, zooming on the iPhone is a digital zoom, which will make the noise factor that much bigger.  Instead of trying to zoom in to get a close-up of heavenly bodies at night, try artistically placing landscape features in the scene, giving the sky some perspective.

Lesson 91: Use a Tripod

Long ago, in Lessons 25 and 34, we talked about holding your iPhone to maximize stability and even using a tripod, particularly for using a telephoto attachment lens with your iPhone.  Well, if ever there was a time to use a tripod with your iPhone, it’s with the Slow Shutter app.

Because I was on a shoot with my DSLR on a tripod, I was able to capture some cool light trails to share with you in the gallery.  However, I was without the tripod for my iPhone, so the best I could do was to prop the phone up on a rock wall and try to hold it still, resulting in this:

15 second exposure while trying to balance the iPhone on a rock

Let’s talk about what happens when you use a slow shutter.  “Slow” means the shutter will stay open for a long time (relatively speaking) before it closes again.  When we use a “fast” shutter, the shutter only stays open a fraction of a second.  The shorter the duration the shutter remains open, the less the subject can move in that fraction of time, so the less blur you will get.

When the shutter stays open for a very long time, like in these images (shot with 15 and 30 second shutter speeds), as the subject moves, the shutter is still open, so it records the moving image.  If you’re moving around, you get a complete mess.  Or, you can get some fun art if you’re particularly talented at moving your phone around.

I mentioned in lesson 90 that you can use Slow Shutter to get light trails, such as cars driving by at night.  Since I don’t have examples of that yet, thought I would go ahead and share the light trails from a lighted boat parade even though they were taken with my DSLR.  Don’t worry–I will eventually get light trails with the Slow Shutter app!

Your Assignment:  Find a location where you have a clear view of a street where cars drive by on a regular basis.  Go after dark–this is a great time of year for this assignment in the Northern hemisphere with the early sunset.

Either use an actual iPhone tripod or come up with a way to prop your iPhone so it will not move.  You need to be able to completely let go of the phone or your movement will jiggle it.  Set your exposure time for about 15 seconds–this depends on how much traffic is going by.  You can do 30 seconds if you have a long line of cars that keep passing or fewer seconds if all lights pass through the frame in less than 15 seconds.

Are you able to get a nice, sharp light trail from the headlights and tail lights of the cars?


Lesson 90: Slow Shutter

In Lesson 83, I showed you how to look at the shutter speed used when you took a photo by looking at the metadata in iPhoto iOS.  But, we didn’t have any choice about what shutter speed was used; it was picked by the camera app we used.  Today, I want to introduce you to an app that allows you to choose slow shutter speeds for fun effects.  It’s called SlowShutter and it’s available in the app store for $.99.

Using a slow shutter speed allows you to create interesting effects like light trails when cars drive by or to pan with a subject in motion, allowing the background to blur behind your subject.  For today’s example, I thought I’d start with something fun–drawing with a light source.

To do this, you need a light of some kind in darkness.  I have two examples.  For one, I found a healthy use for a lit cigarette–use it as your light source for a light trail.  For the other, I used a small light for a bicycle and handheld it.  In both cases, I set the SlowShutter app to a shutter speed of 8 seconds and then drew a heart shape in front of the camera.  I propped the camera on a steady base for both images, although a tripod would have been better–my hearts are a little shaky!

Because the light source is so much brighter than the rest of the scene, it registers in the image while the rest of the scene remains dark.  To change the shutter speed setting, tap the lens icon in the lower left corner of the SlowShutter app and then select the shutter speed you want.  I started with the “light trails” category to get to the 8 second shutter speed.

photo

Your Assignment:  Try downloading the SlowShutter app and then using a flashlight or other light source to see if you can capture words drawn with light.  Hint:  you’ll need a second person to draw the words or operation the camera so you can get enough distance between you and the light source to fit a word in the frame.

Lesson 89: Retromatic Wallpaper

Moving along to something just a bit too funky for me, but fun none-the-less.  Today, we’re going to take a look at the Retromatic app.  This app is designed to help you create really funky, retro creations.  They aren’t really photos anymore when you’re done, but they could make for fun cards, flyers, etc.

I decided to take an image I thought was cute but maybe not really a wall-hanger and see if I could make it wall-worthy by turning it into some silly wallpaper.  I can’t quite visualize what wall I would ever put this on, but I certainly had a good time playing with the capabilities of the Retromatic app.

The one challenge is highlighting just the parts of my subjects with my finger–this was especially tricky on my dog’s legs.  A stylus would probably make this much more accurate.


Your Assignment:  Try following these steps (an improvising) to create your own funky wallpaper:

Lesson 88: Hip Heads

In yesterday’s lesson, I took a rather mundane photo of the recent sculpture addition in my local park, a giant head.  I did several edits on it and showed you what I did.  Now, for those of you who are not particularly excited by the prospect of following 17 steps to make your image more interesting, don’t forget about Hipstamatic.  This gives you the ability to create many effects in a point-and-shoot way.

We first looked at the Hipstamatic app back in Lesson 13 and again in Lessons 14, 24, 29, and 30.  The thing about Hipstamatic is that you choose the “film” and “lens” you want to use, which is the same as picking a collection of editing effects and the camera does all the work for you.

In the 3 examples shown here, I used the same lens:  Helga Viking and 3 different films.  The first is the Ina’s 1935 film.  It gives the image more color and makes the sculpture pop out more.  The second example used D-Type Plate film, which simulates an old black-and-white Tintype photo.  Finally, in the 3rd example I used the C-Type Plate film, which intensifies the contrasts and shadows and also adds a touch of color.

Your Assignment:  Dust the cobwebs off of Hipstamatic and choose a lens/film you want to use.  Take an image of your favorite subject and then try changing to a different film.  Experiment with the film that creates an effect that works best with your subject.

Lesson 87: Adding Drama in iPhoto iOS

This will be the last iPhoto iOS lesson for a bit.  But, I wanted to show some editing on a “regular” photo rather than using the Paper Camera images I edited in Lessons 85 and 86.

This sculpture recently appeared in a park in my neighborhood.  It’s a pretty dramatic sculpture all on its own, but somehow the drama doesn’t quite translate in the photo taken in the Apple Camera app.  Perhaps because this was taken on an overcast day with very even lighting–as you may recall from Lesson 16, lighting makes all the difference.

In any case, I used iPhoto to bring back the drama and maybe even add a little extra.  Here’s what I did:

Your Assignment:

Choose an image that is lackluster.  Yesterday we played with the Exposure settings.  That’s a good way to add drama as a starting place.  Now try using the saturate brush and “Drama” effect in iPhoto to see if you can create an image that really “pops.”

Lesson 86: My Silly Dog and the iPhoto Exposure Tool

If yesterday’s abstract example hurt your eyes, today’s lesson should at least make you smile.  Well, if you’re a dog lover, anyway.

There is just something fun about the way the Paper Camera app’s Con Tours effect renders my dog.  I think it’s that it outlines his spots and turns his nose into a giant white circle that amuses me so much.  Hopefully you find it amusing, too.

In any case, just as in yesterday’s lesson, I started with a Paper Camera Con Tours image (see Lesson 77 for instructions on Paper Camera) and opened it in the iOS 7 version of iPhoto to see if I could make it a little more exciting.

The Paper Camera version is fun, but it isn’t quite contrasty enough for me.

Here are the steps I used to make my dog stand out better:

Your Assignment:  Use the iPhoto exposure adjustment on one of your photos that maybe looks a little dull or hazy.  Notice that the slider is split into 5 parts.  You can slide the black square at the far left to the right to brighten the whole image.  You can slide the white square right to turn down the brightness.  You can move the 3 markers in the middle to adjust the mid-tones.

This works better in a color image where there is more diversity in the range of tones than in my black and white example.  It’s worth experimenting with this because it makes a big difference in the appearance of your photo.  It also can turn into something pretty awful if you go too far with it–have a little fun!  🙂

Lesson 85: iPhoto Con Tours

Back in Lesson 77, we downloaded Paper Camera and did a bunch of fun stuff with it over several lessons.  Today we’re going to take a Paper Camera image using the Con Tours option and then do some editing with it in iPhoto to see what we can do.

Since I was out hiking with my dog, I took one photo of him and one photo of some trees using Paper Camera Con Tours.  Refer to Lesson 77 for instructions on how to take a photo with Paper Camera and to see an example of Con Tours.

After I saved my two photos to my Camera Roll from within Paper Camera, I opened up iPhoto and did some editing.

Here are the steps I used for the image of the trees (we’ll take a look at my dog in tomorrow’s lesson):

Your Assignment:  Try combining apps like Paper Camera and iPhoto and see what you can do.

Lesson 84: iPhoto Mobile Editing

Yesterday, I introduced you to metadata in the mobile version of iPhoto, a free app from Apple.  Today, I thought I’d show you a combination of using one of the brush editing tools and a filter to take my photo from not very interesting to a more retro look.  I particularly like how the light showing through the leaves in the foreground (left side) looks with the black-and-white effect.


Your Assignment:  Download iPhoto if you haven’t already.  Then open it up and select the photo you want to work on.  Here are the steps I followed for my edit: