


One of the challenges with the iPhone is trying to capture photos of wildlife where you can actually see the wildlife in question. In yesterday’s lesson, we looked at using the photojojo telephoto lens to get 8 to 12x magnification optically. You might think this is a really great answer for wildlife.
Using the telephoto attachment for wildlife shooting introduces several additional challenges. First, it’s hard to hold the phone steady enough to get a photo of a wild animal with the telephoto lens attached. Any shake is magnified proportionally to the magnification of the lens. Second, you have to focus manually, which can be very tricky if you’re trying to follow a moving animal. And third, if you don’t have the attachment already on the phone, there’s a good chance the wildlife will have left by the time you get it attached.
I am continuing to experiment and research what other people are doing for wildlife, but so far, I’ve found two patterns: they are shooting subjects they can get up close to without the subject moving. Or, the subject is really big. Like buffalo and moose big.
This morning, I managed to sneak up on a Great Blue Heron who was hanging out by the side of a bike path that runs along the Tennessee River. The secret to sneaking up on a heron is to start by getting as close as possible on your bike.
For heron who hang out by bike paths, they are so used to bikes going by that they assume you’re not a threat when you’re on one. Once you’re off your bike, don’t look at the heron. Get your iPhone unlocked and the app of your choice ready to go. Walk sideways or backwards towards the heron, turning just enough to get the framing you want and snap. Walk closer and snap again. Keep this up until the heron starts to look nervous. Then, back away. By the way, heron are known for stabbing at people’s eyes with their incredibly sharp beaks when threatened, so keep your eyes well out of reach!
The heron I approached this morning was pretty patient. I managed to try two different films in Hipstamatic with the same lens (Tinto 1884) we used in lesson 24 as well as the Camera Awesome app. By the time he started looking nervous, I was within 10 feet (and wishing I had eye protection).
I chose the Tinto 1884 lens because I wanted the blurred effect that helps isolate the subject. I started with the D-type tintype film because I like the look with the bridge in the background. However, because you can’t select the focus point with that film, the heron came out blurry unless I nearly centered the heron, which just didn’t create a pleasing composition:
By switching to the Ina’s 1969 film, I was able to select the focus and get a better composition. To select the focus in Hipstamatic, place your finger on the screen where you want to focus and hold it there for a second. If you look closely, you’ll see a motion in the viewfinder that simulates the turning of a lens to focus. Don’t tap–if you tap, it takes a picture.
Compare the photo on the left, taken with the D-type film that doesn’t allow for focus selection, to the photo on the right, where I was able to select the focus:


As you can see, while the D-type film may create an interesting effect for the scene, the mis-placed focus makes it less pleasing over all than the version using Ina’s 1969 film with the heron in focus.
Finally, here’s the photo I took with the Camera Awesome app (no editing):
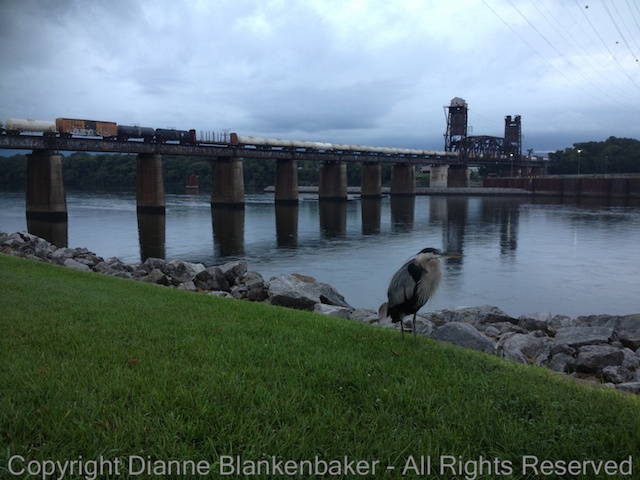
Not bad for an iPhone in low light!
Your Assignment: Go to a local park that has a body of water. There are bound to be frogs, water birds, turtles, and spiders. Water birds are far easier than song birds, by the way. They are usually much larger and they like to sit still for endless periods of time because they’re used to watching for fish.
Try sneaking up on one, taking photos as you work your way closer. How close do you have to get for the photo to work? How big was your subject? If you spot any turtles, these are great subjects as well–they move slowly if at all. Spiders can also make great subjects, but we’ll be talking more about those in a later lesson when we use the photojojo macro attachment mentioned in yesterday’s assignment. You might also try getting photos with your telephoto attachment if you bought one. Were you able to get interesting photos with visible wildlife? Since the iPhone lens is wide angle, you’ll want to apply everything you’ve learned about inclusion and exclusion to make your photo as interesting as possible. Did you get anything really good?
