
Back in lesson 2, we talked about the rule of thirds. I showed you how to turn on the rule of thirds grid in your iPhone and gave some examples of how images can be improved by applying this rule. Today, we’re going to talk about another rule, the rule of symmetry.
The rule of symmetry can be stated as: if what you’re shooting looks symmetrical, don’t mess with that. Often, subjects like architectural structures, moons, subjects with reflections in water, and anything round look better when they are more or less centered in the frame. Sometimes, people do things that make great symmetrical photos as well.
I pulled out a few examples from photos I’ve shot in the past. I added an example that used a DSLR just to make the point.
In this example, I lined up the moon right on the center vertical line of the image and allowed the shapes of the bridge to create a nearly symmetrical image. It bugs me that the bridge elements are not identical on either side, but that’s because each section of the bridge is progressively larger. To make it symmetrical, I’d have to shoot at an angle (which might be worth trying). Click on the image to enlarge.

In the next example, this is a pretty classic way of doing symmetry. I was on a business trip and took a quick photo of a road leading to an arched entrance to a large courtyard in Madrid. This is an iPhone photo taken at the peak of the afternoon sun, creating some very bright areas in the photo, but it is nearly symmetrical.

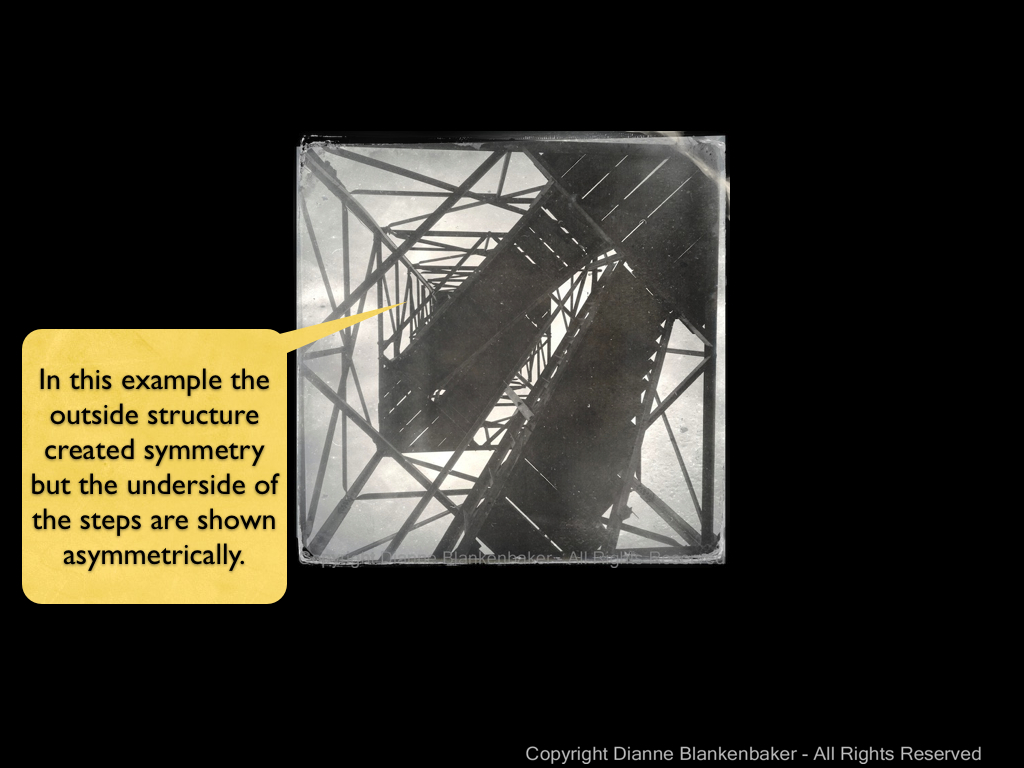
The next example shows a photo taken by laying back on some steps that lead up a fire tower in a park. The outside frame of the structure is quite symmetrical, but the stairs add a slightly off-balancing element.
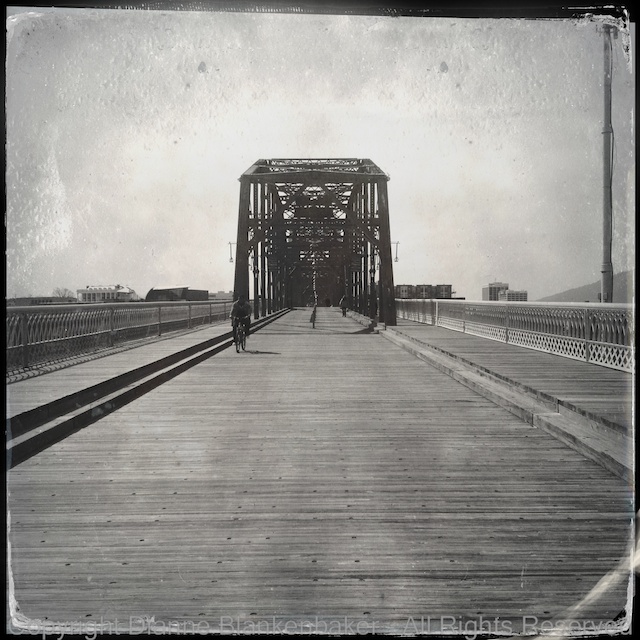
Finally, in this image, I unconsciously applied a slightly revised rule of thirds and the rule of symmetry. The bridge is at about the top grid line for the rule of thirds, but the entire subject is centered on the vertical center of the photo. This helps capture the uphill climb to the bridge as well as draws the eye more effectively to the bridge itself.

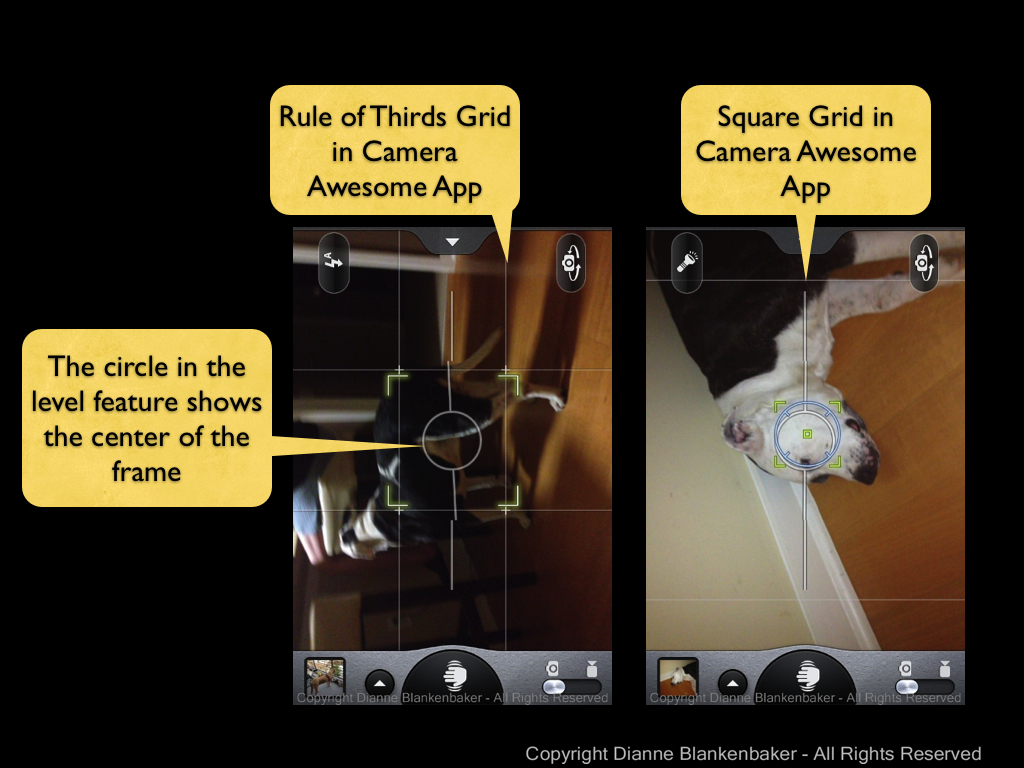
To frame a shot symmetrically, I just leave the rule of thirds grid on. However, if you’re using the Camera Awesome app, you can also choose a square grid, which can be helpful if you’re planning to crop the image to a square later or if it just helps you predict whether you’re image will be symmetrical or not. To select the guidelines you want to display, just tap the tab at the top of the screen. A “drawer” of options slides out and you can choose what you want to use. We’ll stick the rule of thirds and square options right now.

If you also took lesson 7, you probably have your level turned on in the Camera Awesome app. The center circle for the level also indicates the center of your frame, which is another way to determine symmetry.
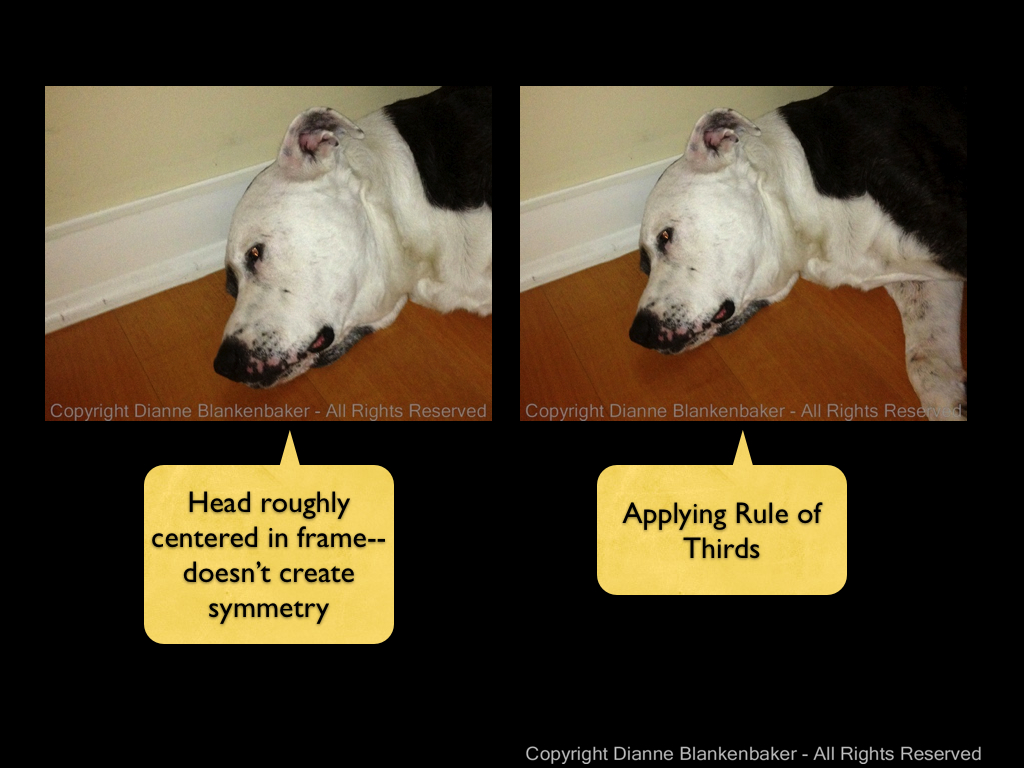
Now, I just want to show one example of what happens when you try to treat a non-symmetrical subject like it’s symmetrical. My dog is not symmetrical (at least not a this angle). When I try to create symmetry with his head by taking a picture with his head in the middle, I don’t actually get any symmetry in the image at all. From this angle, he’s all rule of thirds.
I wanted to show how my dog can look symmetrical if photographered from head on, but my dog wasn’t particularly enthusiastic about modeling for me tonight.
Your Assignment: Look for symmetry around you. Taking a photograph up a flight of steps, head on to a person or pet, straight at a doorway, or centered on a round flower will all create symmetry. Try different subjects that have their own symmetry to them and see which ones you particularly like shot symmetrically. Try combining symmetry with the rule of thirds and see what you get. What kinds of subjects did you come up with that work well symmetrically?
