Lesson 56: The Rule of Opportunity

OK, I made this one up.  But, as someone who has missed many, many moments when I saw a great photo op, I think it’s worth talking about.  The rule of opportunity is:  Get the shot!  (within reason–I do no advocate harming others, wildlife, natural habitat, property, your iPhone, or yourself.)

I am personally haunted by many missed moments.  One of the realities of photography you must accept is that each moment is its own.  It doesn’t happen twice.  If you think you’ve recreated the same moment, you probably aren’t paying attention to details.

There’s an old adage of photography that “the best camera is the one you have with you,” which is a paraphrase of the original quote from Barry Staver, a Pulitzer Prize winning photographer.

That is the power of the iPhone–you have it with you.  But having your iPhone with you is only the first step in getting those moments that happen unplanned.  As someone who has a long, complicated password on my iPhone, I have frequently missed shots trying to unlock my phone so I could get to the app I wanted.

The first strategy for making sure you can capture moments is to know ahead of time what to do.  If you, like me, cannot unlock your iPhone in fewer than 3 attempts, repeat this mantra:  “ The default app is the best choice when an opportunity presents itself.”  I say this because it’s the only camera app that can be launched while the phone is locked (which is something I would love Apple to fix).

With the advent of iOS7, if you upgraded this week like I did, this is a good time to re-familiarize yourself with the Apple camera app.  It looks quite different!

I suggest turning off the HDR setting if it’s on so that, if you’re in a hurry, you will be ready to shoot.  The point is to know how you are going to capture a moment that presents itself before it disappears.

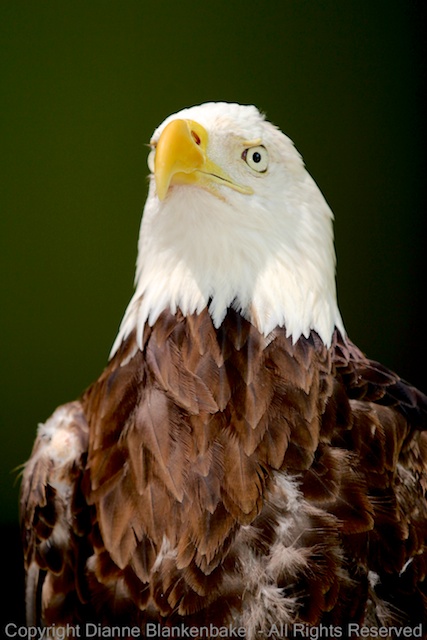
Here are some moments that I barely caught (all of which I can list a bunch of things I wish were better about them) because I had a camera ready:

Sometimes a moment presents itself that lasts longer than a moment.  For example, dogs present endless passing moments (many which I’ve missed), but they also do cute stuff when they’re relaxing.  Here are some examples of dog silliness:

One of the important lessons of being a better photographer is to think like a professional photographer.  Recognizing an opportunity to grab a shot is an important step.  Ironically, if you don’t recognize the opportunity, you will never kick yourself for having missed it.  But once you start looking at the world as a series of photo ops, you’ll want to be a quick-draw with your phone so you don’t miss them.

Your Assignment:  Practice swiping upward on the camera icon on your iPhone lock screen to open your camera app.  This may seem silly, but the way you access it changed a few updates ago from tapping the icon to swiping it upward, so you’ll want to make sure you have the feel of it.  Take a few photos with the default app.

Remember that you can only set focus and exposure together in this app (unlike Camera Awesome, which we’ve been using for many lessons).  Remind yourself that you’re going to have to make more compromises between the focus you want and the exposure you want if you need to capture a moment quickly and don’t have time to unlock your phone.

Experiment with choosing different focus/exposure points to get a sense of how much you can keep in focus and how much you can have exposed correctly using this app.  The only thing more depressing than not getting a photo at all is getting one that fails to capture the subject–something in human nature prevents us from deleting that one bad photo of that one incredible moment and leaves us to torture ourselves with our failure every time we see it.

Lesson 55: The Rule of Leading Lines

This is a “rule” of photography that we haven’t really talked much about.  When you’re composing your photo (meaning deciding what angle to shoot from, what to include in the frame, how close to get, etc.) one of the considerations should be whether there are leading lines in the subject or scene you’re shooting.

Leading lines refer to lines (they don’t have to be straight) that lead the eye into or through the photo, usually helping to draw the eye to a point of interest or main subject.  I sometimes end up with just lines because I find the 3-dimensional aspect they add to photos interesting.

For examples of leading lines, I could just refer back to yesterday’s lesson on symmetry–many of those examples work because of the leading lines combined with the symmetrical framing.  However, let’s look at some new examples.  First, here’s are a comparison to make this concept obvious :

The photo on the left captures the Tennessee Aquarium across the river.  While the piece of foreground tree branches in the lower right (which are otherwise more of a distraction than a help) and the shadows on the river in front of the aquarium help create some sense of three dimensions, it’s what one might call a “flat” photo.

In comparison, the photo on the right creates a strong line that the eye follows down the gray curb and path to discover the Tennessee Aquarium at the end.  While, if you goal is to show off the Tennessee Aquarium, this perspective might be a bit far away to really achieve that, the strong lines drawing the eye create a different a much “deeper” photo than the previous one and provide an interesting option, at least.

I mentioned the shadows in the previous comparison.  Shadows can create interesting leading lines that add to photos like in the following examples:

Similarly, light can work the same way.  While the light in the following example doesn’t exactly for a “line” per se, the reflection on the water creates a visual path through the image that draws the eye in from the front and then up to the moon above.  To demonstrate this, I removed the reflections on the water from the photo.  Notice the difference on how your eye moves over the photo and the sense of depth in the two versions:

Here are some more examples of photos with leading lines (not all are iPhone photos, as noted in captions).  Notice the variety of ways to create leading lines, including dogs’ legs:

Your Assignment:  If you’re sitting on the couch reading this and your iPhone is in reach, try taking a photo of something at the end of your couch by positing yourself/phone so that your using the back of the couch to form a leading line to your subject.  Or if you have a wood floor, how about getting down close and using the lines formed in the floor boards?  Maybe walk outside and use the sidewalk, street, gutter of your roof.  Leading lines are everywhere.  Sometimes you just have to move around a bit to find them.  Do you like this look?  Can you see how it can help make some photos have more depth and interest?

Lesson 52: The Rule of Thirds Revisited

We talked about the Rule of Thirds very early on in Lesson 2.  In that lesson, we talked about framing a dog or a person and placing the intersection of the rule of thirds grid on the subject’s eye.  However, there are lots of ways to apply the rule of thirds.

Today, let’s talk about landscape scenes.  Landscapes are usually divided between sky and ground or sky and water.  To apply the rule of thirds to big sweeping scenes, you can make a simple choice:  is the scene more about the sky or the stuff below it?

If it’s about the sky, make two-thirds of the frame sky.  If it’s about what’s below it, make the sky one-third of the frame.

Here is an example of a landscape photo where I split the sky and sea about down the middle of the frame. I did this on purpose.  I wanted both rocks, the bird, and the water washing back to sea over the sand.  There was no way to apply the rule of thirds and get all of these elements into the frame the way I wanted them.  I happen to like this photo (sorry, it’s not an iPhone photo, but it makes the point).  I’ve also included two cropped versions that put the line between the sea and sky at the lower ⅓ of the frame.  In this case, I prefer to break the rule of thirds.

On the same beach, I took the following shot of a bunch of seagulls rising off the beach.  I was pretty far away when this happened, but I liked the breadth of the flock of seagulls (for all you old enough to remember, no, I’m not referring to the band).  I also like the expanse of beach underneath them with an almost equal expanse of sky.  However, I thought we should try this with the rule of thirds applied, so I cropped with ⅔ of the frame beach and another with ⅔ of the frame sky.  I think the one with ⅔ of the frame sky works rather nicely with the gulls taking off.

The next example splits the sky and land about ½ way.  This one is an iPhone photo, by the way.  I’ve cropped the photo to show ⅔ sky and again to show ⅔ land.  I prefer the one with ⅔ land in this case.  The sky is not particularly interesting or well exposed.  The land is a bit dark, but the bridge in the foreground adds more interest to my eye than the sky in the previous version.

My final example, another iPhone photo, is one where the rule of thirds was perhaps over-applied in the original photo.  The foreground rock starts at the ⅓ point on the left.  The mountains in the middle of the frame end at the ⅔ point on the right.  It’s almost too stripe-y.  I cropped this one very slightly to put the mountains at the ⅔ point on the left side of the frame.  To me, the first version confuses my eye as to which element the photo is supposed to be about.  The second version makes it obvious to me that the photo is about the river valley and surrounding mountains.  I would prefer if the barge were further in the frame, but somethings can’t be fixed.

Your Assignment:  Take a look at any landscape photos you’ve taken with a strong horizontal line.  Is that line at ⅓ or ⅔ of the frame?  If not, try cropping the photo just to see if you like it better (Snapseed provides a nice cropping tool–see Lesson 41).  Sometimes you will.  Sometimes you won’t.  Just remember that the rule of thirds can help you emphasize the part of the scene that you most want to draw the eye to.

Lesson 51: The Rule of Focus

In yesterday’s lesson, we talked about holding still.  The reason holding still is important is because of the Rule of Focus.  The Rule of Focus was once stated to me by a photography instructor as:  “If at least one thing isn’t sharp, your image will fail.”

If you’ve been following along since the beginning, you may recall that in Lesson 4, I talked about a photograph where nothing was sharp, yet it is considered by many to be among the most iconic rock and roll photos ever taken.  So, just like all other “rules,” this too can be broken.

That said, most of the time, it’s true that blurry photos don’t work.  In fact, getting sharp pictures is what drives many photographers to spend thousands of dollars on expensive lenses to get the sharpest image possible.

There are multiple parts to achieving focus.  We talked about motion blur caused by a moving camera in yesterday’s lesson.  We also talked about motion blur caused by a moving subject in Lessons 31 and 32.  Today, we’re going to talk about Depth of Field.  Now, I alluded to depth of field in Lesson 30 when we explored using a Hipstamatic lens that puts only a small portion of the photo in focus.  We also talked about depth of field in Lesson 41 when we talked about putting a human subject far from the background to increase background blur.

Today, let’s talk about some of the benefits of depth of field we get automatically when we shoot with an iPhone.  The easiest way to think of depth of field is to think of the scene you’re shooting.  The scene is 3 dimensional even though your photo has only 2 dimensions.  If you were to lay a ruler on the ground from the front of what you can see to the back of what you can see, the distance that remains in focus in your photo is called depth of field.

The point where sharpness begins is usually a bit in front of where you focused.  The point where sharpness ends is usually about ⅔ of the scene back from the point where you focused.  With the iPhone, the depth of field is far greater than with a DSLR camera with comparable settings because the sensor is so small.  This is a weirdness about depth of field–how small the sensor is affects depth of field in ways that are surprising if you don’t go into detailed, technical explanations about how light works to create images.  And, I promise, I won’t.

Here are the things that are important to remember:

  1. If you’re shooting a landscape, you generally want the photo to be sharp all the way from the front to the back.  To achieve this, try to keep objects closer than 10 feet out of the frame.  Then, select the closest object in the frame for focus.  The background will usually remain reasonably sharp.
  2. If you’re shooting a person, you generally want the person to be really sharp, especially the eyes, and you don’t care about the background–in fact, it would be better if the background were out of focus.  Focus on the person’s face or let the camera use facial recognition to achieve focus.
  3. If you’re shooting something up close, like the flowers I used in yesterday’s lesson, remember that you have to be a certain distance away to get sharp focus.  You might notice that the petals in the following photo that are closest to the camera are not sharply focused.  That’s because they were too close.  By backing away, you can get the entire bouquet in focus when you select the closest petals.

Your Assignment:  Choose a subject you’d like to have completely sharp.  Move closer and further away to determine how close you can get before the foremost part of the subject remains blurry.  Experiment with selecting different focus points to see the best place to choose focus to get the entire subject in focus.  Also try taking pictures of your favorite person to see if you can get their face sharp.  Don’t forget about the Rule of Holding Still.  If you have a landscape you can shoot, see what happens when you tilt the phone so the closest object is at least 10 feet away and you focus on that.  Try it again focusing far back in the scene and again focusing very close.  Which images have the most depth of field?  Which ones do you like best?

Lesson 50: The Rule of Holding Still

I’m not sure I previously stated this as a rule.  Since we’re reviewing the basics, I thought I would state this more directly:  hold still.  Unless, of course, you’re trying not to hold still.  But, we’ll come back to that one later.

We talked about holding the phone early on.  We also talked about different ways to prop your phone so it would be still.  And we talked about using image stabilization to help compensate for shake.

These all amount to the same rule:  hold still.

Not holding still creates blurry images.  The lower the light, the more your movement will cause blur.  If you find you consistently get slightly out-of-focus images that get worse in lower light, this probably means you were not born with the innate ability to hold an iPhone steady while taking a picture.

To show you how the amount of light available and the amount of light required to get a good exposure affects the amount of motion blur in the picture, I took 3 photos.  The first is with the flowers right under the light.  It’s pretty sharp.  The second is with the flowers a foot from the light with the exposure selected for the bright side of the flowers.  Not much difference in sharpness.  The last is the same as the second except that I asked the camera to expose the dark side of the flowers properly.  To let in more light, the camera also lets in more shake–lots of blur.

When we talked about image stabilization, I mentioned that the camera essentially waits for a moment when you’re not shaking to take the photo.  Here’s a side-by-side comparison of trying to get the dark side of the flowers exposed properly with and without image stabilization:

And here’s a second example with the flowers exposed for the well-lit portion:

If you don’t like waiting on the iPhone to decide when to take the shot (which can lead to missed moments), in the default Camera app, you can use the camera button on the screen to take a photo and create a pause between pressing the button and taking the picture by setting your finger on the button, steady yourself, and then release.  The picture is taken when you take your finger off the button.  This does not work with the volume-up button or Camera Awesome (at least not on my 4S).

I also mentioned using the headset volume-up button to take the picture as another option on the 4S or higher.  This works very well if you have a way to set your phone down, but I find it easier to press the volume-up button on the phone case than to hold the phone with one hand and use the headset when I’m hand holding.

Don’t forget about keeping your body still.  Stand with your feet wide–making a wider base will reduce sway.  If there’s a stable object you can lean against, use it.  Again, the lower the light, the more you need to worry about stabilizing yourself.  If you’re shooting in bright light, you probably won’t have motion blur problems unless you are really moving.

Your Assignment:  Try taking a photo in your house.  Indoor lighting is notoriously bad for iPhone photos.  Take a picture of something perfectly still without image stabilization turned on if you’re using the Camera Awesome app (or another app that has this feature).  Do you see blur?  Try looking at your photo on a computer screen if possible so you can tell.  Or zoom into the photo to check for blur.  Sometimes it’s too subtle to see well on the phone.

If you don’t have any blur, try less light or exposing a darker portion of the subject.  The point is to discover what level of light is required before you start having trouble holding the phone still.  Once you get to where you see a little blur, try as many of the techniques above as possible to see which works well for you to eliminate the blur.  It’s good to have several things to use for different situations as well as to combine techniques when the light is really low.

Lesson 48: Deciding When to Upgrade

Well, it’s that time again.  Time to decide if a new iPhone is worth the investment or not–pre-order of the iPhone 5S begins September 20th.

Deciding on new photography equipment is always a bit of a challenge.  Even if budget is not a concern, there are several downsides to switching equipment.  First, there’s the emotional attachment.  I don’t know about you, but I’m attached to my iPhone.  It feels like a friend who’s looked out for me and remained faithful in spite of many abuses.  My 4S has given me two good years and giving up on it when it still seems to be in the prime of its life feels a bit like a betrayal.

Second, anytime I upgrade, there is always a learning curve.  I really want to know if the effort will pay back in dividends with better features that make my life easier.  And, most importantly, that I won’t lose some of the features I’ve come to rely on the most.

Finally, there’s the inevitable domino effect of a new device:  a new case, a new lifejacket, a new bike mount, and, of course, what about all my nifty lens attachments?  Is upgrading to the latest gadget worth the inevitable headaches of replacing all the stuff I’ve accumulated for the current version?

I’ll jump to the end of the story:  I have decided to order the 5S.  But, I don’t take the decision lightly.  If you are considering whether it’s time for an upgrade or not, here are the things that tipped the balance for me:

  1. The fingerprint security.  One of the most painful things about my 4S is having to type in a lengthy, complicated password to unlock it.  Now, not everyone has to have a long, complicated password, so this may not be an issue for you, but the thought of being able to unlock my iPhone by simply placing my finger on the home button means not having to choose between missing a moment and using default camera app.
  2. A faster, brighter camera with a bigger sensor.  I have struggled with night time and low-light photos with my 4S.  Having a bigger sensor should help reduce noise and make it easier to get those low-light photos that I’ve been missing.  If you’re not frustrated by what you get with your current iPhone, this also may not matter to you.
  3. A new processor that will allow the camera to focus faster, capture photos faster, and, presumably, faster photo processing.  This equates to fewer lost moments and less time spent editing.
  4. A co-processor that does smart things to save your battery.  Battery life is another struggle when out and about and doing a lot of shooting.  A dead battery means more missed moments.
  5. 10 frames per second burst mode.  That’s pretty impressive.  It means being able to take a series of photos that are firing off 1/10th of a second apart.  More potential to capture more moments.
  6. An improved flash.  While the flash doesn’t claim to be brighter, it’s supposed to create better color temperature and light the scene better.
  7. iPhoto available at no charge.  iPhoto has some nice organization features and, I hope, will allow for metadata management on the iPhone–something else I’ve missed.

That’s my list of iPhonography related reasons (aka, excuses) for why I’ve decided to order one.  To alleviate my guilt, I’ll be donating my 4S to my husband, who is still using a 3G S iPhone–that way, my 4S will still be part of the family.

Your Assignment:  What are your criteria for how you decide when it’s time to upgrade?

Lesson 46: Flower Power

For today’s lesson, I used Hipstamatic with the Helga Viking Lens and the Black Keys film.  What I’d like to focus on (sorry for the pun) is something called depth of field.  Now, if you’ve read my About page, you know that I’m not allowed to explain technical stuff in this blog.  I’m going to try to keep this as simple as possible:  depth of field is what we call the distance from front to back of the scene that is in focus.  Now that I’ve said that, I’ll warn you that that’s not entirely accurate, but let’s just leave it at that before I get into trouble with Gina.

When we looked at taking portraits in Lesson 41, we talked about wanting to keep some things in focus and other things not in focus.  That’s what depth of field is all about–how do you get what you want in focus without getting other stuff in focus?

One of the painful things about the iPhone (or any other smartphone camera) is that you have very little control over this whole Depth of Field thingy.  But let’s look at what happens when I use Hipstamatic to take some very close-up photos of flowers.

In the first photo, I was so close to the group of bright yellow flowers, the reflection off of them creates a haze around the blooms.  Part of the haze is caused by soft focus on all but one flower hiding in the shadows.  While I usually like sharp photos, there is something about this hazy effect that appeals to me.

In the second photo, the leaf in the foreground is what’s in focus.  The softer focus in the other leaves and the background fence cause the leaf and fence patterns to start to look a lot like each other.  Again, while I would normally consider this a failure because of the limited focus, there’s something appealing about this to me when combined with the Hipstamatic effects.

In the third photo, the blades of grass are very sharp in the foreground, but only a few of them.  The rest blend into a mass of haze.  I’m still trying to decide if I like this or not, but it’s a good demonstration of what we would call a shallow depth of focus–only an area a couple of inches deep in the scene is in focus.

The fourth photo really brings this effect home.  The small, tall flowers in front are sharp while the big flowers in the background are soft.  I want to love this photo, but I would love it more if the foreground flowers were lighter and stood out more.  The background flowers would create a nice backdrop if there were more contrast between the background and foreground.

The fifth photo breaks one of the rules of photography.  That is, don’t have stuff in the foreground that’s out of focus.  Notice the big white flower completely blurred in the lower right.  I like this photo anyway.

Finally, my favorite, the sixth photo focuses sharply on an unopened bud with a large bloom out-of-focus in the background.  I would prefer this photo in a rectangle so that the little leaves around the bud weren’t cutoff, but I like that it’s less expected for the focus to be on the unopened bud than on the fully opened flower.

In all of these examples, I had only one way to control what was in focus and what wasn’t–distance to the subject.  By getting too close to some subjects, they were out-of-focus (like in photos 1 and 5).  Or, by getting just far enough away to focus sharply on the thing that was closest, I left the background out of focus like in photos 2, 3, 4, and 6.

Your Assignment:  See what happens when you get very close to a subject.  Pick a flower garden and shoot away.  Can you get the subject in focus?  How many other things are in focus?  Can you get closer?  When do you start to have problems getting the closest object in focus?  Do you notice how far away the background objects need to be before they fall out of focus?  Which do you prefer:  out-of-focus foreground objects or out-of-focus background objects?

Lesson 44: Fisheyes

This is our last lesson specifically on the Photojojo lens kit we started working our way through over several lessons (see Lessons 37, 38, and 39).  Today, we’re going to use my most favorite attachment, the Fisheye.

Fisheyes are not for everyone.  But in this case, we’re not talking about actual fish.  We’re talking about a lens attachment for your iPhone that causes the world to bend.  Who knew it could be so easy to bend things?

The fisheye attachment creates an effect of looking at the world like it’s in a snow globe.  Without the snow (well, unless it’s really snowing).  This effect can be overused pretty easily, but it sure is fun.  The fisheye effect is actually a super-wide lens that will put more of the scene in the photo than even the wide angle lens we looked at in Lesson 38.  As we noticed in Lesson 38, the scene was already starting to bend at the edges.  The fisheye takes that to an extreme.

Fisheyes in rooms can be especially fun–it’s often difficult to get an entire room into a normal photo.  The fisheye gives the effect of peering through a peep hole at an entire space all at once.  I also favor fisheye photos of my dog in various settings.  By putting my dog front and center, I can use the fisheye attachment to both get a photo of him and get a sense of the large scene around him.

What would you like to see in a snow globe?

Note:  If you combine the Fisheye lens with Hipstamatic, the square frame cuts off the extreme bending that occurs in a rectangular frame.  If you want to really create a snow-globe effect, Camera Awesome with its rectangular frame will work better.

Your Assignment:

Try using the fisheye attachment with people, pets, rooms, and great big open scenes.  Notice what it does to people–sometimes people don’t appreciate the Pinocchio effect.  Do you like big, wide scenes or tight spaces with the fisheye effect better?  Try combining the fisheye attachment with different camera apps we’ve used in previous lessons.  For example, try using Hipstamatic with the tintype effect shown in Lesson 29.  Try the different lens and film combinations show in Lesson 30–especially if your subject is people.

Lesson 41: iPhortraits

We talked about focus long ago in Lesson 4.  One of the things I mentioned back then was that because the iPhone has a very small sensor, it tends to keep a lot of stuff in your photo in focus, even when things are far apart from the front to the back of the scene.

Sometimes, like when you’re creating a portrait of a person, we don’t want everything to be in focus.  Sometimes, we just want the one main subject to be in focus.

Unfortunately, the one setting that has the most impact on whether everything will be in focus or not cannot be changed when using an iPhone.  Instead, we have to find ways to trick the iPhone into giving us the kind of focus we want.

We actually did this in some previous lessons.  In Lesson 30, we used Hipstamatic with the Tinto 1882 lens to blur everything except the face in the photo.  In Lesson 37, we used a macro lens attachment to get very close to small subjects and only a tiny little bit of the subject was in focus.

However, what to do if you don’t want to use a Hipstamatic effect or shoot macro?

There are only a few things that will help create a similar effect when you take the picture, but there are also editing tricks that will help create the blur you want.

When you’re shooting, the closer you are to your subject and the farther your subject is from the background, the more blurred the background will look.  To really emphasize your subject, having a dark background with no bright colors and relatively bright lighting on your subject will also help separate them from the background.  This can get pretty fancy pretty quickly, so let’s take one simple example.

I want to take a photo of my husband outside.  I place him so his back is to the sun.  This creates a rim of light in his hair that will help separate him from the background.  I also place him so that at the angle I’m shooting at will show mostly dark trees in the background.  Now, I get pretty close to my husband to eliminate other background stuff from sneaking into the frame.  However, I don’t want to get so close that I make his nose look bigger.  This is a good time to use the 2x telephoto attachment we talked about in Lesson 39.  It will help me fill the frame with my husband without distorting his face.  It will also make the distant background more blurred.  Compare the two photos side-by-side–can you see how his nose starts to distort and the shape of his face changes when I get too close to him with the default lens?

Now, the next challenge is that his face is in shadow.  I can do 2 things about that.  First, I can take off the telephoto attachment and use the iPhone built-in flash like in this photo:


Camera Awesome Flash on - notice nose
Camera Awesome Flash on – notice nose

By the way, in case you’re wondering what happens if you leave the 2X Telephoto attachment on with the flash, you get scary looking bright circles of light that may indicate paranormal activity:

2x telephoto with flash left on

A second option is to find a way to reflect some light into his face either using a white poster board or an actual photographer’s reflector.  Since my husband was already squinting, I opted for trying to fix it using Snapseed, similar to what we did in yesterday’s lesson.  Here are instructions for the edits I made:

Your Assignment:  Try using the 2X Telephoto attachment with your iPhone to see if you can create better separation between your subject and the background.  Compare the effect to getting closer to the subject without the 2X Telephoto.  Also try standing back a bit and using the flash, then cropping the photo to get a more zoomed in look.  Which method is the most flattering to your subject?  Have you noticed changes in their face shape based on how close you were with the iPhone?  Are any of those changes flattering?

Lesson 40: The Morning After

Or, the afternoon or evening after a shoot . . . whatever the case may be.  It all calls for post-processing.  What is post-processing, you ask?  Well, to put it simply, it’s “gentle” photo editing.

Photo editing can range from creating a completely new picture (like we did in Camera Awesome in Lesson 12) to doing minor adjustments to make your photo look more like reality.  The latter category of editing is usually referred to as “post-processing.”  Post as in “after you’re done shooting” and “processing” as in the digital version of developing a photo.

When you take photos with your iPhone, the iPhone is making a lot of decisions for you.  It decides how saturated to make your colors, how to balance the tones so that white looks white, how bright to make the image, etc.  Sometimes it does a pretty good job.  Sometimes it guesses wrong.

Today, we’re going to download another app.  This time, it’s not a camera, it’s a photo editing tool.  Good news!  It’s free!

Sometimes people are disappointed when they realize that some level of editing is called for to get the most out of their photos.  Using photo editing tools can help  take a ho-hum picture to something much more dramatic.  Often, it’s the drama that gets lost when you take a photo; you’re just putting back what your eyes saw.

We’re going to do a simple edit with Snapseed today.

I’m using an image that has a distracting background I’d like to make less distracting.  To do this, I start by opening the app and then selecting the image I want to edit.  The graphics below will walk you through all the edits I made to this one photo:

I applied a few simple adjustments but left it looking pretty similar to the original–just a little better.  Here they are side-by-side:

Your Assignment:  Download Snapseed (did I mention it’s free?).  Follow the instructions to open a photo that you ilke, but weren’t thrilled with.  Try making the simple post-processing adjustments above.  Do you like it better?  Are there still things you would like to change about it?  What are the things you couldn’t figure out how to do that you’d like to change?