Lesson 47: Blooming Snapseed

Today, I randomly chose a photo and edited it in Snapseed to demonstrate 3 things:

  1. Using some of the tools in Snapseed we haven’t used in earlier lessons
  2. You can edit yourself in circles
  3. Editing doesn’t necessarily make a photo better.

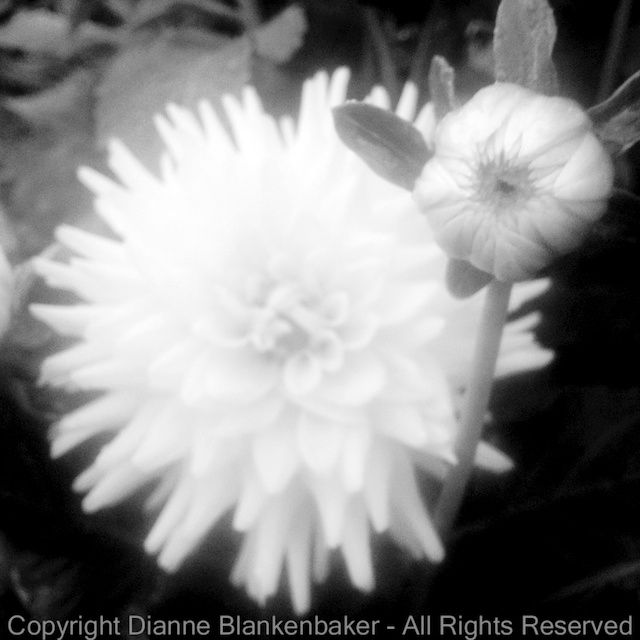
Here is the original photo next to my resulting photo after editing:

In the process, I used the Grunge, Vintage, Details, Retrolux, Drama, and Tune Image tools.  There are several reasons why it probably isn’t a good idea to use this many editing tools on one photo.

First, while there are several claims on the web that Snapseed is “non-destructive,” meaning the resolution of your photo is not compromised by the editing process, I am not convinced.  It’s very difficult to tell what is photo degradation vs editing effects both visually and from a file size perspective.  I tried saving each version of the photo between steps and found that the file size got progressively smaller until I added a texture and then the file size increased.  So, I am going with the assumption that data loss from the original image occurs each time you apply an editing tool, although some editing tools apply extra data.

Second, Applying edits in different orders creates different results.  Working from left to right applying the same edits created a very different photo.  Here are the two different edits side-by-side:

Some edits seem to “undo” previous edits by applying, for example, a different texture to the photo.  In the end, there are a nearly infinite ways in which you can change the photo.  But, the question is:  should you change the photo?

In this case, the main issue with the original photo is that the focus is behind some of the unopened petals in the center.  Neither edit fixed this problem.  If I wanted to improve the photo, I would try sharpening it to see if I could get the center petals in focus.  Interestingly, one of my interim edits did result in a sharper image than the original:

I would still prefer to have had the original photo with the focus I wanted.  Focus is one of the things it’s hard to fix after the fact.

Your Assignment:  Pick a photo that maybe isn’t so interesting.  Open it in Snapseed and try the various tools.  For the steps I took editing the photos, refer to the instructions below.  Try the different tools in Snapseed in different orders to see which order seems to work best for you.  Here are the instructions for the first edit:

Lesson 46: Flower Power

For today’s lesson, I used Hipstamatic with the Helga Viking Lens and the Black Keys film.  What I’d like to focus on (sorry for the pun) is something called depth of field.  Now, if you’ve read my About page, you know that I’m not allowed to explain technical stuff in this blog.  I’m going to try to keep this as simple as possible:  depth of field is what we call the distance from front to back of the scene that is in focus.  Now that I’ve said that, I’ll warn you that that’s not entirely accurate, but let’s just leave it at that before I get into trouble with Gina.

When we looked at taking portraits in Lesson 41, we talked about wanting to keep some things in focus and other things not in focus.  That’s what depth of field is all about–how do you get what you want in focus without getting other stuff in focus?

One of the painful things about the iPhone (or any other smartphone camera) is that you have very little control over this whole Depth of Field thingy.  But let’s look at what happens when I use Hipstamatic to take some very close-up photos of flowers.

In the first photo, I was so close to the group of bright yellow flowers, the reflection off of them creates a haze around the blooms.  Part of the haze is caused by soft focus on all but one flower hiding in the shadows.  While I usually like sharp photos, there is something about this hazy effect that appeals to me.

In the second photo, the leaf in the foreground is what’s in focus.  The softer focus in the other leaves and the background fence cause the leaf and fence patterns to start to look a lot like each other.  Again, while I would normally consider this a failure because of the limited focus, there’s something appealing about this to me when combined with the Hipstamatic effects.

In the third photo, the blades of grass are very sharp in the foreground, but only a few of them.  The rest blend into a mass of haze.  I’m still trying to decide if I like this or not, but it’s a good demonstration of what we would call a shallow depth of focus–only an area a couple of inches deep in the scene is in focus.

The fourth photo really brings this effect home.  The small, tall flowers in front are sharp while the big flowers in the background are soft.  I want to love this photo, but I would love it more if the foreground flowers were lighter and stood out more.  The background flowers would create a nice backdrop if there were more contrast between the background and foreground.

The fifth photo breaks one of the rules of photography.  That is, don’t have stuff in the foreground that’s out of focus.  Notice the big white flower completely blurred in the lower right.  I like this photo anyway.

Finally, my favorite, the sixth photo focuses sharply on an unopened bud with a large bloom out-of-focus in the background.  I would prefer this photo in a rectangle so that the little leaves around the bud weren’t cutoff, but I like that it’s less expected for the focus to be on the unopened bud than on the fully opened flower.

In all of these examples, I had only one way to control what was in focus and what wasn’t–distance to the subject.  By getting too close to some subjects, they were out-of-focus (like in photos 1 and 5).  Or, by getting just far enough away to focus sharply on the thing that was closest, I left the background out of focus like in photos 2, 3, 4, and 6.

Your Assignment:  See what happens when you get very close to a subject.  Pick a flower garden and shoot away.  Can you get the subject in focus?  How many other things are in focus?  Can you get closer?  When do you start to have problems getting the closest object in focus?  Do you notice how far away the background objects need to be before they fall out of focus?  Which do you prefer:  out-of-focus foreground objects or out-of-focus background objects?

Lesson 45: Post Processing or Photo Manipulation?

In Lesson 40, we took a badly lit photo of my dog sitting on my husband and did some basic editing to shift the attention from the bright background to my intended subjects using Snapseed.  These are the original and post-processed versions side-by-side:

I mentioned in Lesson 40 that post-processing is usually considered the digital equivalent of developing film.  However, you can also do an extreme amount of editing and end up with something that doesn’t look like a photo at all.  This is usually called digital manipulation or graphic art, but when editing crosses from post-processing to “manipulation” is largely subjective and hotly debated.

Since it really doesn’t matter what you call it, we’re not going to argue about it.  I’m just going to show you an example of more extreme editing that produces a completely different look from what I actually saw when I took the photo.

I used Snapseed to do a similar editing process as in Lesson 40, but I took my changes to the extreme.  I also used heavy sharpening to create an effect that makes my husband and dog look more like a drawing than a photo.

Here are the steps I used in this edit.  Note that there is a clever tip included on copying and pasting selective adjustments that comes in very handy.

Let’s look at the original photo, the previsously post-processed version, and today’s extreme edit side-by-side:

Personally, I am a bit of a traditionalist.  I like photos to look like photos or to not at all look like photos.  More abstract subjects work for me in extreme editing modes, but I am not fond of this look for human or animal subjects.  Maybe someday it will wear me down and I’ll start to like it–in the meantime, I always think of images of Elvis on black velvet when I do these types of edits.  🙂

Your Assignment:  Start with a photo that has something a bit off in it like a too-bright background and poorly lit subject.  See if you can use this series of edits (and/or throw in some of your own) to create something that looks really cool.  Or, perhaps, makes you, too, think of Elvis on black velvet.  Do you like this look?  It’s OK if you do.  🙂  That’s the important point–discovering what is possible and what appeals to you.

Lesson 44: Fisheyes

This is our last lesson specifically on the Photojojo lens kit we started working our way through over several lessons (see Lessons 37, 38, and 39).  Today, we’re going to use my most favorite attachment, the Fisheye.

Fisheyes are not for everyone.  But in this case, we’re not talking about actual fish.  We’re talking about a lens attachment for your iPhone that causes the world to bend.  Who knew it could be so easy to bend things?

The fisheye attachment creates an effect of looking at the world like it’s in a snow globe.  Without the snow (well, unless it’s really snowing).  This effect can be overused pretty easily, but it sure is fun.  The fisheye effect is actually a super-wide lens that will put more of the scene in the photo than even the wide angle lens we looked at in Lesson 38.  As we noticed in Lesson 38, the scene was already starting to bend at the edges.  The fisheye takes that to an extreme.

Fisheyes in rooms can be especially fun–it’s often difficult to get an entire room into a normal photo.  The fisheye gives the effect of peering through a peep hole at an entire space all at once.  I also favor fisheye photos of my dog in various settings.  By putting my dog front and center, I can use the fisheye attachment to both get a photo of him and get a sense of the large scene around him.

What would you like to see in a snow globe?

Note:  If you combine the Fisheye lens with Hipstamatic, the square frame cuts off the extreme bending that occurs in a rectangular frame.  If you want to really create a snow-globe effect, Camera Awesome with its rectangular frame will work better.

Your Assignment:

Try using the fisheye attachment with people, pets, rooms, and great big open scenes.  Notice what it does to people–sometimes people don’t appreciate the Pinocchio effect.  Do you like big, wide scenes or tight spaces with the fisheye effect better?  Try combining the fisheye attachment with different camera apps we’ve used in previous lessons.  For example, try using Hipstamatic with the tintype effect shown in Lesson 29.  Try the different lens and film combinations show in Lesson 30–especially if your subject is people.

Lesson 43: Patterns

Today we’re going to return to a basic photography concept for inspiration.  Early on, we talked about filling the frame, the rule of thirds, and symmetry as different ways to create interesting compositions in your photos.  By composition, we’re talking about the arrangement of the stuff in your frame.  We also talked about inclusion and exclusion when it comes to deciding what to put in the frame and what to keep in focus.

Today, we’re going to talk about repeating patterns.  Sometimes, something that might seem ordinary and not worth photographing can become very interesting we we select a pattern from what we’re seeing and fill the frame with that pattern.

One of the aspects of what makes an interesting pattern in a photo is the 3 dimensional aspect of the subject.  For example, here are a couple of repeating patterns that don’t work so well to my tastes:

But, when we take a repeating pattern that has some dimension to it and add an angle to help guide the eye into the photo, you start to get something more interesting.  Compare the begonia angles and the walkway angles side-by-side:

Gardens create interesting patterns to work with almost by definition–the gardener has probably carefully grouped together different types of flowers to create patterns pleasing to the eye.  In this particular garden, I found lots to work with.  Not only are the plants grouped to form patterns, but the plants themselves contain patterns, such as the large hosta.  The hosta has rib patterns in its leaves, a pattern of white marks at the edge of each leaf, patterns of repeating leaf shapes, and the pattern in which it grows.  It works well in color and it works in black and white against a similarly patterned fence:

I particularly like to have a surprise in my photos that contain a repeating shape.  For example, one flower that stands out from the rest, fallen petals, a complimentary color in the background.  These are the kinds of things that make the pattern more obvious because there’s an exception.

A field of flowers can create more random patterns.  If you look at the photo that shows a field of flowers vs the photo next to it that gets in closer and just shows a few flowers as a random arrangement of repeating shapes, it give it a totally different look at feel (these were taken with a DSLR, sorry):

Your Assignment:  Look for repeating shapes with interesting textures and/or lines that can help draw the eye.  Try taking pictures of these repeating patterns from different angles and different distances.  Try using different apps–Camera Awesome is always great for realistic photos.  The black and white examples were taken using Hipstamatic with the Helga Viking lens and Black Keys film.  Do some patterns work better in color or B&W?  Do some work better from far away?  Think of photos you may have seen of the tulip fields in the Netherlands–if you haven’t see any, do a quick Google search on “tulip fields netherlands” and click on images to get an extraordinary number of examples of ways to shoot these repeating patterns).  Are there times when you could think about repeating patterns to enhance the way you, say, take a picture of a flower?

Lesson 42: New and Improved

Way back in Lesson 2, I mentioned there were several things that could be improved about the photo example that I would get to later.  I bet you thought I forgot?

Well, OK, I did, but then I remembered again.  So, here’s the photo from Lesson 2:

IMG_2613

What things can you see about this photo that could be better?

Here are the things I don’t like about it:

  1. The bright areas in the background are distracting.
  2. I think my dog would look better if I’d shot lower to the ground.
  3. My dog’s black spots are under exposed.
  4. The lighting is too gray.

So, today, we’re going to do two things.  First, we’re going to try to edit the original photo with Snapseed to see if we can make it look better.  Snapseed will help with items 1, 3, and 4, but it cannot help with the angle of the photo.

Second, I’m going to take a similar photo of my dog and see if I can’t improve upon the original photo by using a different setting that has better light, and using a lower angle.  I am beginning to realize why taking my dog to obedience classes might be useful.

So let’s edit the photo in Snapseed.  Here are the steps I went through to improve the original photo:

And here is the edited version side-by-side with the original:

The other approach is to try to capture the same photograph in a different setting that eliminates the bright areas in the background and allows me to take the photo at a lower angle to the ground.  I was planning to have some examples of a similar pose out on the grass in some lovely evening light.  Unfortunately, my dog was unwilling to cooperate.  Here is a selection of photos I got of my dog while trying to get him to lie in the same position as in the original photo:

But even that has a lesson in it:  if someone or something you love is doing something you want to remember, take the photo.  Sometimes you can’t get rid of distracting background.  Sometimes you can’t get the perfect angle before the subject jumps up and runs away.  But having imperfection is better than having nothing.  And, as we will discover over and over again on our photographic journeys, no two moments are ever exactly the same.

You’re Assignment:  Choose a photo from one of our early assignments you think you might be able to improve upon using Snapseed.  Get a little crazy with it.  See if you can create something that you really like.  Now, try to recreate the same situation with whatever bugged you about the photo fixed.  Is that even in the realm of possibility?

Lesson 41: iPhortraits

We talked about focus long ago in Lesson 4.  One of the things I mentioned back then was that because the iPhone has a very small sensor, it tends to keep a lot of stuff in your photo in focus, even when things are far apart from the front to the back of the scene.

Sometimes, like when you’re creating a portrait of a person, we don’t want everything to be in focus.  Sometimes, we just want the one main subject to be in focus.

Unfortunately, the one setting that has the most impact on whether everything will be in focus or not cannot be changed when using an iPhone.  Instead, we have to find ways to trick the iPhone into giving us the kind of focus we want.

We actually did this in some previous lessons.  In Lesson 30, we used Hipstamatic with the Tinto 1882 lens to blur everything except the face in the photo.  In Lesson 37, we used a macro lens attachment to get very close to small subjects and only a tiny little bit of the subject was in focus.

However, what to do if you don’t want to use a Hipstamatic effect or shoot macro?

There are only a few things that will help create a similar effect when you take the picture, but there are also editing tricks that will help create the blur you want.

When you’re shooting, the closer you are to your subject and the farther your subject is from the background, the more blurred the background will look.  To really emphasize your subject, having a dark background with no bright colors and relatively bright lighting on your subject will also help separate them from the background.  This can get pretty fancy pretty quickly, so let’s take one simple example.

I want to take a photo of my husband outside.  I place him so his back is to the sun.  This creates a rim of light in his hair that will help separate him from the background.  I also place him so that at the angle I’m shooting at will show mostly dark trees in the background.  Now, I get pretty close to my husband to eliminate other background stuff from sneaking into the frame.  However, I don’t want to get so close that I make his nose look bigger.  This is a good time to use the 2x telephoto attachment we talked about in Lesson 39.  It will help me fill the frame with my husband without distorting his face.  It will also make the distant background more blurred.  Compare the two photos side-by-side–can you see how his nose starts to distort and the shape of his face changes when I get too close to him with the default lens?

Now, the next challenge is that his face is in shadow.  I can do 2 things about that.  First, I can take off the telephoto attachment and use the iPhone built-in flash like in this photo:


Camera Awesome Flash on - notice nose
Camera Awesome Flash on – notice nose

By the way, in case you’re wondering what happens if you leave the 2X Telephoto attachment on with the flash, you get scary looking bright circles of light that may indicate paranormal activity:

2x telephoto with flash left on

A second option is to find a way to reflect some light into his face either using a white poster board or an actual photographer’s reflector.  Since my husband was already squinting, I opted for trying to fix it using Snapseed, similar to what we did in yesterday’s lesson.  Here are instructions for the edits I made:

Your Assignment:  Try using the 2X Telephoto attachment with your iPhone to see if you can create better separation between your subject and the background.  Compare the effect to getting closer to the subject without the 2X Telephoto.  Also try standing back a bit and using the flash, then cropping the photo to get a more zoomed in look.  Which method is the most flattering to your subject?  Have you noticed changes in their face shape based on how close you were with the iPhone?  Are any of those changes flattering?

Lesson 40: The Morning After

Or, the afternoon or evening after a shoot . . . whatever the case may be.  It all calls for post-processing.  What is post-processing, you ask?  Well, to put it simply, it’s “gentle” photo editing.

Photo editing can range from creating a completely new picture (like we did in Camera Awesome in Lesson 12) to doing minor adjustments to make your photo look more like reality.  The latter category of editing is usually referred to as “post-processing.”  Post as in “after you’re done shooting” and “processing” as in the digital version of developing a photo.

When you take photos with your iPhone, the iPhone is making a lot of decisions for you.  It decides how saturated to make your colors, how to balance the tones so that white looks white, how bright to make the image, etc.  Sometimes it does a pretty good job.  Sometimes it guesses wrong.

Today, we’re going to download another app.  This time, it’s not a camera, it’s a photo editing tool.  Good news!  It’s free!

Sometimes people are disappointed when they realize that some level of editing is called for to get the most out of their photos.  Using photo editing tools can help  take a ho-hum picture to something much more dramatic.  Often, it’s the drama that gets lost when you take a photo; you’re just putting back what your eyes saw.

We’re going to do a simple edit with Snapseed today.

I’m using an image that has a distracting background I’d like to make less distracting.  To do this, I start by opening the app and then selecting the image I want to edit.  The graphics below will walk you through all the edits I made to this one photo:

I applied a few simple adjustments but left it looking pretty similar to the original–just a little better.  Here they are side-by-side:

Your Assignment:  Download Snapseed (did I mention it’s free?).  Follow the instructions to open a photo that you ilke, but weren’t thrilled with.  Try making the simple post-processing adjustments above.  Do you like it better?  Are there still things you would like to change about it?  What are the things you couldn’t figure out how to do that you’d like to change?

Lesson 39: 2X

This is not a lesson about shirt sizes.  Instead, we’re continuing our progress using the Photojojo lens attachments with the iPhone.  Yesterday, we looked at the wide angle attachment.  The day before, we used the macro attachment.  Today, let’s take a look at the 2x Telephoto attachment.

This is what it looks like up close:

Telephoto Lens

If you either have reading glasses handy or don’t need them, you can see the edge of the lens is labeled “telephoto” to help you tell it apart from the other lenses in the kit.  If you’ve already adhered the metal ring around the built-in lens on your iPhone, the magnet in the 2x Telephoto lens will hold the lens in place on the ring.  If not, refer to the instructions that came with the lens kit for more info.

We previously used a different telephoto lens attachment in Lesson 25 to take pictures of the moon.  That one is 8x telephoto (or 12x for an iPhone 5).  So, you might ask, why would I want 2x if I have 8x (or 12x)?  Well, the answer is simple.  Sometimes, 8x (or 12x) is too much.  Bigger is not always better.

Let’s take the example of being in a park where you want to get a picture of a spider.  The spider is close enough that using the 8x telephoto wouldn’t allow the entire spider to fit in the frame, but far enough away that with no zoom, the spider gets lost in the flowers.

Let’s consider the macro attachment.  You might wonder why you wouldn’t use that for the spider as well.  There are three considerations:  1) How big is the spider?  2) Will the spider hold still while you manipulate the lens inches (or less above it)?  3) Will you scream and throw the phone if the spider suddenly moves while you’re that close?

The 2x zoom gets you in tighter without having to get within grabbing distance.

Here’s a side-by-side comparison of my spider with and without the 2x zoom (uncropped):

And a second one, just for fun.  By the way, in the interest of full disclosure, even with the 2x zoom, I still jumped when the spider suddenly ran to the top of its web.  It’s a big spider.

Your Assignment:

Attach the 2x telephoto lens to your camera.  Look for subjects where you’d like to get closer without getting physically closer.  Notice how 2x sounds like a lot, but really only brings things in slightly closer.  Can you use the 2x telephoto attachment to fill the frame with your subject from further away?  Did you get any great photos of critters that can be hard to get close to like spiders or butterflies?

Lesson 38: Wide Views

In yesterday’s lesson, we used the Photojojo macro lens to take close-ups of small subjects.  Today, we’re going to use the exact same lens but with the wide angle ring in place.  As a reminder, the wide/macro lens has two parts that look like this when separated:

Wide/Macro lens with the Wide ring removed

When the two parts are screwed together, lens looks like this (the one in the middle):


The complete lens kit with the Wide/Macro lens in one piece

If you still have them separated, reattach the wide angle ring for this lesson.  The lens will stick to the metal ring around your iPhone lens via a magnet.  Refer to Lesson 37 for more details about attaching the lens.

The iPhone lens is quite wide to begin with.  It’s a 4mm lens, which helps to compensate for its very small sensor when you’re trying to go big.  However, sometimes it’s still not wide enough.

The Photojojo wide angle lens takes your built-in lens from 4mm to 2.68mm, putting more stuff in the frame when the scene you’re shooting is really big.  Here’s a side-by-side comparison of what you get without and with the wide-angle attachment:

Notice two side-effects.  The corners of the image can get dark (called Vignetting) and objects around the edges of the photo start to bend.  Sometimes those effects can be fun to play with, too.

Your Assignment:  For an easy subject, try taking a picture from the corner of a room in your house.  If you can stand on a chair, even better.  Take the photo both with and without the wide angle attachment.  Can you get the whole room in?  Do you see both the ceiling and the floor in the photo?  How much more do you see with the attachment?  If possible, try the same experiment outside.  Notice what happens to street lights and houses at the outside edges of the frame–you get a little reality bending with a lens this wide.