Lesson 35: Do the Time Warp

In Lesson 32, we downloaded Fast Camera and discussed using Fast Camera to take pictures of moving subjects. We also exported a series of photos as a movie. What we didn’t do was talk about time-lapse photography. That is what we are doing when we take a series of still images and then string them together into a video. When the video plays so that the photos are shown closer together in time than they were taken, that’s a time lapse.

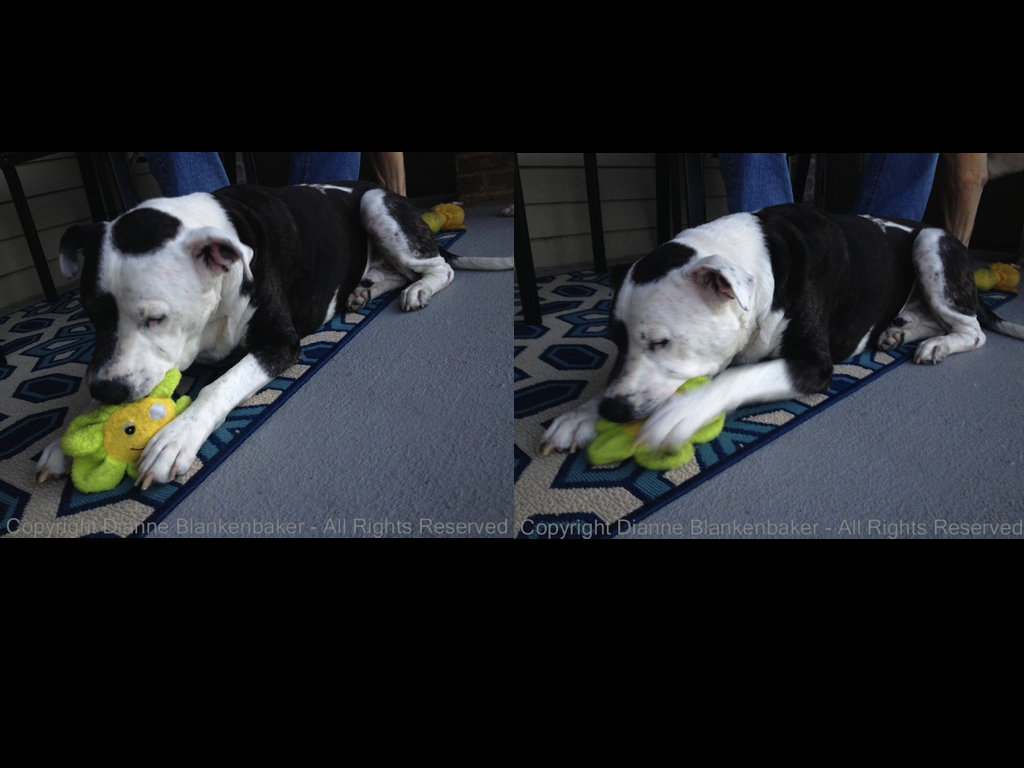
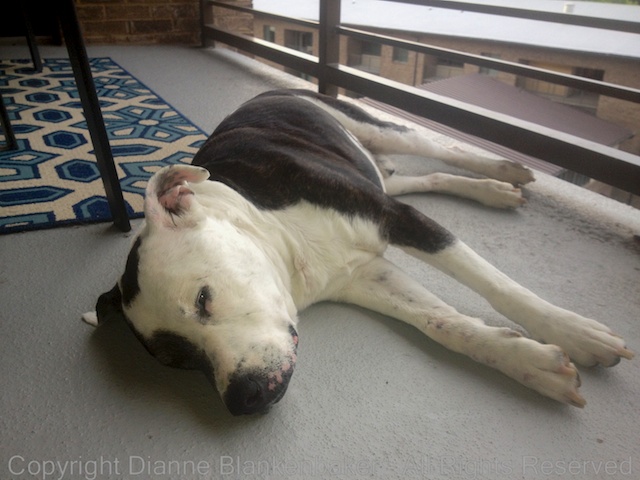
This used to be (and still can be) something complicated and difficult to do, but Fast Camera makes it very easy. There are two tricks to creating interesting time-lapse videos. First, the camera must be still through the entire process of taking the photos. This is what happens when you follow a moving subject around and then try to create a time-lapse video from them:

It looks more like a series of photos of my dog than a time-lapse. While, technically, it is still a time-lapse video, because the background keeps changing, we lose sight of the fact that we’re watching a scene unfold. Instead of following a subject around, place the iPhone on the tripod we used back in Lesson 25 and again in Lesson 34. Or, refer to Lesson 34 for other ways to stabilize the phone. For this exercise, I used the tripod:

AU0A3745

Notice the headset plugged into the iPhone. I used the volume up button on the headset to start and stop taking photos so I wouldn’t knock my precariously balanced iPhone over.

Putting the iPhone on a tripod for time-lapse photography also implies that there needs to be something moving in the frame while you take a series of photos. For example, you’ve probably seen some really awesome time-lapse videos of a flower blooming or of city traffic. In the first case, the subject remains in the frame the entire time but moves. In the second case, the subject is the city itself and the traffic driving through it provides the motion.

Another great subject for movement is water. When I chose the river as my subject, I was hoping for a nice big barge to go by or perhaps a low-flying Great Blue Heron. I didn’t get that lucky. The only boats that went by were so small and far away that they’re very hard to see. However, the movement of the water still creates interesting motion. As a side note, the small tripod on an uneven rock wall makes it rather difficult to get a level photo.

Here is a time lapse taken under a bridge:

And another looking down the river:

Could you spot the boats moving through the video? These were both shot with a 5 second delay between photos.

Another great subject for time lapse is any astronomical body. For the iPhone, the sunset is a safe bet. A couple of problems happened during my sunset time lapse. First, I used a 10-second delay between photos. Because of the lack of cloud motion, that was too fast. Second, the sun popped through the cloud coverage in a couple of frames, causing sudden overexposure. Finally, failing to take my own advice on making sure I had a fully charged phone before heading out to shoot, I ran out of juice before the sun had gone down. See Lesson 28 for tips on conserving battery life when you’re out to get a time-lapse–it is battery intensive. This is what it looks like:

The final thing to think about is what frame rate you want to create the video at. The frame rate is how many of the photos will be displayed per second. 30 frames per second is the rate that most movies are played at, so if you want a really smooth looking video, that would be the rate to choose. Since I took a smaller number of photos, I slowed things down a bit and exported my videos at 24 frames per second. Think of it this way: if you want 1 minute of video at 30 frames per second, you need 60*30=1800 photos.

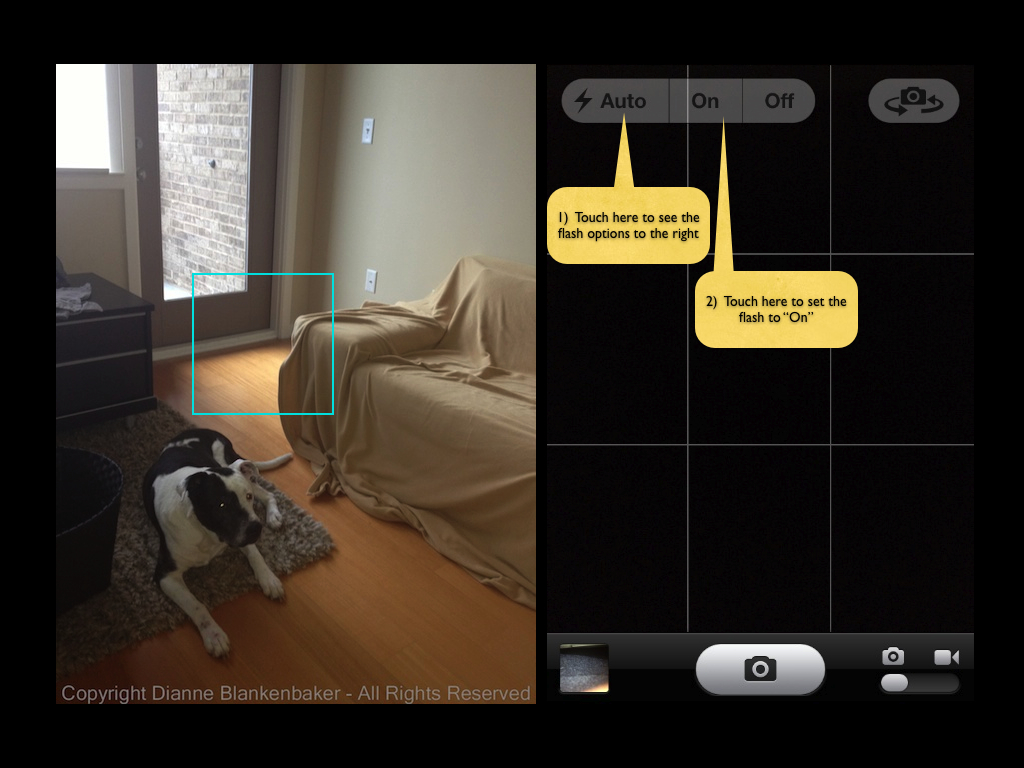
Your Assignment: Open Fast Camera (and stop the photos if you have it set to start taking photos at launch) and follow the instructions below to set the time between photos. The faster the movement, the less time you need between photos to create a sense of movement. I used a 5 second delay for the river and a 10 second delay for the sunset. I would suggest using a 1 minute delay for the sunset instead, but it depends on whether the clouds are moving rapidly or not.

Now decide on your scene. If you don’t have one, you could try setting the phone up in your living room during a time when people (and/or pets) will be coming in and out. Time-lapse videos of families moving in and out of a room can be quite amusing.

Save and export your movie using the instructions in Lesson 32. Choose the frames per second based on whether you want it to look like a real video or whether you’d rather slow things down. You can also export the video and then go back and export it again at a different speed so you can decide what works best later.

What do you think? Is this a medium you could get into?

Lesson 34: When You’ve Got the Shakes

In Lesson 31, we talked about how adding the iPhone flash can help reduce the blur of slow-moving subjects.  What we didn’t talk about was another way blur can be introduced by movement–the movement of you holding your iPhone.

One way to reduce movement of your phone is to hold it very still.  For tips on how to hold it as steady as possible, see Lesson 6.  Sometimes, it’s hard to hold your phone still–especially if you’re shooting in low-light conditions when holding it still makes the biggest difference.  In those cases, using a tripod would be ideal, if a little silly looking.

In Lesson 25, we looked at using a telephoto attachment from Photojojo that includes a mini-tripod for your iPhone.  You don’t have to use the telephoto attachment to benefit from the tripod.  If you are taking landscape photos, especially in low-light, and you purchased the telephoto kit, try using the tripod without the telephoto lens to see how it improves your landscape photos.

There are other options if you don’t have a tripod for your iPhone.  For one, you can find a place to set the iPhone if you can balance it or prop it against something to eliminate your shake.  If you are a die-hard iPhone user, you may also find some of the various attachments for the iPhone that are helpful for keeping it stable.  For example, a car holder that doesn’t block the camera, a mount on your bike, or even the LifeProof life vest I showed in Lesson 19.  The large block size of the life vest makes the iPhone easier to grip securely.  It also makes it easier to stand on edge.  As a bonus–if your iPhone falls off its perch, there’s not much chance it will get damaged!

But let’s say you want to take a photo when there is no way to prop up your phone, or, the only place you could prop your phone would not result in getting the photo you want.  Another option is to use the “image stabilization” feature provided in many camera apps.  Unfortunately, not the default camera app from Apple, but, yes, it is one of my favorite features in the Camera Awesome app.

Unlike expensive gear that comes with image stabilization features that work mechanically, the Camera Awesome app uses the gyroscope in the iPhone to determine if the phone is moving.  If it is, it waits until a moment when you’re still before taking the photo.  This works great in that pushing the volume-up button or touching the shutter button on the screen creates most of the motion.  This setting allows the movement to settle before the picture is taken.

The downside is that the pause can cause you to miss the exact shot you wanted when your subject is fickle (like my dog) and decides to walk away while you’re waiting for the photo to take.  I highly recommend it when you’re taking photos of subjects that are either still or cooperative.

Here’s how to turn the image stabilization feature on in the Camera Awesome app (downloaded in Lesson 7):

Your Assignment:  Get out the Camera Awesome app and turn on the image stabilization feature.  Take some photos of a scene that isn’t moving.  Now, turn it off and take the same photos.  Do you notice a difference?  If so, you might want to make it a setting you use a lot.  If you happen to have very steady hands, you might prefer not to use it because of the delay it can introduce.

Lesson 8: Separating Focus from Exposure

In yesterday’s lesson, we downloaded the app Camera Awesome.  If you missed yesterday’s lesson, you might want to download it now.  It’s a free app available from the Apple App Store.

One of the pains of using the default camera app that comes with the iPhone is that you can only pick one spot on your screen to set both the exposure and the focus.  The Camera Awesome app is one of several apps that allows you to pick one spot to set the focus and another spot to set the exposure.

Why is this awesome?  There are many times when the thing you want to be in focus is  darker or lighter than the overall scene and you have to choose between what you want in focus and how you want the image exposed (see lesson 5).  With Camera Awesome, you can focus in one spot and adjust the exposure in another spot so you get a better exposure and still get the focusing point you want.

For example, when shooting landscape scenes like the one in the example below (click to enlarge), with the default camera app, if I choose the rock for the focus point, the sky turns white.  If I choose the sky to get a better exposure, the rock is not longer sharp.  I don’t want a blurry foreground and I don’t want a white sky.

Separate Focus and Exposure.001

Using the Camera Awesome app, I can touch the screen with one finger and, while keeping that finger still, tap the screen with a second finger to get a green square for focusing and a blue circle for setting exposure. I can move each around with a fingertip to find the best focus point and best exposure point separately.

Separate Focus and Exposure.002

By separating the two functions, I have more choices about how the photo will look.

Separate Focus and Exposure.003

One note I didn’t mention in yesterday’s lesson:  With the Camera Awesome app, the photo is stored inside the app until you tell it to save it to your Camera Roll.  It’s best to choose the images you want to keep and save them to your Camera Roll for future use as soon as you’re done shooting.  That way you won’t end up with hundreds of photos in the app.

Here’s one last example of when separating focus and exposure are important.  I focused on my dog is in the foreground, but found an exposure that keeps details visible in both the dark spot on his face and the sky.

IMG_1956

Your Assignment:  Choose a scene that has some brighter and darker areas where you want to focus on something in the foreground.  Using the default camera app that comes with the iPhone, choose the focus point and take a picture.

Next, open up the Camera Awesome app and practice touching with one finger and tapping with a second finger to get the separated exposure and focus settings to appear.

Focus on the same point you focused on using the default app.  Now slide the exposure around until you get the best exposure for your image.  Take a picture.  Save it to your Camera Roll.  Compare the two images.  Which one do you like better?

Lesson 7: Keep It Level

Today, we’re downloading our first new app!  While there are quite a few iPhone apps to choose from, one of my particular favorites is the SmugMug app formerly called Camera! and currently called Camera Awesome.  I’m sorry to say that it’s not available for other smart phones for those of you without iPhones.

You might want to pause and download the app before you continue.

While we talked about holding the iPhone firmly and square, we didn’t talk about holding  it level.  Sometimes having a crooked photo can really ruin a great image.  This is especially true when shooting skylines, water scenes, and architecture.  Anything the eye expects to be level will usually look pretty off when it’s not–even if you can’t tell when you take the photo.

The iPhone is not easy to hold level.  I seem to come home with crooked photos all the time.  For today’s lesson, we’re going to look at using the level feature in Camera Awesome to help us find level even when it’s hard to tell by eye.

If you open up the Camera Awesome app, there is a little tab at the top of the screen that will slide open like a drawer when you tap it.  In the upper right corner, you’ll see a button to tap that toggles the level on and off on the screen.  Turn the level on so your screen looks like this:

turning on the level.003 (1)

Tap the tab again to close the drawer and now you’re ready to shoot level.  The level will turn green like in the image above when you’re holding the phone perfectly level.

In the example below, I was standing on the side of a hill looking down a slope to a sidewalk at angle to me that leads to a river.  There are lines and curves intersecting everywhere and it was impossible to tell when I was level except for the handy level feature in the Camera Awesome app:

level examples.001

As you can see (click image to enlarge), the scene looks odd when shot at an angle even though I couldn’t tell what was level when I was standing on the hillside.  Sometimes, shooting level isn’t important–and can even be a detriment.  Take a look at the following example (ignoring the fact that my dog wouldn’t hold still):

level examples.002

Your Assignment:  Can you tell which of the two images above was shot level?  I’ll give you a hint–I was surprised when I saw them side-by-side and realized which one was which.  Which one do you like better?

Now, take a walk where you can get a view of the sky or a body of water or really any open landscape view.  Try taking quite a few photos of what you see both level and not level.  Now, turn off the level feature and see if you can shoot level without it.  How’d you do?

Lesson 5: Exposure

I mentioned in yesterday’s lesson that the iPhone’s default camera app both focuses and sets exposure based on where you tap on your phone’s screen.  Yesterday we talked about focus.  Today we will talk about exposure.

The fact that focus and exposure are tied together in the iPhone app can create some frustrating situations.  In later lessons, we’ll talk about other iPhone apps you can use that separate these two functions, for right now, we’ll stick to the default app.

Let’s take a made-up example.  Let’s say I want a picture of my dog that includes the patio door for some reason.  When I tap my dog on the screen, the iPhone both focuses and sets the correct exposure for my dog, which works reasonably well:

Setting the focus/exposure point using my dog work reasonably well for this image
Dog chosen as focus/exposure point

Now let’s pretend there is something really fascinating about that patio door and I want a picture that exposes the patio door correctly, but also includes my dog.  If I tap on the patio door to get the right exposure for it, this is what I get:

Glass in door focus/exposure point selected

If we could see my dog, we would find that he’s kind of fuzzy in addition to being too dark.

To get both my dog and the door, I can choose a portion of the image that is approximately halfway in between the two and turn on the flash like this:

Choosing a compromise point and turning on the flash

You’ll notice in the image above (click to enlarge) used to show where to focus, the downside of using the flash is that my dog’s eye reflected the light, but we’ll learn how to deal with that later.

As you can see, when the exposure required for a subject causes the rest of the image to be too bright or too dark, this technique can help.  By choosing the place to tap so that it’s between the two extremes, it helps equalize the gap.  If the gap is too big, you can use the built-in flash to help equalize things further.  Note:  the distance the flash will have an effect is limited to very short distances (a few feet).

Your Assignment:  Take a walk outside during the day.  Try taking a photo of a solid subject that has a lot of light behind it.  See if you can find good spot to tap on to get both reasonable exposure and focus.  Try turning on the flash to see if it helps.  For bonus points, try using the rule of thirds in the same photo.

Lesson 4: Focus

Today’s lesson is about focus.  Focus is usually one of the few inescapable rules of good photos.  Although, even as I write that, I think of the photo of Paul Simonon of the Clash smashing his bass on stage.  The photographer, Pennie Smith, reportedly didn’t want the photo to be used because it wasn’t sharply focused.  It graced the cover of the London Calling album anyway and is considered by many to be one of the most iconic photos in rock and roll.

However, the vast majority of the time, photos fail when the subject isn’t sharp.  With the iPhone, sometimes this gets a little tricky, but it’s easily solved.

Let’s say you see something and you pull your phone out of your pocket, launch the camera app and snap a shot as quickly as possible.  Your iPhone camera will decide what the subject is.  Sometimes it’s quite good at this (like people’s faces).  Sometimes it’s not.

To demonstrate this, I’ve lined up 3 things in a row that runs from close to the camera to far from the camera.  To maximize the difference the focus point can make, in the image on the left, I focused on the Cetaphil bottle in the foreground.  In the image on the right, I focused on my dog.  (Click on the image to get a larger view.)

Image on left is sharp on the bottle.  Image on right is sharp on the dog.
Image on left is sharp on the bottle. Image on right is sharp on the dog.

Notice the difference in how sharp the letters on the bottle are and my dog is in the background in the first image versus the second.  If I would have let the iPhone choose where to focus, it would have focused in the middle, resulting in an image with slightly soft focus in both the foreground and the background.  Instead, I can choose which part of the image I want to be sharp.

To choose what you want to focus on, touch the screen on the thing you most want to be sharp.  To demonstrate this, I did a screen capture of the iPhone camera and drew in a square approximating what the focus box looks like.  In this image, this is where the iPhone wanted to focus by default:

The iPhone chose the center of the scene, where the closest object was.

In the next image, I touched the screen to tell the iPhone to focus on my dog’s eye.  That made the elephant slightly softer in focus, but the elephant and my dog’s eye are close enough together that it’s hard to see the difference except under magnification.  The key is that my dog is the more important subject, and his eyes are the most important things to have in focus.

By tapping on my dog's eye, I ensured his eyes would be sharp.
By tapping on my dog’s eye, I ensured his eyes would be sharp.

One of the things that can be an advantage with an iPhone or any small-sensor camera is that they tend to keep a lot more things in focus from the front to back of the subject you’re photographing than a bigger, fancier camera.  This is also a disadvantage, but we’ll save that for a later lesson.

As a side note, when you touch the screen to set the focus point, the iPhone default camera app also uses that point to set the exposure.  We’ll talk more about exposure in tomorrow’s lesson.

Your assignment:  Practice taking photos of several different subjects in different settings.  Wait to take the picture until the focusing square appears.  Notice what the iPhone (or other camera) is picking for you.  Take a second photo of each subject and choose what you want to focus on.  Pick the thing that is most important to you to have in focus (hint:  eyes are always a good choice if your subject has them).  Now look at the photos on a large computer screen you can see well.   Take a look at what’s in focus.  Where does the iPhone’s automatic focusing decision work well?  When do you notice a big difference between what it chose and what you chose?

Lesson 2: The Rule of Thirds

In our last lesson, I explained that rules are just a way of organizing the choices you can make when you take a photo.  The rule of thirds is one of those choices.

The iPhone default camera app can be set to turn a rule of thirds grid on in the Options menu.  Most camera apps and point-and-shoot cameras have this option.  This is what it looks like with the grid on:

iPhone camera with grid on

The grid divides the frame into thirds both horizontally and vertically.  For many subjects, placing the subject so that the most important feature aligns with the intersection of one of these lines can make the subject grab the eye much more effectively.

Here’s an example.  First, in the next image, I’ve centered my dog’s head in the frame:

Subject centered in frame

In the next image, I placed one of the grid intersections on my dog’s left eye:

Rule of thirds grid 3

I chose the lower-left intersection in the grid because it allowed me to get his front legs in the frame as well.

Which one do you like better?

Your Assignment:  Turn the grid on in your camera app or camera if it has it.  If not, you can imagine where the grid would be by guestimating.  Pick a subject that isn’t moving like a flower or a vase or a sleeping dog.  Try photographing it centered in the frame, then try each of the 4 intersections of the rule-of-thirds grid.  Which do you like best?