Disappearing Act and Long Exposures

A while back, I posted a couple of long exposures on Facebook (see the post here) and asked if people could tell which one had been exposed for 1/30 of a second vs 29 seconds. It was a little confusing because the shot with the higher exposure value (that is, it was brighter) was the one with the 1/30 of a second exposure.

I thought I would explain the purpose of the exercise and talk a bit about how I achieved super long exposure times (shutter speeds) in bright sunlight.

First, if you know nothing about how a given exposure value was achieved other than the shutter speed, you cannot draw a conclusion about whether a brighter image has a longer shutter speed than the darker image. As a reminder, there are 3 settings that determine exposure: aperture, ISO, and shutter speed. The same exposure can be achieved with vastly different shutter speeds by adjusting the ISO and aperture to offset the difference.

So, if all you know is the shutter speed, what differences can you see that will tell you which had the longer exposure time? From an artistic perspective, we choose shutter speed based on whether we want to show or freeze motion. “Showing motion” means motion blur becomes visible in an image. So, our first test is “how much motion blur do we see?”

However, with this particular subject, the clouds are not moving quickly. The clouds are our best clue as to how long the shutter was open. But the clouds moved slowly enough that the difference in motion blur between the 1/30 of a second exposure and the 29 second exposure is relatively subtle. When you compare the 1/60 of a second exposure to the 77 second exposure the difference becomes far more obvious.

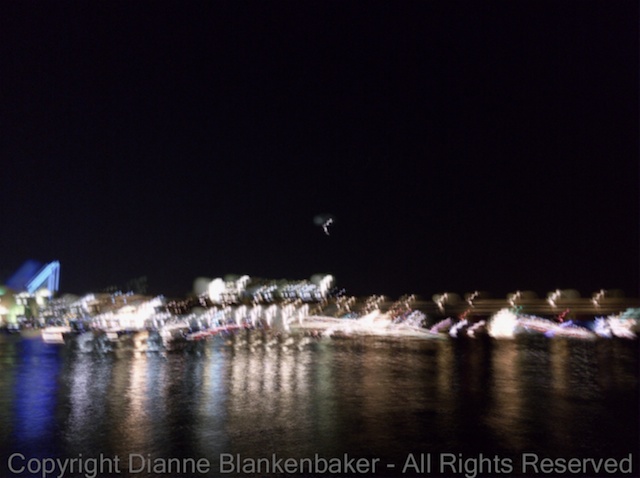
Likewise, moving water is usually a great clue as to how long an exposure is. As the exposure gets longer, fewer ripples in the river show.

The third difference you might notice if you look very closely is that the highway that curves around the river has no cars on it in any of the images with a 29 second or longer exposure time (shutter speed).

This happens to be one of the cool reasons to do super-long exposures. It’s a way of removing traffic and crowds from a scene. “But WAIT!” you ask, “What happened to slow shutters showing motion blur?”

Disappearing objects are the extreme of motion blur. The moving objects don’t reflect enough light relative to the total light signal to register as part of an image. This is a big difference in how cameras “see” vs how we see. We do not have a time factor that increases or decreases the exposure of what we look at. A camera, however, continues to gather light, exposing the image for the length of time the shutter is open in a quantity determined by the aperture size. How much light is needed to get a given exposure is then determined by the ISO.

So, why does this make moving objects disappear? Well, let’s look at the trees in our long exposure examples. They’re very dark. They reflect back less light than the river next to them. But they are sitting still, standing in one place, reflecting back that little bit of light in the same location for the duration of the open shutter. It’s enough to register a dark image of a tree. By comparison, the cars on the freeway are driving through the frame. They reflect only a little more light than the trees, but only for a split second in each point along their trajectory–the accumulative effect of the open shutter is lost on them. They would have to be very bright to register in the image–which is how you create light trails when cars have their lights on.

So, the bottom line is that if you can get your shutter slow enough that moving objects can’t reflect enough light to show up in the image, you can make them disappear.

The next question is, of course, how do you get a super slow shutter in daylight? We can stop down the aperture as much as possible (to the point before diffraction causes our images to fall apart, but that’s another subject) and we can turn our ISO as low as it will go, but at 7:52PM in July (more than an hour before sunset), that only got me a 1/30 of a second shutter speed.

All of the example images have the same aperture and ISO settings. Having reached the limits of my camera’s ability to control exposure, my only other option to get a slower shutter was to block some of the light reaching my camera’s sensor. To do this, I used a Heliopan 10-stop neutral density filter.

So what is a Neutral Density (ND) filter? From a technical perspective, an ND filter is called “neutral” because it is designed to block all colors of light equally. In other words, the color of the light should not be affected by an ND filter, just less light should make it through the lens.

That said, 10-stop ND filters reduce the light that reaches your sensor by 1000x. Many result in a color shift. In the case of the Heliopan, it’s a red shift. The good news is that it is something easily corrected via white balance settings in the case of the Heliopan (not true of all ND filters). I personally like the color shift in these examples and didn’t bother to correct it–it was like sunset came early.

To get the identical exposure with a 10-stop ND filter, if you are changing only the shutter speed, you would need to multiple the shutter speed by 1000. So, 1/30 becomes  33.33 seconds. If you really want this shutter speed, you need to use the bulb setting on your camera with a remote and time how long the shutter has been open. I did successively longer exposures using the Bulb setting to see what I liked best.

Neutral Density filters give you more control over light. They let you use much slower shutter speeds or allow you to open up your aperture significantly in brightly lit conditions where this isn’t otherwise possible.

If you like playing with motion or shallow depth of field in bright light, neutral density filters are a great option to explore.

Lesson 109 (DSLRs): Lightening and Long Exposure

Since I promised more examples of things you can do with long exposures in Lesson 108 and then we had a storm that offered a great opportunity to shoot lightening, here’s the first follow-up example.

Before we go into how to shoot lightening, let’s start with a little background on the shutter setting I prefer for this.

For lightening shots, I think it’s easiest to use that mysterious shutter speed called “Bulb.”   The first step is to find how to turn it on.  In some cameras, the shooting mode dial on the top of the camera has a “B” for Bulb and turning the dial to B is all you need to do.  In other cameras, “bulb” is at the end of the shutter speed options just past the setting for 30 seconds.  In this case, turn the shooting mode dial to “M” (for Manual) and then set the shutter speed to “Bulb.”

So now you’re in “Bulb” and you may be wondering what the heck that means.  This setting let’s you to open the shutter and keep it open until you decide to close it.  To do this, you either have to hold the shutter button down the entire time you want the shutter opened or you need to use a remote.

I am currently using a Pixel Pro Oppilas wireless remote, which was amazingly cheap.  In fact, I accidentally ordered 2 and decided for the $20 price tag, it was worth keeping the second one as a backup.

In any case, whether you choose a cheap 3rd party wireless remote, a wired remote, or a high-end wireless remote, you will definitely want a remote for bulb exposures.  There are two reasons for this:  1)  It’s very annoying to have to stand around holding the shutter button down for extensive periods of time, and 2) It’s extremely difficult to hold the shutter button down without introducing camera shake, which will cause blur in your images.

So, you’re in bulb mode and you have a remote attached to your camera.  You will also need to put your camera on a tripod.  This is a must.  And a solid tripod that won’t allow your camera to vibrate helps tremendously.  Alternatively, you need a really solid place to set your camera.  A fellow photographer friend says setting the camera on a large bean bag will help keep it stable if you have a flat surface to put it on.

Next, you need a safe vantage point to shoot from.  A safe vantage point is not, for example, the middle of an open field, under the one tree in said open field, on a roof top, or anywhere above timberline on a mountain.  A safe vantage point generally means that you are indoors.  Some folks shoot lightening through car or home windows using a polarizing filter to remove glare from the glass.  This is definitely the safest thing to do.  For recommendations on lightening and safety, go here:  http://www.lightningsafety.com/nlsi_pls.html

I will make no recommendations and I am not going to tell you where I shoot from because I don’t want to be responsible for anyone besides myself when it comes to lightening safety.  🙂

That said, let’s assume you’ve found a good, safe place to shoot lightening from.  Now that you’ve found your place, you next need to be there at the right time.

Since night time lightening is more dramatic, if you are at home in the evening, having a spot you can get to on a moment’s notice increases the odds that you will be able to capture some great shots.  Otherwise, watch the weather forecast and be prepared to go to your favorite location only to be disappointed.

Let’s say all has aligned and now you have your camera in Bulb, with a remote, on a tripod, in a safe location, and there is lightening!  You are 90% of the way there!

There are lots of different opinions on what to do next.  This is my personal preference:

  1. Use the widest focal length you’ve got.  It greatly increases the odds that lightening will be captured inside the frame since you cannot predict where it will strike.  The examples for this post were shot at 16mm on a camera with a full frame sensor (meaning 40% wider than if you’re using a crop-sensor camera).  Images were then cropped in post-processing.
  2. I use one of two options for focusing.  If there is enough light to focus either automatically or manually, I like to focus on an object in the landscape that will result in getting everything in the frame sharp.  I like to include foreground objects (like buildings) for scale.  If it is too dark to find focus, I set my lens to manual focus and then turn the focusing ring until the mark aligns with the infinity symbol (this is called focusing at infinity).  If everything in the frame is at the hyperfocal distance or further from the camera, this will keep everything sharp as well.  (If you don’t know what hyperfocal distance is, it just means from that point on, everything to infinity will be acceptably sharp.  You can use a Depth of Field calculator to get an estimate of this distance.  See Lesson 106 for more info on calculating this.)
  3. Stop down the aperture to something around f/16ish.  I like f/16 because it gives me so much depth of field that I don’t have to worry about everything being sharp and, more importantly, allows for very long exposure times without overexposing the image between lightening strikes.  That said, when you are shooting with a very wide angle focal length and your subject is far away, you don’t need to be on f/16 to get a lot of DOF, so feel free to try opening up the aperture if you find that works better for you.
  4. Set the ISO as low as you can.  I started with ISO 400, over exposed a strike that was very close, turned it down to 100, under exposed several strikes that were further away, and then turned it up to 200.  This is not an exact science, but be aware that long exposures, especially at night, tend to get very noisy (speckled and grainy).  Setting a high ISO will also add noise, but decreases the length of time the shutter needs to stay open.  In this case, what we’re trying to do is keep the shutter open as long as possible with the least exposure until lightening actually strikes.  So, we really want just enough light amplification (what the ISO setting controls) to allow for a great exposure during the lightening strike.
  5. Get your camera all set and pointed at the sky (don’t forget to level it) and then take a comfortable seat.
  6. Some people claim they can sense lightening before it strikes.  I suggest that if you find your arm hairs standing on end or have some sense of an electrical charge, it’s time to move–quickly!  I open the shutter with my remote and watch and listen.
  7. I leave my shutter open for a while and watch how many flashes there are in the sky and how bright they are.  If they are not very bright, I will wait through several flashes and then close the shutter (by pressing the remote shutter release a second time). 
  8. This next step is critical:  look at the exposure you got.  I do not have a scientific way to predict what exposure you will need for lightening.  This is very much a feel thing.  The longer you sit there watching the storm, guessing at how much light has reached your sensor and checking to see if you guessed right, the better you will get at this.  The important thing to bear in mind is that when lightening strikes, if it’s very bright, it’s time to close the shutter and start the next exposure.  Conversely, if you’ve been getting lots of flashes in the clouds but no bright strikes and you’ve had the shutter open for a while, it’s probably time to close the shutter and start over.  If the sky gets too exposed before the lightening strikes, the lightening will not show up as well.

One word of caution:  leaving your shutter open for extensive periods of time will drain your battery quickly.  Make sure you have a fully charged battery (and a spare if you have it).

In a nutshell, my approach to get lightening shots is to have the right equipment, show up in the right place at the right time, get ready, and then open my shutter and adjust as things happen.  Kind of like life.  🙂

Lesson 91: Use a Tripod

Long ago, in Lessons 25 and 34, we talked about holding your iPhone to maximize stability and even using a tripod, particularly for using a telephoto attachment lens with your iPhone.  Well, if ever there was a time to use a tripod with your iPhone, it’s with the Slow Shutter app.

Because I was on a shoot with my DSLR on a tripod, I was able to capture some cool light trails to share with you in the gallery.  However, I was without the tripod for my iPhone, so the best I could do was to prop the phone up on a rock wall and try to hold it still, resulting in this:

15 second exposure while trying to balance the iPhone on a rock

Let’s talk about what happens when you use a slow shutter.  “Slow” means the shutter will stay open for a long time (relatively speaking) before it closes again.  When we use a “fast” shutter, the shutter only stays open a fraction of a second.  The shorter the duration the shutter remains open, the less the subject can move in that fraction of time, so the less blur you will get.

When the shutter stays open for a very long time, like in these images (shot with 15 and 30 second shutter speeds), as the subject moves, the shutter is still open, so it records the moving image.  If you’re moving around, you get a complete mess.  Or, you can get some fun art if you’re particularly talented at moving your phone around.

I mentioned in lesson 90 that you can use Slow Shutter to get light trails, such as cars driving by at night.  Since I don’t have examples of that yet, thought I would go ahead and share the light trails from a lighted boat parade even though they were taken with my DSLR.  Don’t worry–I will eventually get light trails with the Slow Shutter app!

Your Assignment:  Find a location where you have a clear view of a street where cars drive by on a regular basis.  Go after dark–this is a great time of year for this assignment in the Northern hemisphere with the early sunset.

Either use an actual iPhone tripod or come up with a way to prop your iPhone so it will not move.  You need to be able to completely let go of the phone or your movement will jiggle it.  Set your exposure time for about 15 seconds–this depends on how much traffic is going by.  You can do 30 seconds if you have a long line of cars that keep passing or fewer seconds if all lights pass through the frame in less than 15 seconds.

Are you able to get a nice, sharp light trail from the headlights and tail lights of the cars?


Lesson 61: The Rule of Light

In yesterday’s post, I compared the iPhone 4S and 5S flash photos.  Today, I want to switch gear’s and revisit the rule of light.  This is a rule of photography that cannot be broken, although it can be bent, manipulated, and worked around.  But no matter what you do, you have to have light and enough of it to get a photograph–after all, that’s what photography is: a recording of light.

In Lessons 16, 17, and 18 we talked about how time of day affects outdoor lighting, how you can choose the direction you shoot from based on the lighting, and how to use Pro HDR to help combat big differences in light and dark areas in your photos.

What we didn’t talk about is indoor lighting.  The iPhone has traditionally struggled with low-light situations and most rooms create a low-light situation–especially at night.

And what happens when you shoot in a low-light situation?  Well, if you might remember from Lesson 31, when you don’t have enough light you get more blur.  In Lesson 31, I didn’t explain this because my best friend Gina, the inspiration for this blog, doesn’t want to know.  However, today I have decided to risk upsetting Gina by explaining that it’s because the less light you have, the slower the shutter speed will be on the camera and the slower the shutter speed, the more blur you’ll get.

The best way to combat this indoors is to add light.  Add light by turning on every light in the room.  Move a lamp over to your subject.  Move your subject over to a lamp.  Position the lamp to light your subject as best as possible.  Do all of these things if you can.  For example, you may remember this example of flowers from Lesson 50:


Still flowers under bright light = sharp photo

By putting the bouquet of flowers directly under a lamp, I was able to get a sharp photo because both I and the flowers were holding still.  The more light you have, the faster the shutter will open and shut.  The faster the shutter opens and shuts, the less blur you’ll get.

In this photo, the shutter opened and shut at the exact same speed as in the photo above.  However, because Twiggy, the dog in the foreground, was moving, her face blurred:

IMG_1350

If you can’t add any more ambient light, you can always turn on the flash.  But there’s another option we haven’t talked about in past blogs:  set the exposure based on a lightest part of the photo.  For example, in this photo of my dog, I chose to expose on the white side of his face:

IMG_2232

This got me a slightly faster shutter speed than in similar photos where I set the exposure on a darker part of the subject.  It’s probably not a big enough difference to stop my dog’s motion if he were to, say, jump up from the couch.  But, it is enough of a difference to help with more subtle movement.  Because white reflects more light than black, when you select a white area for exposure, you get a faster shutter speed.  If you need a reminder on how to set the exposure separately from the focus, check out Lesson 8 on how to do this in the Camera Awesome app.

Your Assignment:  Try taking some pictures indoors.  Try taking a picture of your living room for example.  In one photo, choose a dark object for the exposure.  Take a second photo with the same composition but pick a light object for the exposure.  Can you see the difference in the exposure of the two photos based on what you selected?  Now, try including a subject with a tiny bit of slow motion like a relaxed dog or a person who will move slowly for you.  Does choosing light vs dark areas for exposure make a difference in stopping the motion of the moving subject?  How slowly do they have to move before it makes a difference?