
In yesterday’s post, I compared the iPhone 4S and 5S flash photos. Today, I want to switch gear’s and revisit the rule of light. This is a rule of photography that cannot be broken, although it can be bent, manipulated, and worked around. But no matter what you do, you have to have light and enough of it to get a photograph–after all, that’s what photography is: a recording of light.
In Lessons 16, 17, and 18 we talked about how time of day affects outdoor lighting, how you can choose the direction you shoot from based on the lighting, and how to use Pro HDR to help combat big differences in light and dark areas in your photos.
What we didn’t talk about is indoor lighting. The iPhone has traditionally struggled with low-light situations and most rooms create a low-light situation–especially at night.
And what happens when you shoot in a low-light situation? Well, if you might remember from Lesson 31, when you don’t have enough light you get more blur. In Lesson 31, I didn’t explain this because my best friend Gina, the inspiration for this blog, doesn’t want to know. However, today I have decided to risk upsetting Gina by explaining that it’s because the less light you have, the slower the shutter speed will be on the camera and the slower the shutter speed, the more blur you’ll get.
The best way to combat this indoors is to add light. Add light by turning on every light in the room. Move a lamp over to your subject. Move your subject over to a lamp. Position the lamp to light your subject as best as possible. Do all of these things if you can. For example, you may remember this example of flowers from Lesson 50:
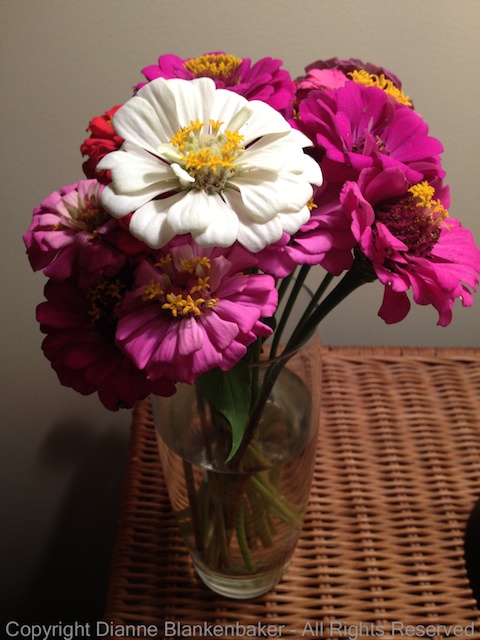
By putting the bouquet of flowers directly under a lamp, I was able to get a sharp photo because both I and the flowers were holding still. The more light you have, the faster the shutter will open and shut. The faster the shutter opens and shuts, the less blur you’ll get.
In this photo, the shutter opened and shut at the exact same speed as in the photo above. However, because Twiggy, the dog in the foreground, was moving, her face blurred:

If you can’t add any more ambient light, you can always turn on the flash. But there’s another option we haven’t talked about in past blogs: set the exposure based on a lightest part of the photo. For example, in this photo of my dog, I chose to expose on the white side of his face:

This got me a slightly faster shutter speed than in similar photos where I set the exposure on a darker part of the subject. It’s probably not a big enough difference to stop my dog’s motion if he were to, say, jump up from the couch. But, it is enough of a difference to help with more subtle movement. Because white reflects more light than black, when you select a white area for exposure, you get a faster shutter speed. If you need a reminder on how to set the exposure separately from the focus, check out Lesson 8 on how to do this in the Camera Awesome app.
Your Assignment: Try taking some pictures indoors. Try taking a picture of your living room for example. In one photo, choose a dark object for the exposure. Take a second photo with the same composition but pick a light object for the exposure. Can you see the difference in the exposure of the two photos based on what you selected? Now, try including a subject with a tiny bit of slow motion like a relaxed dog or a person who will move slowly for you. Does choosing light vs dark areas for exposure make a difference in stopping the motion of the moving subject? How slowly do they have to move before it makes a difference?

One thought on “Lesson 61: The Rule of Light”