
We talked about focus long ago in Lesson 4. One of the things I mentioned back then was that because the iPhone has a very small sensor, it tends to keep a lot of stuff in your photo in focus, even when things are far apart from the front to the back of the scene.
Sometimes, like when you’re creating a portrait of a person, we don’t want everything to be in focus. Sometimes, we just want the one main subject to be in focus.
Unfortunately, the one setting that has the most impact on whether everything will be in focus or not cannot be changed when using an iPhone. Instead, we have to find ways to trick the iPhone into giving us the kind of focus we want.
We actually did this in some previous lessons. In Lesson 30, we used Hipstamatic with the Tinto 1882 lens to blur everything except the face in the photo. In Lesson 37, we used a macro lens attachment to get very close to small subjects and only a tiny little bit of the subject was in focus.
However, what to do if you don’t want to use a Hipstamatic effect or shoot macro?
There are only a few things that will help create a similar effect when you take the picture, but there are also editing tricks that will help create the blur you want.
When you’re shooting, the closer you are to your subject and the farther your subject is from the background, the more blurred the background will look. To really emphasize your subject, having a dark background with no bright colors and relatively bright lighting on your subject will also help separate them from the background. This can get pretty fancy pretty quickly, so let’s take one simple example.
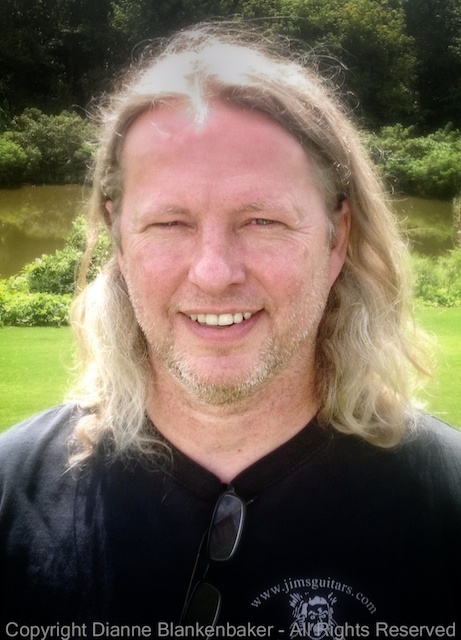
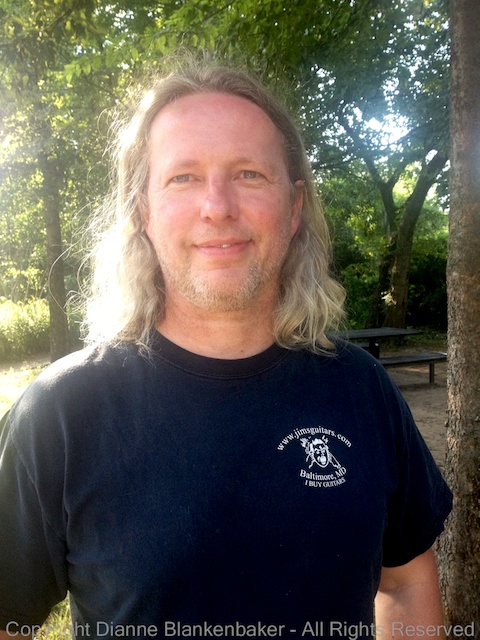
I want to take a photo of my husband outside. I place him so his back is to the sun. This creates a rim of light in his hair that will help separate him from the background. I also place him so that at the angle I’m shooting at will show mostly dark trees in the background. Now, I get pretty close to my husband to eliminate other background stuff from sneaking into the frame. However, I don’t want to get so close that I make his nose look bigger. This is a good time to use the 2x telephoto attachment we talked about in Lesson 39. It will help me fill the frame with my husband without distorting his face. It will also make the distant background more blurred. Compare the two photos side-by-side–can you see how his nose starts to distort and the shape of his face changes when I get too close to him with the default lens?


Now, the next challenge is that his face is in shadow. I can do 2 things about that. First, I can take off the telephoto attachment and use the iPhone built-in flash like in this photo:
By the way, in case you’re wondering what happens if you leave the 2X Telephoto attachment on with the flash, you get scary looking bright circles of light that may indicate paranormal activity:

A second option is to find a way to reflect some light into his face either using a white poster board or an actual photographer’s reflector. Since my husband was already squinting, I opted for trying to fix it using Snapseed, similar to what we did in yesterday’s lesson. Here are instructions for the edits I made:


Your Assignment: Try using the 2X Telephoto attachment with your iPhone to see if you can create better separation between your subject and the background. Compare the effect to getting closer to the subject without the 2X Telephoto. Also try standing back a bit and using the flash, then cropping the photo to get a more zoomed in look. Which method is the most flattering to your subject? Have you noticed changes in their face shape based on how close you were with the iPhone? Are any of those changes flattering?
