I previously promised I would talk about PhotoForge as an editing tool. After I put together steps for a simple adjustment that can be made using PhotoForge (see below), I did a little googling so I could tell you how much PhotoForge costs. Unfortunately, I discovered I apparently missed the news bulletin that PhotoForge’s development company was acquired by Yahoo in June and the app was removed from the App Store.
So, if you don’t already have PhotoForge, this lesson will not apply for you. Sorry about that. I guess this will be the one and only lesson on PhotoForge!
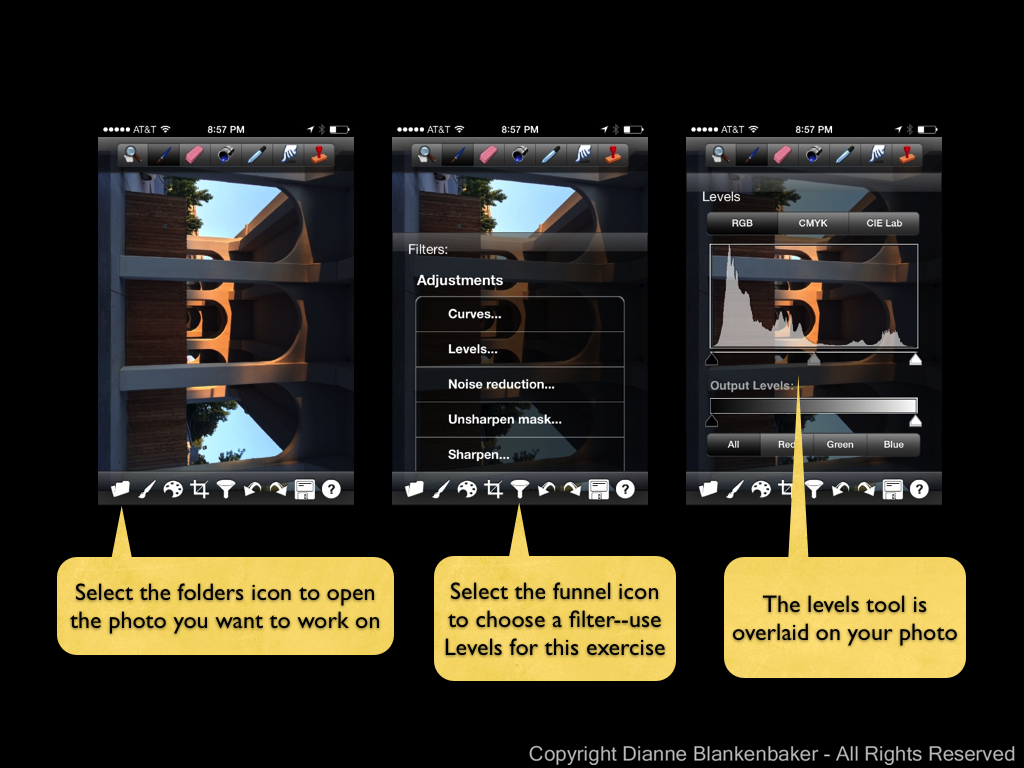
The adjustment I love the most in PhotoForge is available in a variety of editing tools (I’ll find another iPhone app for this in a future lesson). I use it on nearly every photo I take, iPhone or DSLR. It’s the levels adjustment.
“Levels” refers, to put it simply, to how bright or dark the tones are in a photo. The “tones” are grouped into shadows, mid-tones, and highlights. The left-most slider adjusts the darkest parts of the photo, the middle affects the mid-tones, and the right-most slider adjusts the highlights. This allows you to, more-or-less, selectively change the exposure. It gives you far better control than, say, the brightness adjustment in Snapseed.
For this example, I chose a photo that was an OK photo, but needed some punch. Follow the steps below if you have PhotoForge to play along at home.
Your Assignment: Try a levels adjustment in PhotoForge (if you already have the app). Here are the steps: