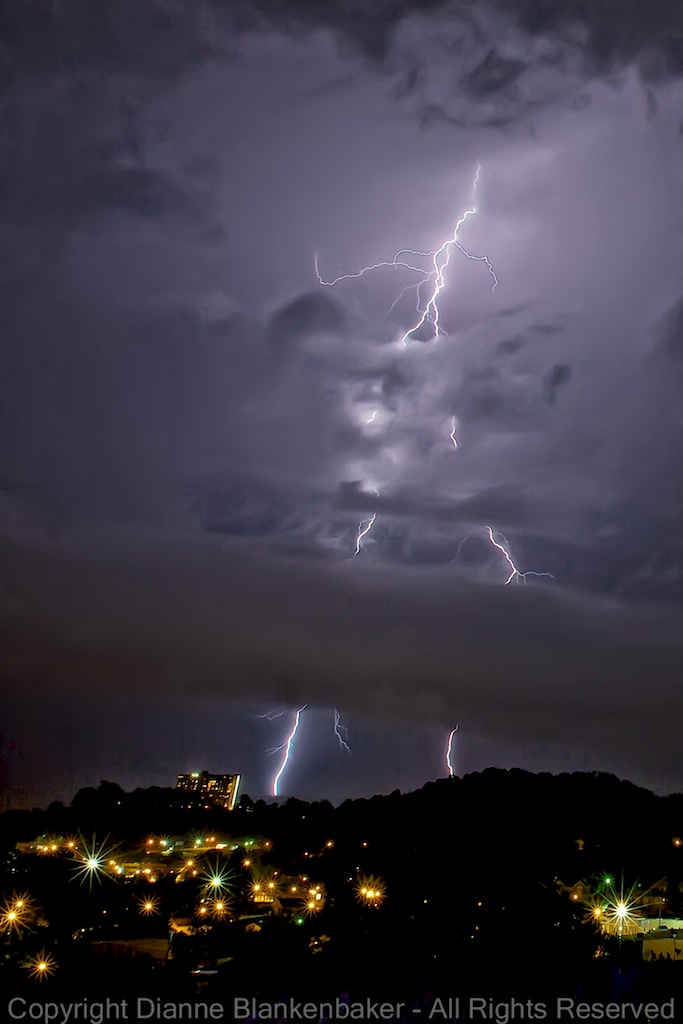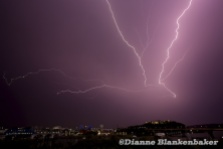

Since I promised more examples of things you can do with long exposures in Lesson 108 and then we had a storm that offered a great opportunity to shoot lightening, here’s the first follow-up example.
Before we go into how to shoot lightening, let’s start with a little background on the shutter setting I prefer for this.
For lightening shots, I think it’s easiest to use that mysterious shutter speed called “Bulb.” The first step is to find how to turn it on. In some cameras, the shooting mode dial on the top of the camera has a “B” for Bulb and turning the dial to B is all you need to do. In other cameras, “bulb” is at the end of the shutter speed options just past the setting for 30 seconds. In this case, turn the shooting mode dial to “M” (for Manual) and then set the shutter speed to “Bulb.”
So now you’re in “Bulb” and you may be wondering what the heck that means. This setting let’s you to open the shutter and keep it open until you decide to close it. To do this, you either have to hold the shutter button down the entire time you want the shutter opened or you need to use a remote.
I am currently using a Pixel Pro Oppilas wireless remote, which was amazingly cheap. In fact, I accidentally ordered 2 and decided for the $20 price tag, it was worth keeping the second one as a backup.
In any case, whether you choose a cheap 3rd party wireless remote, a wired remote, or a high-end wireless remote, you will definitely want a remote for bulb exposures. There are two reasons for this: 1) It’s very annoying to have to stand around holding the shutter button down for extensive periods of time, and 2) It’s extremely difficult to hold the shutter button down without introducing camera shake, which will cause blur in your images.
So, you’re in bulb mode and you have a remote attached to your camera. You will also need to put your camera on a tripod. This is a must. And a solid tripod that won’t allow your camera to vibrate helps tremendously. Alternatively, you need a really solid place to set your camera. A fellow photographer friend says setting the camera on a large bean bag will help keep it stable if you have a flat surface to put it on.
Next, you need a safe vantage point to shoot from. A safe vantage point is not, for example, the middle of an open field, under the one tree in said open field, on a roof top, or anywhere above timberline on a mountain. A safe vantage point generally means that you are indoors. Some folks shoot lightening through car or home windows using a polarizing filter to remove glare from the glass. This is definitely the safest thing to do. For recommendations on lightening and safety, go here: http://www.lightningsafety.com/nlsi_pls.html
I will make no recommendations and I am not going to tell you where I shoot from because I don’t want to be responsible for anyone besides myself when it comes to lightening safety. 🙂
That said, let’s assume you’ve found a good, safe place to shoot lightening from. Now that you’ve found your place, you next need to be there at the right time.
Since night time lightening is more dramatic, if you are at home in the evening, having a spot you can get to on a moment’s notice increases the odds that you will be able to capture some great shots. Otherwise, watch the weather forecast and be prepared to go to your favorite location only to be disappointed.
Let’s say all has aligned and now you have your camera in Bulb, with a remote, on a tripod, in a safe location, and there is lightening! You are 90% of the way there!
There are lots of different opinions on what to do next. This is my personal preference:
- Use the widest focal length you’ve got. It greatly increases the odds that lightening will be captured inside the frame since you cannot predict where it will strike. The examples for this post were shot at 16mm on a camera with a full frame sensor (meaning 40% wider than if you’re using a crop-sensor camera). Images were then cropped in post-processing.
- I use one of two options for focusing. If there is enough light to focus either automatically or manually, I like to focus on an object in the landscape that will result in getting everything in the frame sharp. I like to include foreground objects (like buildings) for scale. If it is too dark to find focus, I set my lens to manual focus and then turn the focusing ring until the mark aligns with the infinity symbol (this is called focusing at infinity). If everything in the frame is at the hyperfocal distance or further from the camera, this will keep everything sharp as well. (If you don’t know what hyperfocal distance is, it just means from that point on, everything to infinity will be acceptably sharp. You can use a Depth of Field calculator to get an estimate of this distance. See Lesson 106 for more info on calculating this.)
- Stop down the aperture to something around f/16ish. I like f/16 because it gives me so much depth of field that I don’t have to worry about everything being sharp and, more importantly, allows for very long exposure times without overexposing the image between lightening strikes. That said, when you are shooting with a very wide angle focal length and your subject is far away, you don’t need to be on f/16 to get a lot of DOF, so feel free to try opening up the aperture if you find that works better for you.
- Set the ISO as low as you can. I started with ISO 400, over exposed a strike that was very close, turned it down to 100, under exposed several strikes that were further away, and then turned it up to 200. This is not an exact science, but be aware that long exposures, especially at night, tend to get very noisy (speckled and grainy). Setting a high ISO will also add noise, but decreases the length of time the shutter needs to stay open. In this case, what we’re trying to do is keep the shutter open as long as possible with the least exposure until lightening actually strikes. So, we really want just enough light amplification (what the ISO setting controls) to allow for a great exposure during the lightening strike.
- Get your camera all set and pointed at the sky (don’t forget to level it) and then take a comfortable seat.
- Some people claim they can sense lightening before it strikes. I suggest that if you find your arm hairs standing on end or have some sense of an electrical charge, it’s time to move–quickly! I open the shutter with my remote and watch and listen.
- I leave my shutter open for a while and watch how many flashes there are in the sky and how bright they are. If they are not very bright, I will wait through several flashes and then close the shutter (by pressing the remote shutter release a second time).
- This next step is critical: look at the exposure you got. I do not have a scientific way to predict what exposure you will need for lightening. This is very much a feel thing. The longer you sit there watching the storm, guessing at how much light has reached your sensor and checking to see if you guessed right, the better you will get at this. The important thing to bear in mind is that when lightening strikes, if it’s very bright, it’s time to close the shutter and start the next exposure. Conversely, if you’ve been getting lots of flashes in the clouds but no bright strikes and you’ve had the shutter open for a while, it’s probably time to close the shutter and start over. If the sky gets too exposed before the lightening strikes, the lightening will not show up as well.
One word of caution: leaving your shutter open for extensive periods of time will drain your battery quickly. Make sure you have a fully charged battery (and a spare if you have it).
In a nutshell, my approach to get lightening shots is to have the right equipment, show up in the right place at the right time, get ready, and then open my shutter and adjust as things happen. Kind of like life. 🙂


